You can’t adjust the volume or turn on your device.

In this guide, we show you how to replace your Mate S’ defective standby/volume control cable on your own. You need this repair if the volume rocker switch isn’t working or has no pressure point. You also need to replace this part if you can’t turn on your device.

Required tools

Required replacement part

  • Huawei Mate S standby/volume control cable

    Huawei Mate S standby/volume control cable

    on Amazon
Show all replacement parts for the Mate S 

Getting started with the repair of your Mate S

If you get stuck or have questions, you can post a comment. We’d be happy to help.

11 steps
  1. Switching off your device

    Mate S - Switching off your device 01
    Mate S - Switching off your device 02
    Mate S - Switching off your device 03
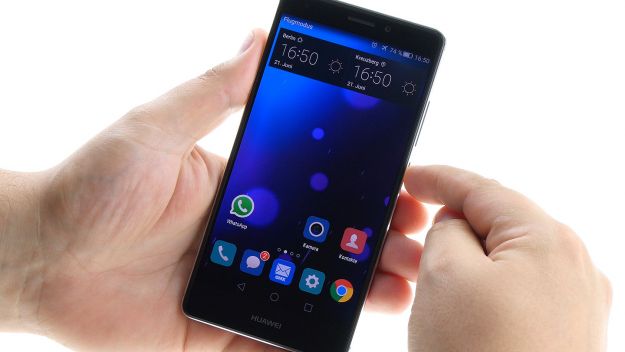
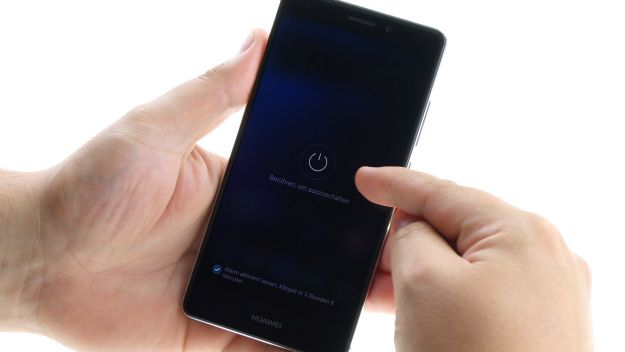
    1. Turn off your device holding down the power button until a menu appears. Select “Power off” and tap again to confirm.
  2. Removing the SIM card tray

    Mate S - Removing the SIM card tray 01
    Mate S - Removing the SIM card tray 02
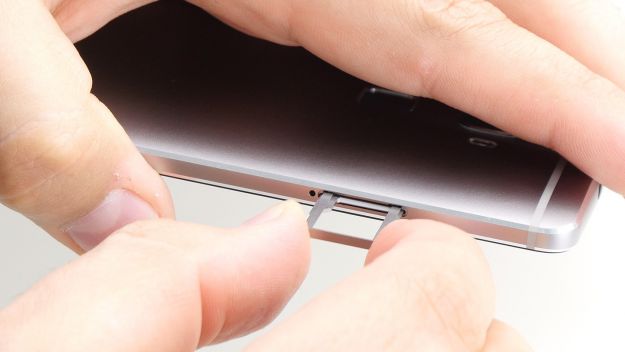
    1. Insert your SIM tool into the little opening on the tray to unlock the tray.
    2. Remove the SIM tray and, if applicable, the SIM and microSD cards.
  3. Removing the enclosure screws

    Mate S - Removing the enclosure screws 01
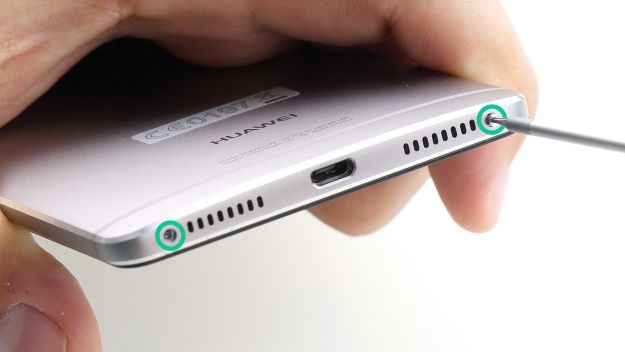
    1. Unscrew and remove the two screws at the bottom of the device that keep the enclosure closed.
      2 x 3.1 mm T2 Torx screw
  4. Lifting the display

    Mate S - Lifting the display 01
    Mate S - Lifting the display 02
    Mate S - Lifting the display 03
    Mate S - Lifting the display 04
    Mate S - Lifting the display 05
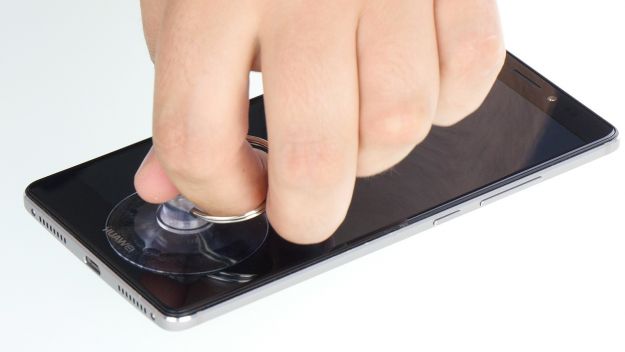
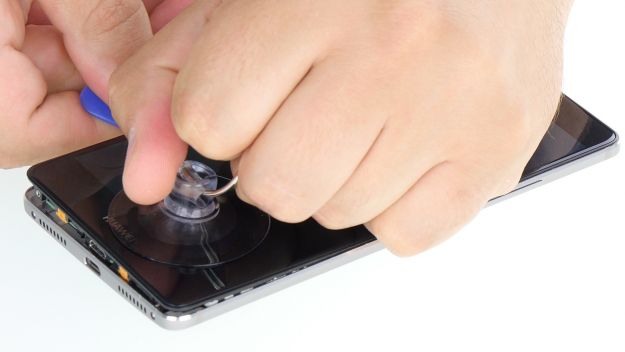
    1. Put the suction cup as far down on the display as possible, for example where it says “Huawei.” If the glass is too cracked for the suction cup to generate a vacuum, you can cover the display with tape.
    2. Pull on the suction cup while using the pick to push the back cover against the table. As soon as a gap appears between the display and the enclosure, you can carefully insert the pick.
    3. Also move the pick along the edges to disconnect the display on the sides. Continue to pull carefully on the suction cup.
    4. The fingerprint sensor is installed in the back cover. A flexible flat cable connects this sensor to the motherboard. Be careful when you take off the display to avoid damaging the cable or board.

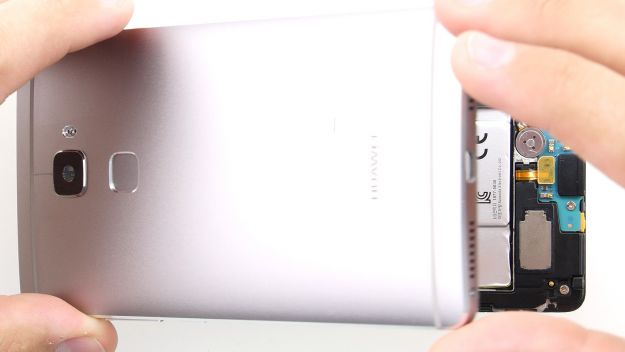
    5. Carefully lift the display. Slowly open the device at the short upper edge like a book. Now you should be able to see the connection cable.
    6. Disconnect the cable from the motherboard by carefully inserting the spudger below the contact and disconnecting it.
  5. Disconnecting the battery contact

    Mate S - Disconnecting the battery contact 01
    Mate S - Disconnecting the battery contact 02
    Mate S - Disconnecting the battery contact 03
    Mate S - Disconnecting the battery contact 04
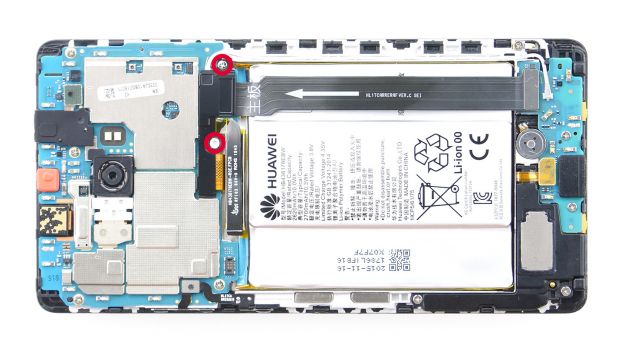
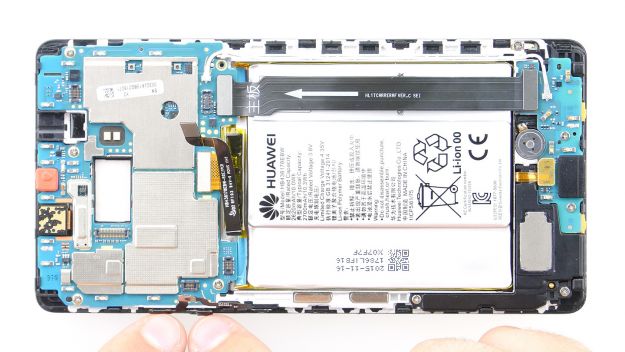
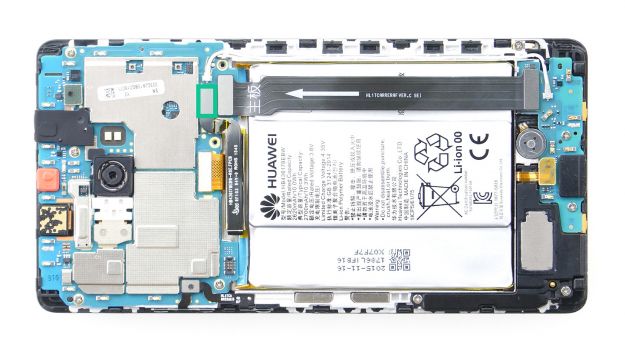
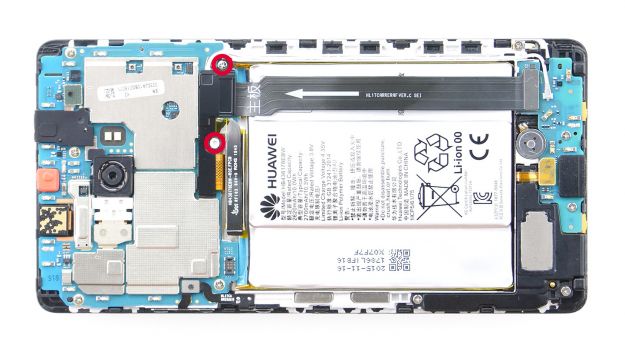
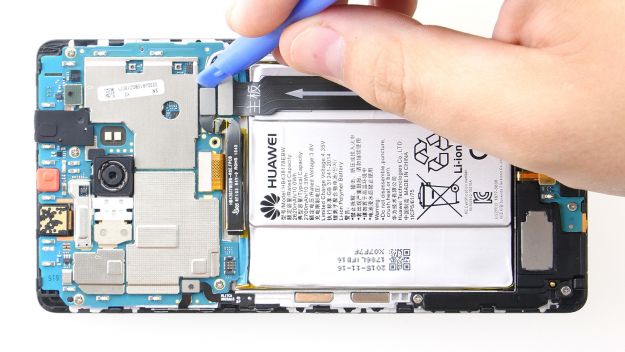
    1. Remove the two screws that hold the black plate in place.
      2 x 2.3 mm PH00 Phillips screw
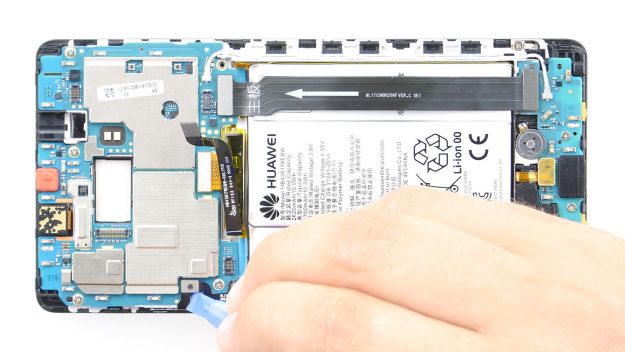
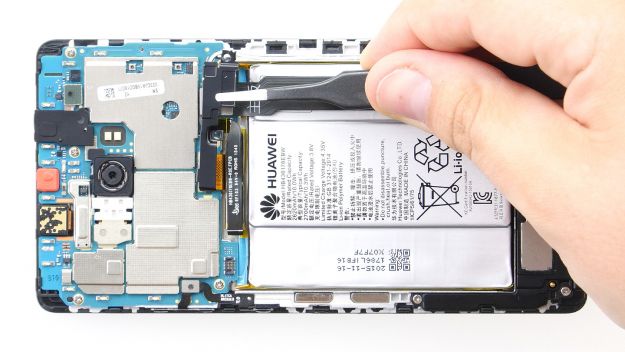
    2. Disconnect the plate from the motherboard. The plate is hooked on in three places. Insert the tweezers below the plate and carefully unhook it.
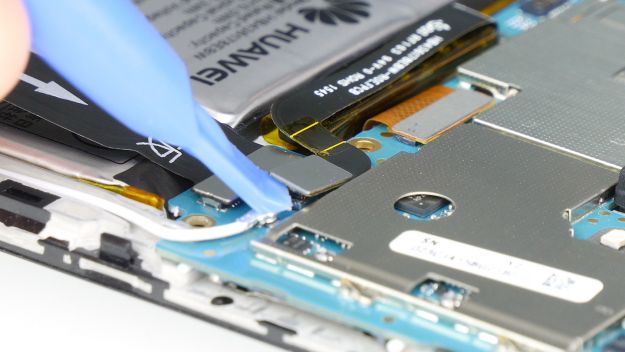
    3. Disconnect the battery contact from the motherboard. Carefully insert the spudger below the contact and disconnect it from the socket.
  6. The right tools for your repair

    With the right tools, you will succeed in any repair. In our store you will find a large selection of professional quality tools.
    VIEW NOW
  7. Removing the control buttons

    Mate S - Removing the control buttons 01
    Mate S - Removing the control buttons 02
    Mate S - Removing the control buttons 03
    Mate S - Removing the control buttons 04
    Mate S - Removing the control buttons 05
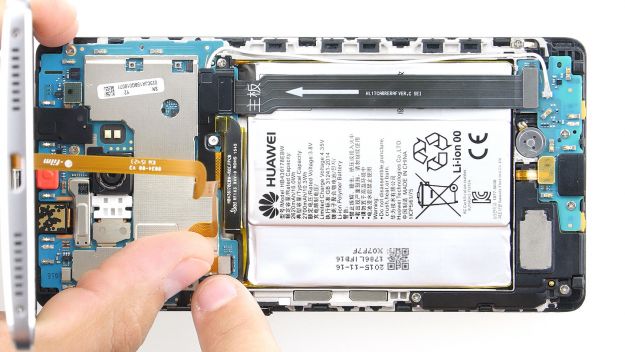
    1. Disconnect the plug contact for the control buttons from the motherboard.
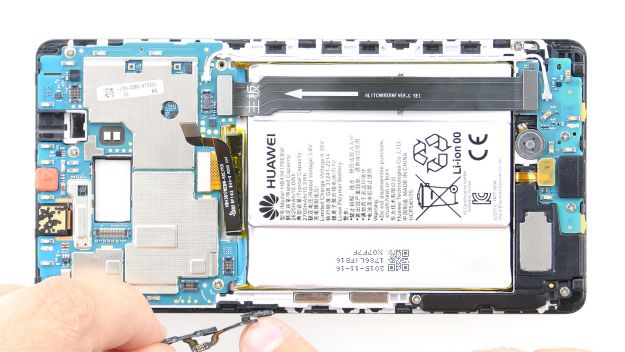
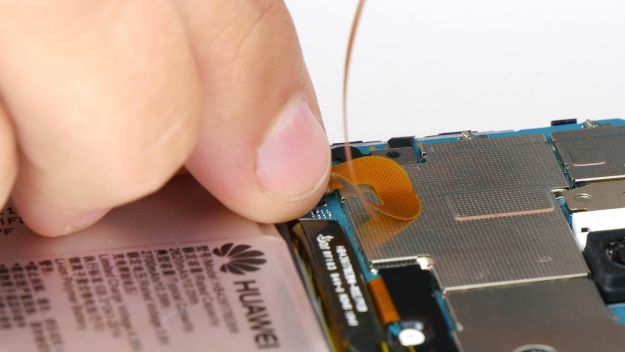
    2. The control buttons are glued to the display frame on the side. Insert the steel laboratory spatula between the frame and the cable to detach the glue. Start with the individual button. The cable’s very delicate.
    3. Then disconnect the other two buttons from the frame.
    4. Remove the cable.
  8. Installing the control buttons

    Mate S - Installing the control buttons 01
    Mate S - Installing the control buttons 02
    Mate S - Installing the control buttons 03
    1. Stick the control buttons back on the enclosure frame. Make sure the little openings in the cable go over the tabs on the frame.
    2. Press the entire cable firmly onto the side of the frame so the glue will stick.
    3. Connect the plug contact to the board.
  9. Connecting the battery contact

    Mate S - Connecting the battery contact 01
    Mate S - Connecting the battery contact 02
    Mate S - Connecting the battery contact 03
    Mate S - Connecting the battery contact 04
    1. Connect the battery contact to the motherboard again by carefully pressing the contact into the socket with your finger until you hear it click into place.
      Battery contact
    2. Put on the black plate to hold the contacts in place. Hook it onto the board.
    3. Fasten the plate with the two screws.
      2 x 2.3 mm PH00 Phillips screw
  10. Installing the display

    Mate S - Installing the display 01
    Mate S - Installing the display 02
    Mate S - Installing the display 03
    1. Put the back cover at the short upper edge of the display and carefully connect the fingerprint sensor’s contact. You have to hear the contact click into place.
    2. Close the device by folding down the back cover and pressing on the display.
  11. Fastening the enclosure screws

    Mate S - Fastening the enclosure screws 01
    1. Use the two screws on the bottom of the enclosure to close the device.
      2 x 3.1 mm T2 Torx screw
  12. Installing the SIM card tray

    Mate S - Installing the SIM card tray 01
    1. Put the SIM tray and any cards back in your device. Make sure the tray is positioned properly.
Ø 5 (1 Ratings)

Bewerte unsere Anleitung

Hat dir unsere Anleitung weitergeholfen? Wir sind auf deine Beurteilung gespannt.

Submit rating

Submit rating

How did you like this repair guide?

Exceptional

Similar guides

You might also be interested in these guides.

You might be interested in

Get in touch with iDoc
Please contact our customer service for any questions about iDoc's products and services.

  • Send a message

    If you have a question about a guide or want to give us general feedback, just use our contact form

    Write a message
  • Free shipping

    From a minimum order value of 79.00 € your order will be shipped free of charge within Germany.
  • Call iDoc

    If you have any questions about our guides or services, call us from Monday to Friday, 10:00 a.m. to 6:00 p.m.

    +49 30 200 514 455
  • 5 star service

    We offer top quality and service. Our customers confirm this as well.

    Show reviews

Profi-Insights & Tipps für deine erfolgreiche Handy-Reparatur

iDoc schenkt dir den ultimativen Reparatur-Guide GUIDE GRATIS ANFORDERN

Profi-Insights & Tipps für deine erfolgreiche Handy-Reparatur

iDoc schenkt dir den ultimativen Reparatur-Guide GUIDE GRATIS ANFORDERN