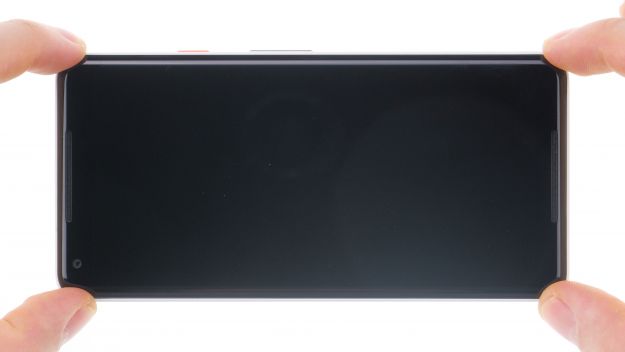
The screen is broken or stays black.

Repair the Google Pixel 2 XL yourself with this detailed step-by-step guide. During this repair we replace the touch screen and the screen. You may have to take some small parts from the old display unit, depending on how the new spare part is equipped. We recommend that you visually inspect your spare part before installing it.

The Pixel 2 XL display is relatively easy to replace because you can remove the display directly and don't have to take the whole device apart first. When removing the display, however, it's better to take some time into your planning.

Run a data backup before the repair, use a clean work surface and take enough time. If you have questions, use the live chat on our website or write a comment.

Required tools

  • Flat Picks

    Flat Picks

    You need a very flat tool such as a flat pick to pry out parts that are glued in place.

    from €11.95 on Amazon
  • iFlex Opening Tool

    iFlex Opening Tool

    Opening your smartphone can be a very delicate operation, especially if the glue is very persistent. The blade of the flexible but sturdy iFlex measures just 0.15 mm, so it fits in even the smallest gaps, such as between the screen and the frame. The practical iFlex is made of stainless steel and sits comfortably in the hand. This makes it the perfect assistant for every smartphone repair.

    from €10.95 on Amazon
  • Tweezers

    Tweezers

    We recommend using tweezers to remove screws and various small parts from your device.

    on Amazon
  • Plastic prying tool

    Plastic prying tool

    You need a flat plastic prying tool to disconnect the various plugs and connectors.

    from €14.99 on Amazon
  • Steel Laboratory Spatula

    Steel Laboratory Spatula

    You need a flat and sturdy prying tool to disconnect glued parts.

    on Amazon

Required replacement part

Show all replacement parts for the Pixel 2 XL 

Getting started with the repair of your Pixel 2 XL

If you get stuck or have questions, you can post a comment. We’d be happy to help.

9 steps
  1. Switch off device

    Pixel 2 XL - Switch off device 01
    Pixel 2 XL - Switch off device 02
    Pixel 2 XL - Switch off device 03
    Pixel 2 XL - Switch off device 04

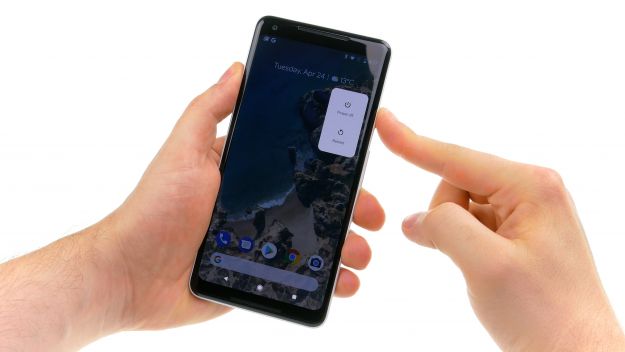
    Switch off the device before the repair.

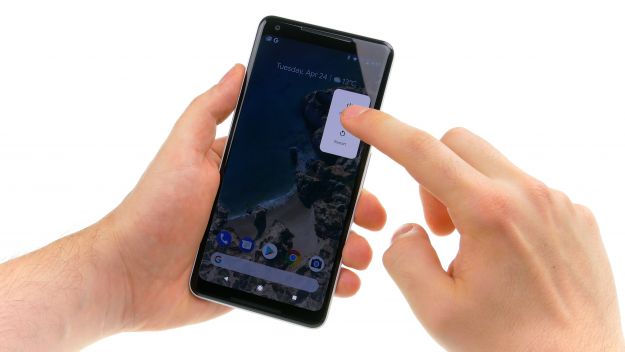
    1. Press and hold the standby button until "Power off" appears.
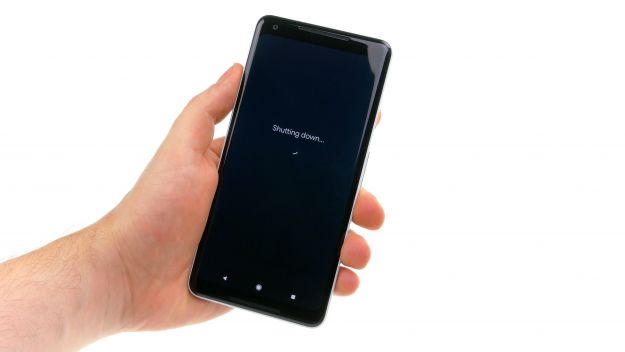
    2. Tap again to confirm and wait till the device has shut down.
  2. Remove the screen

    Pixel 2 XL - Remove the screen 01
    Pixel 2 XL - Remove the screen 02
    Pixel 2 XL - Remove the screen 03
    Pixel 2 XL - Remove the screen 04
    Pixel 2 XL - Remove the screen 05
    Pixel 2 XL - Remove the screen 06
    Pixel 2 XL - Remove the screen 07
    Pixel 2 XL - Remove the screen 08

    Now you can start and take off the display.

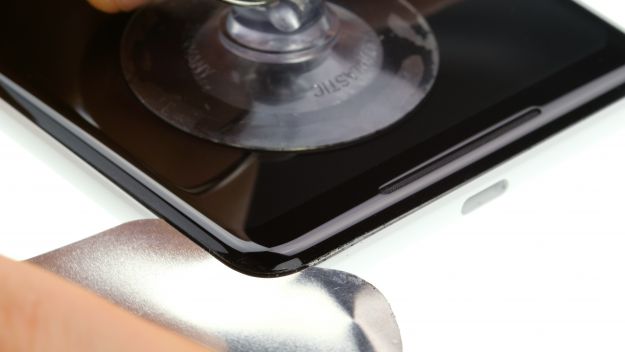
    The screen is very easy to damage. So you should only replace internal parts like the battery, if the display is already broken.It's better to heat the screen several times if you feel resistance, instead of bending it.The cable underneath is very sensitive. Never insert the tool more than 5 mm. Also don't use the tool as a lever, but run it flatly along the edges to release the glue.

    1. First heat the glue around the edges with a hot air tool to about 60°C. Repeat and heat the display to the point where you can barely touch it.
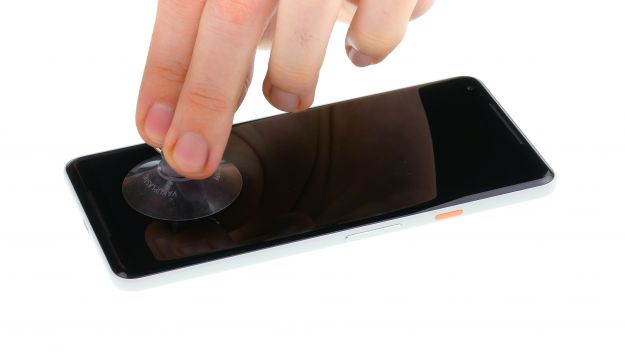
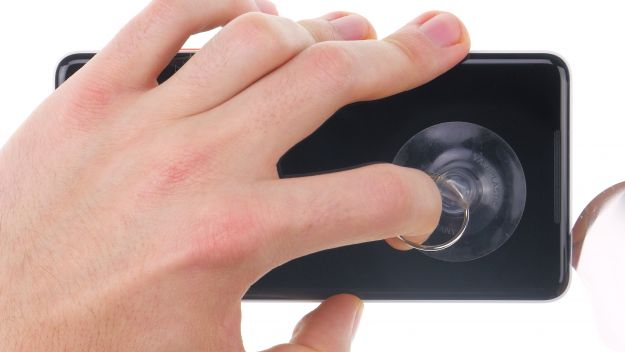
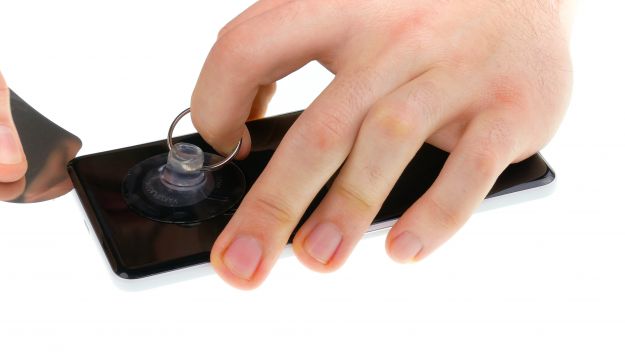
    2. Then attach a suction cup at the bottom of the display over the USB connector and pull on it.
    3. Then slide a very thin, flat tool between the display and the frame and slide it around the edge to release one corner of the display.
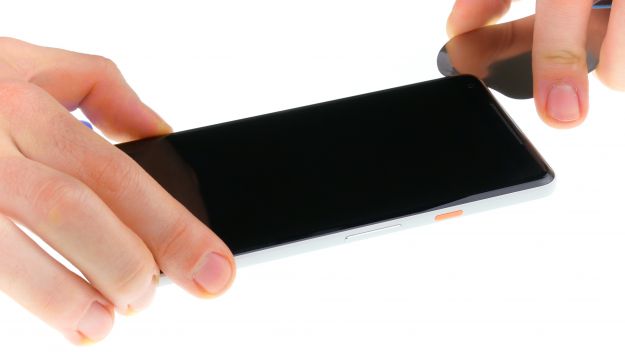
    4. Then slide a pick between frame and display. You can use other picks to get off the display all around. Don't insert any tool more than 5 mm!
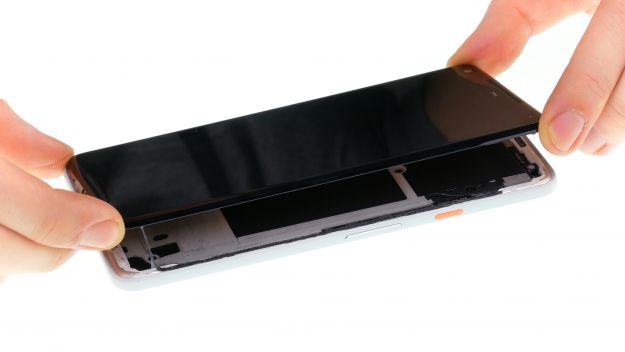
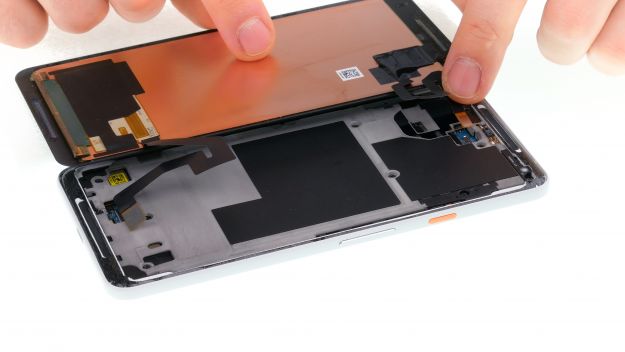
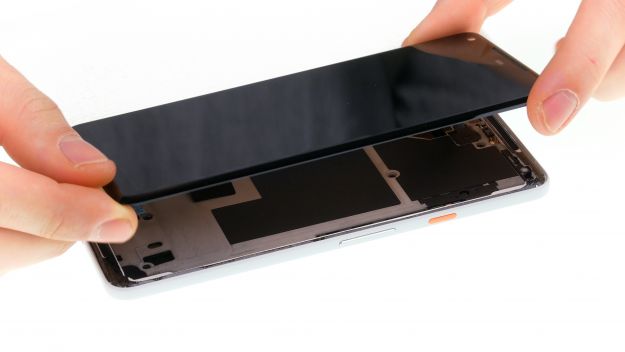
    5. When the glue is detached everywhere, you can lift the display off. Carefully fold the display to the top (as seen in the image), as there are still 2 flex cables attached.

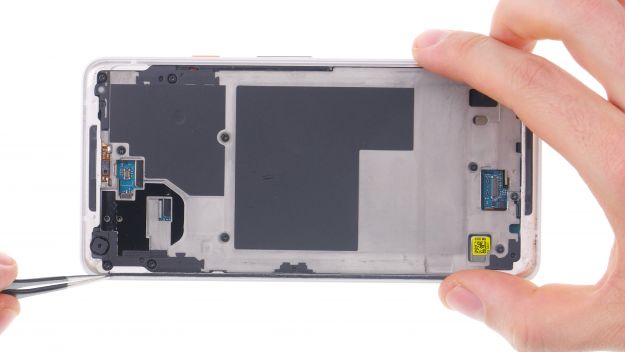
    The display is very thin. If the display badly broken, you have to scrape it out of the frame bit by bit. Scrape any glass residue out of the frame using a flat metal tool.

  3. Disconnect the display

    Pixel 2 XL - Disconnect the display 01
    Pixel 2 XL - Disconnect the display 02
    Pixel 2 XL - Disconnect the display 03
    Pixel 2 XL - Disconnect the display 04
    Pixel 2 XL - Disconnect the display 05
    Pixel 2 XL - Disconnect the display 06
    Pixel 2 XL - Disconnect the display 07
    Pixel 2 XL - Disconnect the display 08
    • Connector
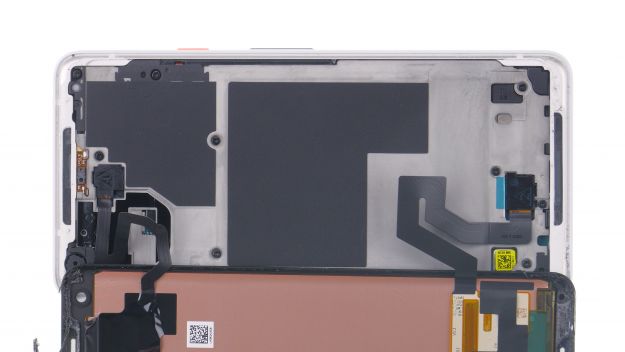
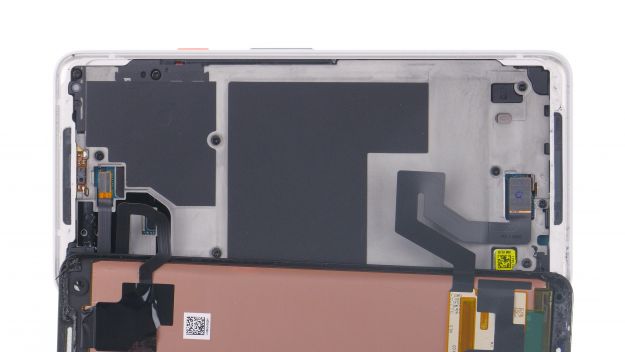
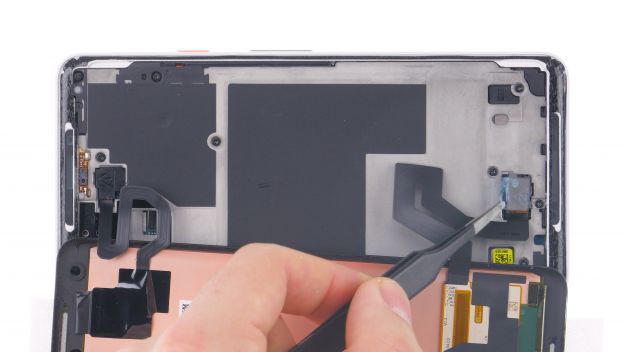
    1. Under the screen there are two very delicate flex cables. Fold up the display carefully, so you don't strain them.
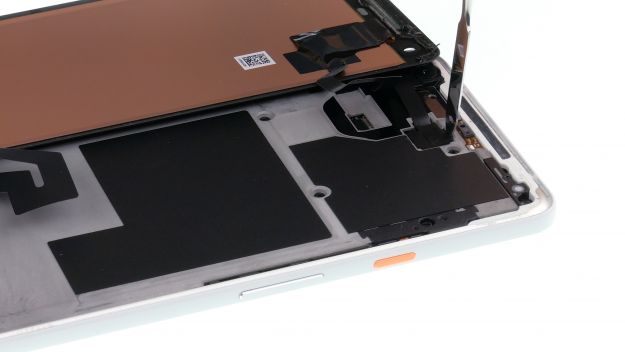
    2. Remove the plastic cover marked with "1" by sliding a flat tool into the gap and prying it out.
    3. Then remove cover no. 2. It has a small tape strip that you also need to detach.
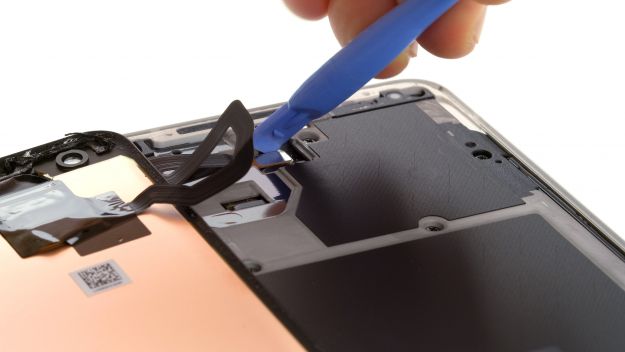
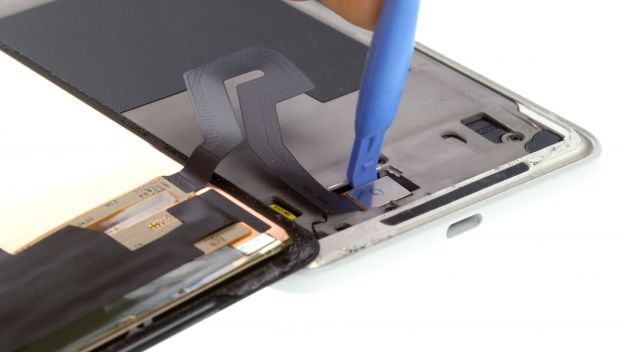
    4. Unplug both connectors using a spudger.
    Be very careful with the lower contact. Next to the connector, there are components on the circuit board that can easily be damaged.
    1. Now put the display aside.

    As you can see, the display unit is very fragile and the glass screen has no extra protection, so be very careful.

  4. Test the display

    Pixel 2 XL - Test the display 01
    Pixel 2 XL - Test the display 02
    Pixel 2 XL - Test the display 03
    Pixel 2 XL - Test the display 04
    Pixel 2 XL - Test the display 05
    Pixel 2 XL - Test the display 06
    Pixel 2 XL - Test the display 07
    • Display connector

    Test the display before installing it to make sure you didn't buy a broken spare part. If you find any error, don't continue, but contact your vendor and return the part if necessary.

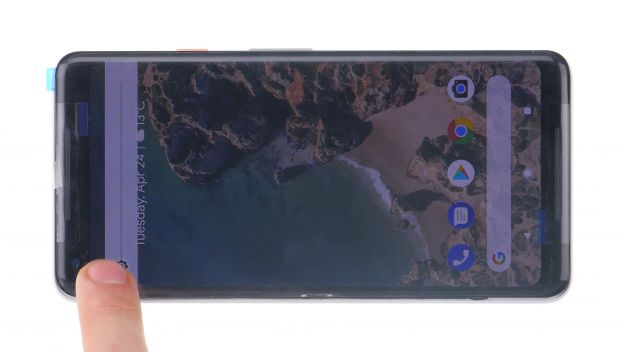
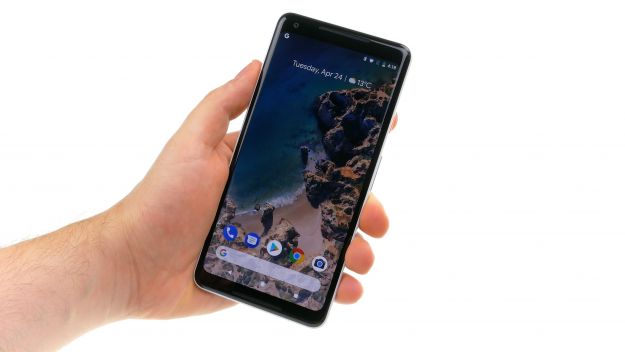
    1. Check the minimum and maximum brightness of the display and check for pixel errors.
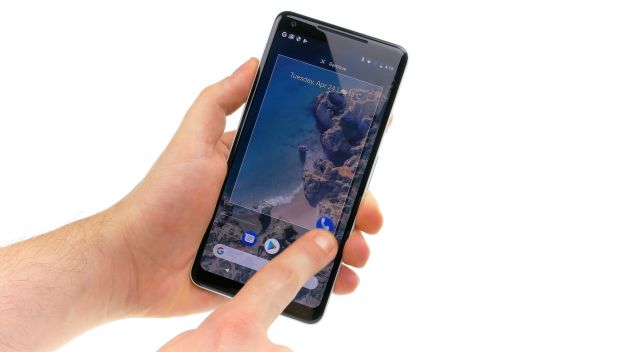
    2. Drag any app across the screen in a zig-zag pattern. If it doesn't jump, the touch function is OK.
    3. If everything works fine, switch the device off again and unplug both connectors.
    4. Now you can remove all backing films.
  5. The right tools for your repair

    With the right tools, you will succeed in any repair. In our store you will find a large selection of professional quality tools.
    VIEW NOW
  6. Clean and prepare the frame

    Pixel 2 XL - Clean and prepare the frame 01
    Pixel 2 XL - Clean and prepare the frame 02
    Pixel 2 XL - Clean and prepare the frame 03
    Pixel 2 XL - Clean and prepare the frame 04
    Pixel 2 XL - Clean and prepare the frame 05
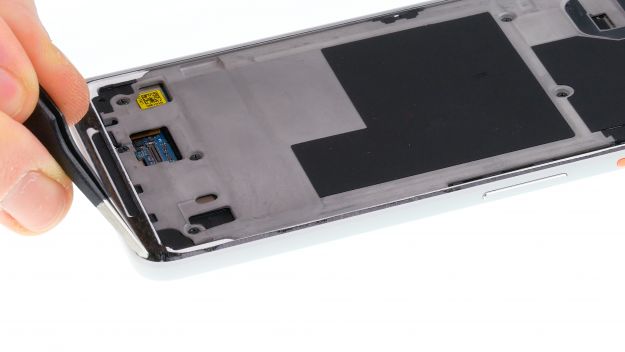
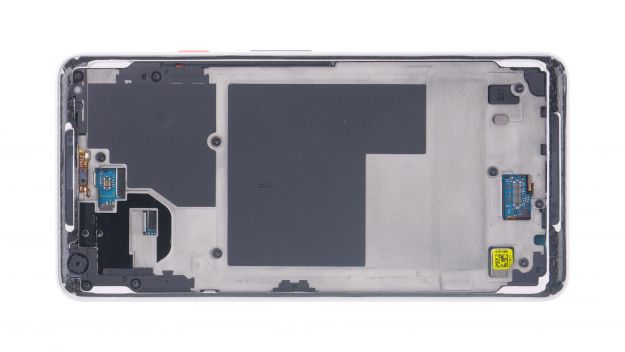
    1. Carefully remove all bits of broken glass.

    Be careful not to hurt yourself or use gloves.

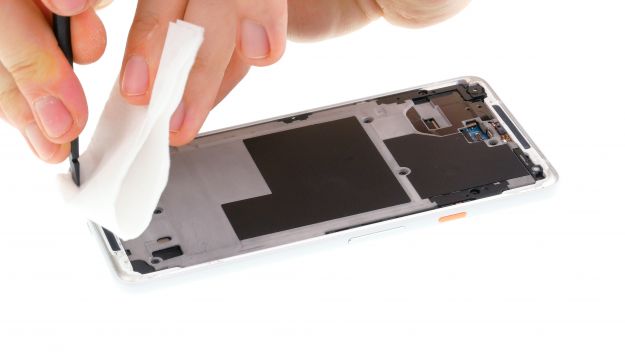
    1. Remove all adhesive residue with a plastic tool.
    2. Thoroughly clean the edges of the chassiswith rubbing alcohol / isopropanol.
    3. Run a pointed plastic tool through all the ridges with the moist cloth to clean out all residue.
  7. Attaching a new frame sticker

    Pixel 2 XL - Attaching a new frame sticker 01
    Pixel 2 XL - Attaching a new frame sticker 02
    Pixel 2 XL - Attaching a new frame sticker 03
    Pixel 2 XL - Attaching a new frame sticker 04
    Pixel 2 XL - Attaching a new frame sticker 05
    Pixel 2 XL - Attaching a new frame sticker 06
    Pixel 2 XL - Attaching a new frame sticker 07
    Pixel 2 XL - Attaching a new frame sticker 08

    If you're opening the display, you need to attach a new adhesive frame to close the device, so you should order one before starting the repair.

    Attach the frame sticker to fasten the display.

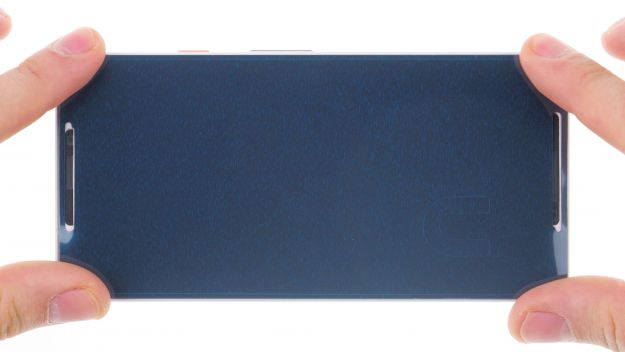
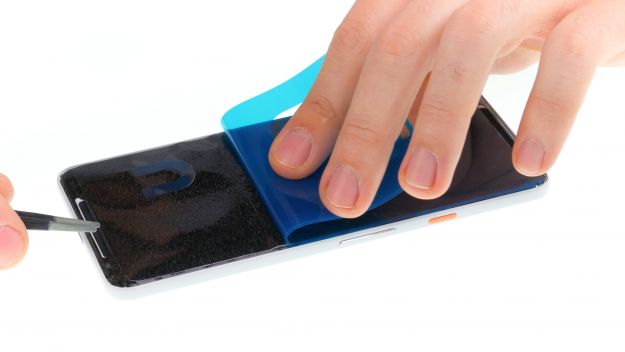
    1. First put the frame sticker on the display with the backing film attached to check the alignment.
    2. The hole for the front camera shows you which way the adhesive frame should face.
    3. Then peel off the outer backing film and stick on the frame sticker. The blue film should be facing up.
    The adhesive frame is very thin and tears easily, so you have to work slowly and step by step.
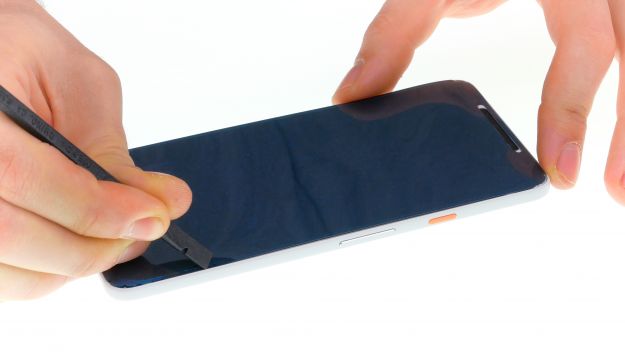
    1. First press on the top edge of the sticker and make sure it sticks. Then attach it on the opposite side, especially at the corners.
    2. Press the edges to the chassis frame. The blue backing film should already be peeling off a little. This shows you that the sticker is sitting on the frame properly.
    3. Once the sticker is properly attached, pull of the second backing film. Correct its position, if the black sticker film isn't sitting right. Make sure the adhesive doesn't come out at the edges when you close the device.
    4. Then pull out the the whole inner part of the sticker by pulling on the U-shaped tab.
  8. Connect the display

    Pixel 2 XL - Connect the display 01
    Pixel 2 XL - Connect the display 02
    Pixel 2 XL - Connect the display 03
    Pixel 2 XL - Connect the display 04
    Pixel 2 XL - Connect the display 05
    Pixel 2 XL - Connect the display 06
    • Display connector

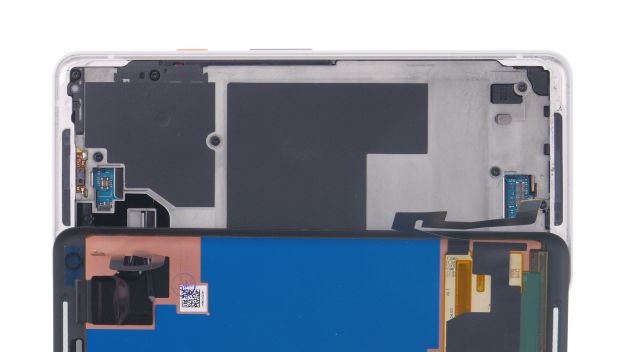
    Place the display on one edge of the device. Place the display on a spacer of some sort to keep the frame from sticking by accident.

    1. Reconnect the display connectors. Press the contact carefully onto the connection on the motherboard until you hear it click into place.
    2. Put the two plastic covers back in place and press them in. Don't forget to attach the tape of the second plastic cover.
  9. Test the device

    Pixel 2 XL - Test the device 01
    Pixel 2 XL - Test the device 02
    Pixel 2 XL - Test the device 03
    Pixel 2 XL - Test the device 04
    Pixel 2 XL - Test the device 05
    Pixel 2 XL - Test the device 06
    Pixel 2 XL - Test the device 07

    Switch on your assembled device and test the display again.

    Do watch out that the display doesn't slip, but don't press it on yet.

    1. Drag any app across the screen in a zig-zag pattern. If it doesn't bounce back, everything's ok.
    2. Also test the minimum and maximum brightness of the screen and look out for any pixel errors.
  10. Attach the screen

    Pixel 2 XL - Attach the screen 01
    Pixel 2 XL - Attach the screen 02
    Pixel 2 XL - Attach the screen 03
    Pixel 2 XL - Attach the screen 04
    Pixel 2 XL - Attach the screen 05
    1. Place the display on the frame and make sure it's sitting right.
    2. Then press on the display all around. Press it a bit longer to make the glue stick.

    The adhesive needs some time to bond. You can heat the screen a little and place it between two books, so the glue will hold better. Do take care not to damage the screen though!

Ø 5 (8 Ratings)

Bewerte unsere Anleitung

Hat dir unsere Anleitung weitergeholfen? Wir sind auf deine Beurteilung gespannt.

Submit rating

Submit rating

How did you like this repair guide?

Exceptional

Similar guides

You might also be interested in these guides.

You might be interested in

Get in touch with iDoc

Please contact our customer service for any questions about iDoc's products and services.

  • Send a message

    If you have a question about a guide or want to give us general feedback, just use our contact form

    Write a message
  • Free shipping

    From a minimum order value of 79.00 € your order will be shipped free of charge within Germany.

  • Call iDoc

    If you have any questions about our guides or services, call us from Monday to Friday, 10:00 a.m. to 6:00 p.m.

    +49 30 200 514 455
  • 5 star service

    We offer top quality and service. Our customers confirm this as well.

    Show reviews

Profi-Insights & Tipps für deine erfolgreiche Handy-Reparatur

iDoc schenkt dir den ultimativen Reparatur-Guide GUIDE GRATIS ANFORDERN

Profi-Insights & Tipps für deine erfolgreiche Handy-Reparatur

iDoc schenkt dir den ultimativen Reparatur-Guide GUIDE GRATIS ANFORDERN