New battery for your OnePlus 6

Is your battery getting weak? Power up your OnePlus 6! Each step has detailed photos to guide you through this battery replacement. The battery isn't glued in very strong and you don't need tools to remove it.

We advice you to check your spare part before installation. If you find any visible errors, please contact your vendor before starting.

The repair is somewhat more difficult because the OnePlus 6 has to be opened via the glass back cover.

Run a data backup before the repair, use a clean work surface and take enough time. If you have questions, use the live chat on our website or write a comment.

Required tools

  • Flat Picks

    Flat Picks

    You need a very flat tool such as a flat pick to pry out parts that are glued in place.

    €5.00 at the iDoc store
  • Heat gun

    Heat gun

    You can use a heat gun to heat parts that are glued on so they’re easier to remove. In most cases, you can also use a hairdryer.

    from €14.47 on Amazon
  • For storing screws

    For storing screws

    We recommend storing your screws so you don’t mix up the various screws and small parts.

    €10.00 at the iDoc store
  • iPlastix Opening Tool

    iPlastix Opening Tool

    Do you want to open your smartphone or lever out large parts like the battery? Then the iPlastix with its large blade will help you. The practical assistant is made of flexible, especially sturdy plastic and lies comfortably in the hand. Thanks to its design, you can even get into smaller gaps, for example to lift the screen or to prevent it from sticking together again.

    €10.00 at the iDoc store
  • Tweezers

    Tweezers

    We recommend using tweezers to remove screws and various small parts from your device.

    €11.00 at the iDoc store
  • Plastic prying tool

    Plastic prying tool

    You need a flat plastic prying tool to disconnect the various plugs and connectors.

    €2.00 at the iDoc store
  • Steel Laboratory Spatula

    Steel Laboratory Spatula

    You need a flat and sturdy prying tool to disconnect glued parts.

    €4.00 at the iDoc store
  • Samsung Tool Kit, 17 pieces

    Samsung Tool Kit, 17 pieces

    With various opening and lever tools, a Phillips screwdriver from Wiha, tweezers and steel spatula, you have everything you need for a successful Samsung repair. To help you succeed even in tricky situations, our favorites - the iPlastix, the iFlex and the iDoc magnetic mat - can't be missing from this Samsung tool set.

    €40.00 at the iDoc store

Required replacement part

Show all replacement parts for the OnePlus 6 

Passendes Werkzeug

Mit unserem Werkzeug gelingt dir die Reparatur.

for €40.00

Getting started with the repair of your OnePlus 6

If you get stuck or have questions, you can post a comment. We’d be happy to help.

11 steps
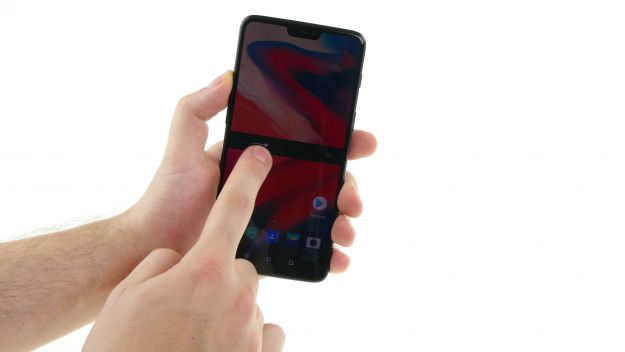
  1. Switch off the device

    OnePlus 6 - Switch off the device 01
    OnePlus 6 - Switch off the device 02
    OnePlus 6 - Switch off the device 03

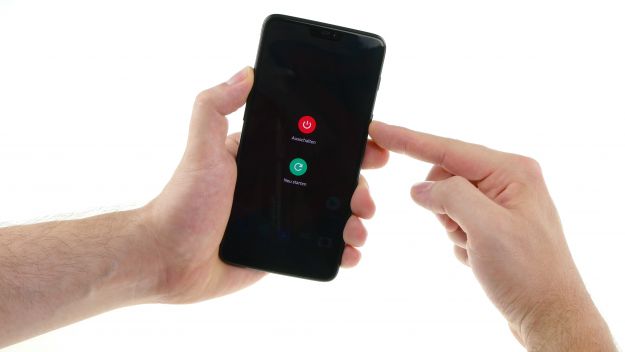
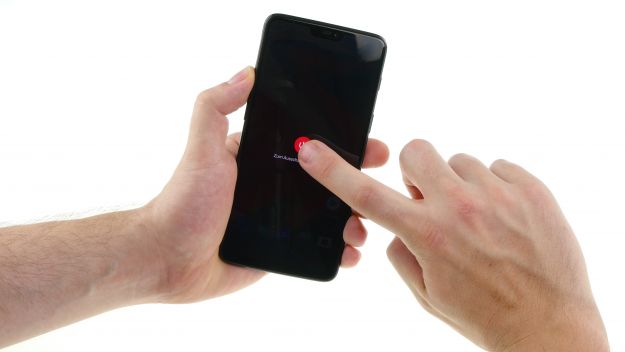
    Turn off your OnePlus 6 completely.

    1. Press and hold the standby button until the "Turn off" option is displayed.
    2. Confirm the power off with a second tap.
  2. Remove the back cover

    OnePlus 6 - Remove the back cover 01
    OnePlus 6 - Remove the back cover 02
    OnePlus 6 - Remove the back cover 03
    OnePlus 6 - Remove the back cover 04
    OnePlus 6 - Remove the back cover 05
    OnePlus 6 - Remove the back cover 06

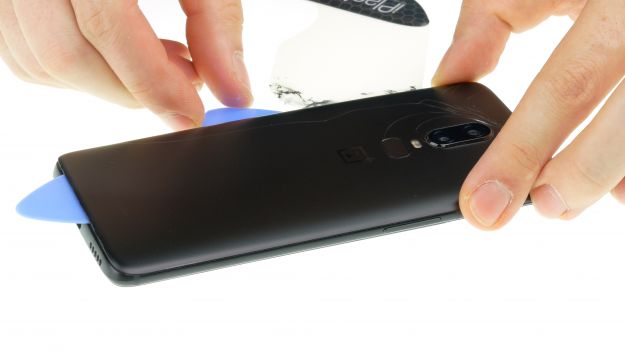
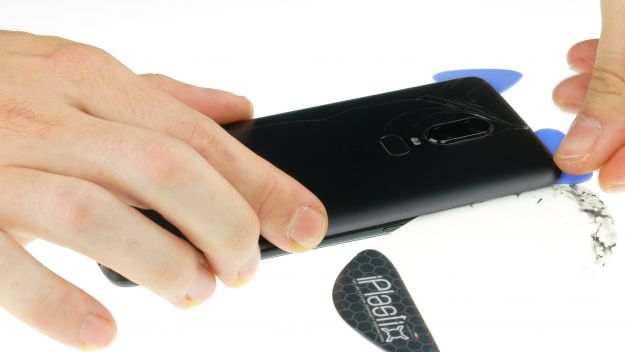
    To loosen the back cover, use a heat gun or an ordinary hair dryer. Warm glue is easier to loosen, allowing you to remove the back cover. The easiest way to loosen the back cover is to use a flat and flexible tool such as the iPlastix or iFlex.

    You will also need several plastic picks to unstick the back cover all around.

    1. Heat the spot where you start.
    2. Press a flat tool between the back cover and the frame.

    The iPlastix is made of plastic, so it won't scratch the device. On the other hand, it's very soft and tricky to insert.You can use a suction cup to help lift the rear glass slightly.

    Be extra careful, the back cover can break very easily. If necessary, apply the heat several times and try again. Removing the back cover might take half an hour. Take a little more time and work carefully to make sure you don't break anything.

    1. Once the tool is inserted, stick a pick into the gap to keep it open.
    2. Then run the tool around the entire edge to gradually loosen the glue.
    3. Heat the next part and insert the picks one by one.
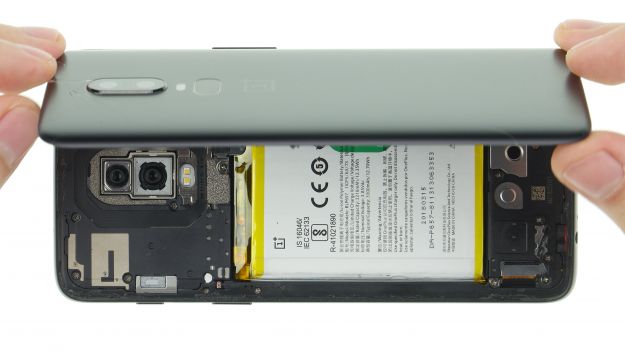
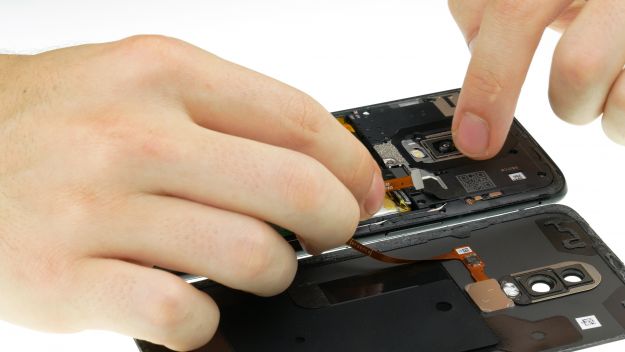
    4. Once the back cover is loosened, lift it very slightly. The fingerprint sensor underneath the camera is still connected with a cable.

    If your backcover is broken as well as in this case, you can try to leave it intact and not damage it further. You could use it again after replacing the display, as long as the cracks don't bother you.

  3. Disconnect the fingerprint sensor

    OnePlus 6 - Disconnect the fingerprint sensor  01
    OnePlus 6 - Disconnect the fingerprint sensor  02
    OnePlus 6 - Disconnect the fingerprint sensor  03
    OnePlus 6 - Disconnect the fingerprint sensor  04
    OnePlus 6 - Disconnect the fingerprint sensor  05
    • Fingerprint Connector
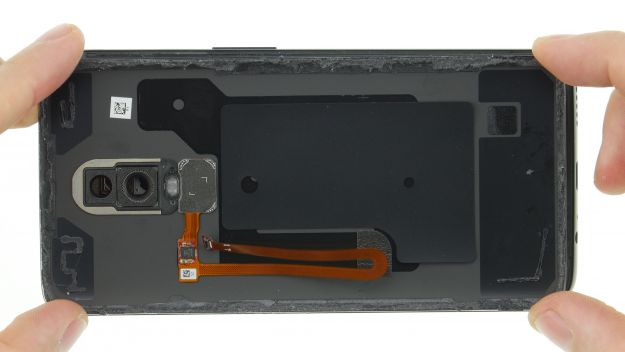
    1. Now carefully lift up the loosened back cover and fold it over.
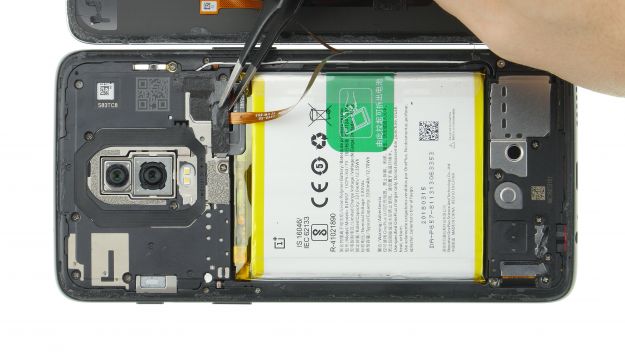
    2. Loosen the adhesive strip over the cover plate.
    3. Remove the cover over the connector with tweezers or your fingers.
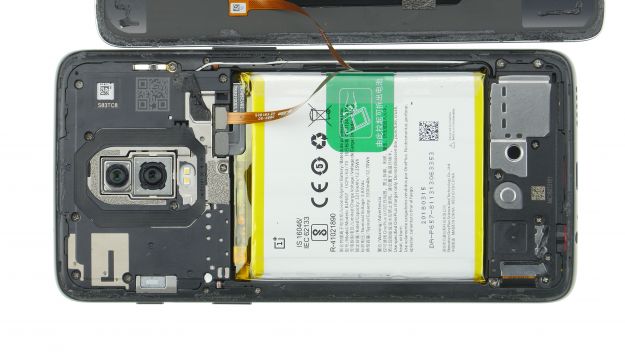
    4. Then carefully disconnect the connector with a spudger or your fingernail and remove the back cover.
  4. Disconnect the battery

    OnePlus 6 - Disconnect the battery 01
    OnePlus 6 - Disconnect the battery 02
    OnePlus 6 - Disconnect the battery 03
    • Battery Connector
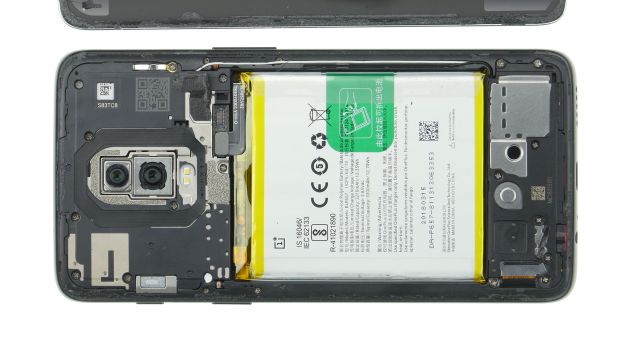
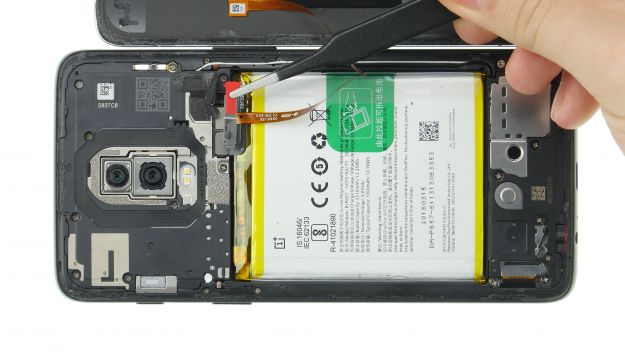
    1. Now the battery connector is free.
    2. Disconnect the battery to avoid short circuits during the repair.
  5. Remove the battery

    OnePlus 6 - Remove the battery 01
    OnePlus 6 - Remove the battery 02
    OnePlus 6 - Remove the battery 03
    OnePlus 6 - Remove the battery 04
    OnePlus 6 - Remove the battery 05
    OnePlus 6 - Remove the battery 06
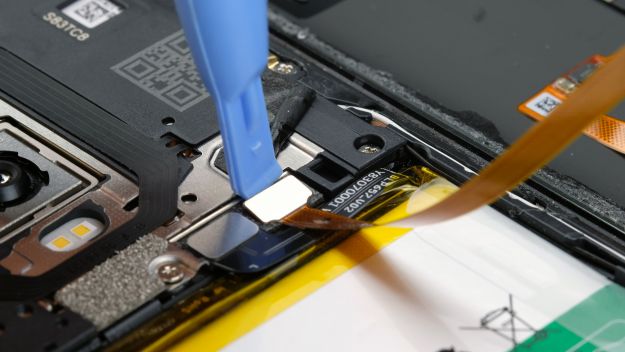
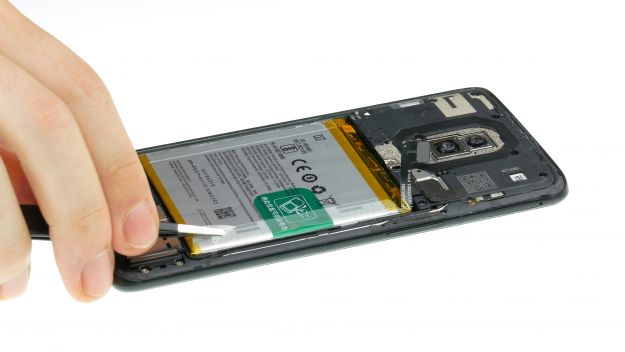
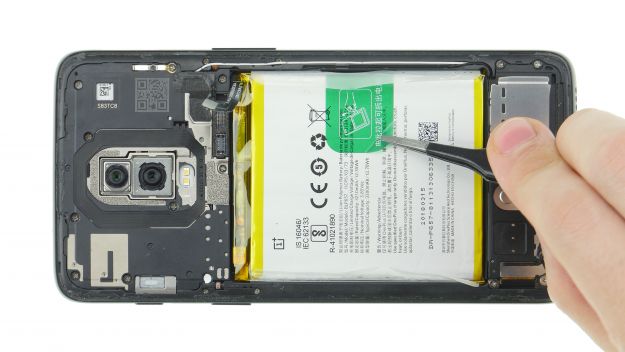
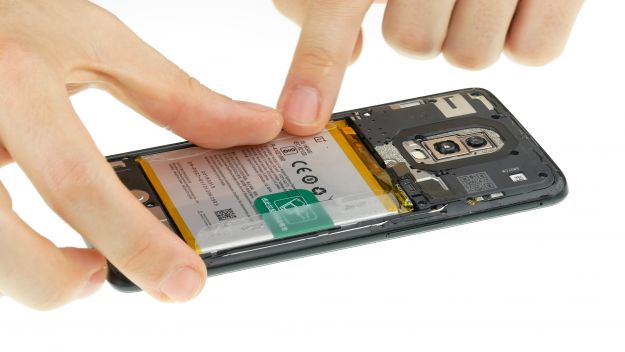
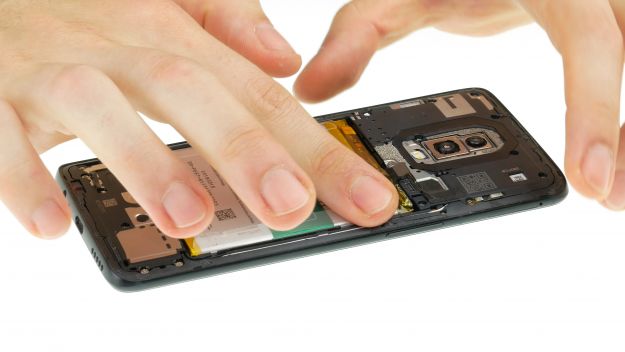
    1. Unstick the two transparent adhesive tabs on both sides of the battery.
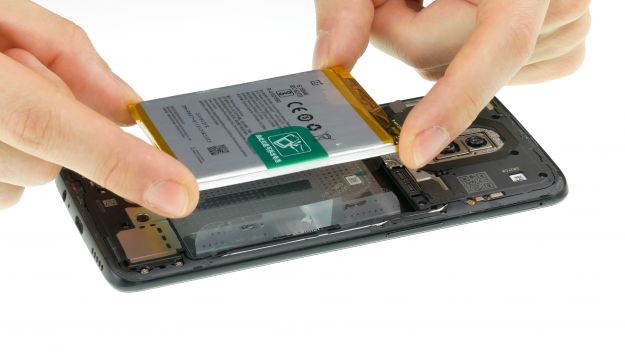
    2. Now pull the green tab until the battery comes out. Pull carefully so the tab won't tear.

    Be careful not to bend the battery. The battery is not very firmly glued, but if the adhesive is too strong, you can heat the unit from the display side.

  6. The right tools for your repair

    With the right tools, you will succeed in any repair. In our store you will find a large selection of professional quality tools.
    VIEW NOW
  7. Prepare the battery

    OnePlus 6 - Prepare the battery 01

    Transfer the green pull tab to your new battery so you can easily remove it later.

  8. Insert the battery

    OnePlus 6 - Insert the battery 01
    OnePlus 6 - Insert the battery 02
    OnePlus 6 - Insert the battery 03
    OnePlus 6 - Insert the battery 04
    OnePlus 6 - Insert the battery 05
    1. Place the battery in its place and make sure that it has some space on all sides and is not pressed against the frame or other components.
    2. The battery contact should be directly above its socket on the mainboard.
  9. Connect the battery

    OnePlus 6 - Connect the battery 01
    OnePlus 6 - Connect the battery 02
    OnePlus 6 - Connect the battery 03
    • Connector
    1. Connect the battery to the mainboard.
  10. Connect the fingerprint sensor

    OnePlus 6 - Connect the fingerprint sensor 01
    OnePlus 6 - Connect the fingerprint sensor 02
    OnePlus 6 - Connect the fingerprint sensor 03
    OnePlus 6 - Connect the fingerprint sensor 04
    OnePlus 6 - Connect the fingerprint sensor 05
    OnePlus 6 - Connect the fingerprint sensor 06
    OnePlus 6 - Connect the fingerprint sensor 07
    • Fingerprint Connector
    1. Put the back cover next to the device.
    2. Position the fingerprint sensor cable over its mainboard contact and connect it.
    3. Put on the cover with the red rubber piece. Reattach the black glue.
  11. Test the device

    OnePlus 6 - Test the device 01
    OnePlus 6 - Test the device 02
    OnePlus 6 - Test the device 03
    OnePlus 6 - Test the device 04
    OnePlus 6 - Test the device 05

    Before you finally close the device again, you should test it.

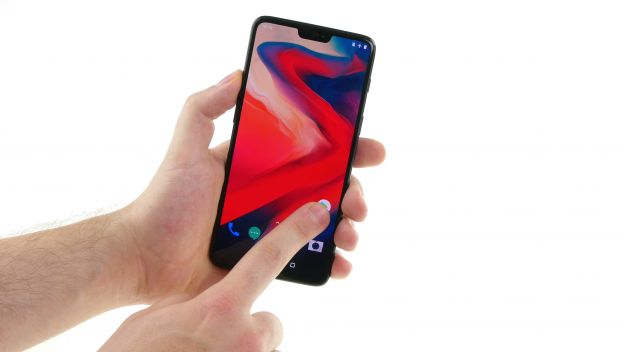
    1. Turn on the device and check the screen first.
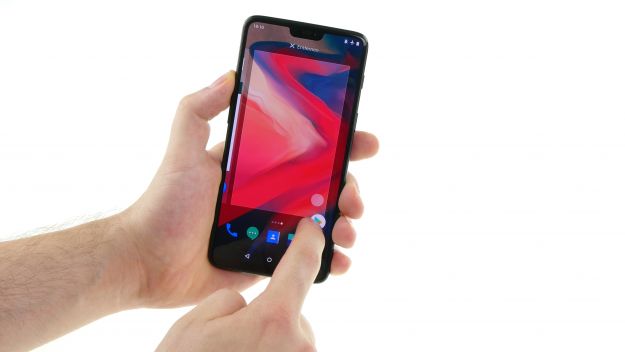
    2. Slide an app along the edge and zigzag it across the display to make sure the touchscreen responds correctly at all points.
    3. Also test the minimum and maximum brightness.
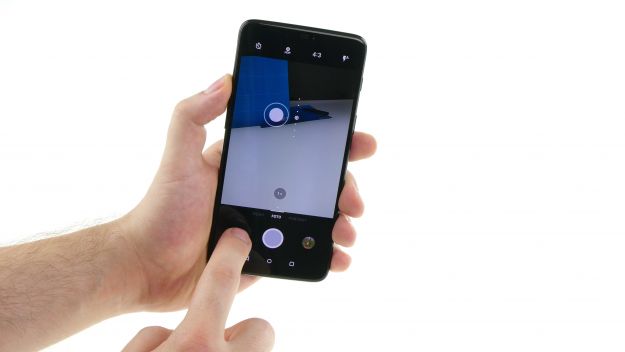
    4. Test the front and rear cameras and the flash.
    5. Call someone to test the microphone and earcup.
    6. Mute the phone to test the vibration motor.
  12. Attach the back cover

    OnePlus 6 - Attach the back cover 01
    OnePlus 6 - Attach the back cover 02
    OnePlus 6 - Attach the back cover 03
    OnePlus 6 - Attach the back cover 04

    You can reuse the glue still on the frame and back cover. Make sure that it is spread as evenly as possible and remove any glue that has wrinkled or protrudes.

    1. Heat the device again to soften the glue of the back cover.
    2. Press the back cover firmly onto the frame of the device.

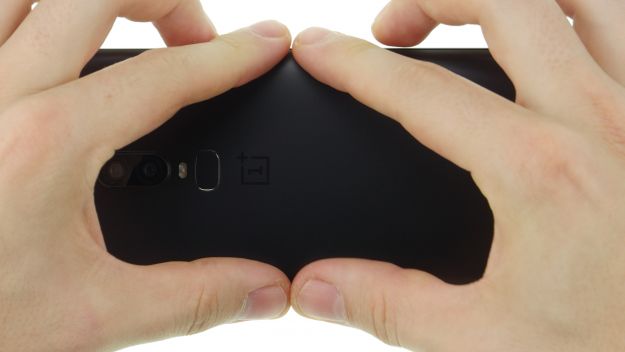
    Clamp the device between a few books for example and give the glue an hour to set.

Ø 4.8 (10 Ratings)

Bewerte unsere Anleitung

Hat dir unsere Anleitung weitergeholfen? Wir sind auf deine Beurteilung gespannt.

Submit rating

Submit rating

How did you like this repair guide?

Exceptional

Similar guides

You might also be interested in these guides.

You might be interested in

Get in touch with iDoc

Please contact our customer service for any questions about iDoc's products and services.

  • Send a message

    If you have a question about a guide or want to give us general feedback, just use our contact form

    Write a message
  • Free shipping

    From a minimum order value of 79.00 € your order will be shipped free of charge within Germany.

  • Call iDoc

    If you have any questions about our guides or services, call us from Monday to Friday, 10:00 a.m. to 6:00 p.m.

    +49 30 200 514 455
  • 5 star service

    We offer top quality and service. Our customers confirm this as well.

    Show reviews

Profi-Insights & Tipps für deine erfolgreiche Handy-Reparatur

iDoc schenkt dir den ultimativen Reparatur-Guide GUIDE GRATIS ANFORDERN

Profi-Insights & Tipps für deine erfolgreiche Handy-Reparatur

iDoc schenkt dir den ultimativen Reparatur-Guide GUIDE GRATIS ANFORDERN