
The screen is broken or remains black.
In this repair guide, we show you how to replace your Moto X Play’s defective display unit. You need this repair if the glass is cracked, the touchscreen no longer responds to touch, or the LCD remains black or flickers.
Required tools
-
Heat gun
Heat gun
You can use a heat gun to heat parts that are glued on so they’re easier to remove. In most cases, you can also use a hairdryer.
from €15.99 on Amazon -
For storing screws
For storing screws
We recommend storing your screws so you don’t mix up the various screws and small parts.
from €10.99 on Amazon -
Tweezers
Tweezers
We recommend using tweezers to remove screws and various small parts from your device.
on Amazon -
Steel Laboratory Spatula
Steel Laboratory Spatula
You need a flat and sturdy prying tool to disconnect glued parts.
on Amazon - Wiha PicoFinish Torx Screwdriver T3
Required replacement part
- Motorola Moto X Play Screen


Getting started with the repair of your Moto X Play
If you get stuck or have questions, you can post a comment. We’d be happy to help.
-
Turning off your Motorola Moto X Play
![Moto X Play - Turning off your Motorola Moto X Play 01]()
![Moto X Play - Turning off your Motorola Moto X Play 02]()
-
-
Removing the SIM card tray
![Moto X Play - Removing the SIM card tray 01]()
![Moto X Play - Removing the SIM card tray 02]()
-
-
Removing the back cover
![Moto X Play - Removing the back cover 01]()
![Moto X Play - Removing the back cover 02]()
-
-
Removing the midframe
![Moto X Play - Removing the midframe 01]()
![Moto X Play - Removing the midframe 02]()
-
-
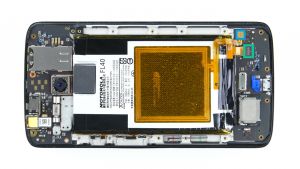
Disconnecting the battery and the NFC antenna
![Moto X Play - Disconnecting the battery and the NFC antenna 01]()
![Moto X Play - Disconnecting the battery and the NFC antenna 02]()
![Moto X Play - Disconnecting the battery and the NFC antenna 03]()
-
-
Removing the battery
![Moto X Play - Removing the battery 01]()
![Moto X Play - Removing the battery 02]()
![Moto X Play - Removing the battery 03]()
-
-
Disconnecting the display connector
![Moto X Play - Disconnecting the display connector 01]()
![Moto X Play - Disconnecting the display connector 02]()
![Moto X Play - Disconnecting the display connector 03]()
![Moto X Play - Disconnecting the display connector 04]()
![Moto X Play - Disconnecting the display connector 05]()
![Moto X Play - Disconnecting the display connector 06]()
![Moto X Play - Disconnecting the display connector 07]()
![Moto X Play - Disconnecting the display connector 08]()
![Moto X Play - Disconnecting the display connector 09]()
-
-
Removing the logic board
![Moto X Play - Removing the logic board 01]()
![Moto X Play - Removing the logic board 02]()
![Moto X Play - Removing the logic board 03]()
![Moto X Play - Removing the logic board 04]()
![Moto X Play - Removing the logic board 05]()
![Moto X Play - Removing the logic board 06]()
-
-
Removing the earpiece
![Moto X Play - Removing the earpiece 01]()
![Moto X Play - Removing the earpiece 02]()
![Moto X Play - Removing the earpiece 03]()
-
-
Removing the volume control cable
![Moto X Play - Removing the volume control cable 01]()
![Moto X Play - Removing the volume control cable 02]()
![Moto X Play - Removing the volume control cable 03]()
![Moto X Play - Removing the volume control cable 04]()
![Moto X Play - Removing the volume control cable 05]()
-
-
Installing the volume control cable
![Moto X Play - Installing the volume control cable 01]()
![Moto X Play - Installing the volume control cable 02]()
![Moto X Play - Installing the volume control cable 03]()
![Moto X Play - Installing the volume control cable 04]()
![Moto X Play - Installing the volume control cable 05]()
-
-
Installing the earpiece
![Moto X Play - Installing the earpiece 01]()
![Moto X Play - Installing the earpiece 02]()
![Moto X Play - Installing the earpiece 03]()
-
-
Installing the logic board
![Moto X Play - Installing the logic board 01]()
-
-
Connecting the display connector
![Moto X Play - Connecting the display connector 01]()
![Moto X Play - Connecting the display connector 02]()
![Moto X Play - Connecting the display connector 03]()
![Moto X Play - Connecting the display connector 04]()
![Moto X Play - Connecting the display connector 05]()
![Moto X Play - Connecting the display connector 06]()
![Moto X Play - Connecting the display connector 07]()
-
-
Inserting the battery
![Moto X Play - Inserting the battery 01]()
-
-
Connecting the battery and the NFC antenna
![Moto X Play - Connecting the battery and the NFC antenna 01]()
![Moto X Play - Connecting the battery and the NFC antenna 02]()
![Moto X Play - Connecting the battery and the NFC antenna 03]()
![Moto X Play - Connecting the battery and the NFC antenna 04]()
-
-
Installing the midframe
![Moto X Play - Installing the midframe 01]()
![Moto X Play - Installing the midframe 02]()
-
-
Installing the control buttons
![Moto X Play - Installing the control buttons 01]()
![Moto X Play - Installing the control buttons 02]()
![Moto X Play - Installing the control buttons 03]()
-
-
Attaching the back cover
![Moto X Play - Attaching the back cover 01]()
![Moto X Play - Attaching the back cover 02]()
-
-
Inserting the SIM card tray
![Moto X Play - Inserting the SIM card tray 01]()
![Moto X Play - Inserting the SIM card tray 02]()
-
-
Testing the display
![Moto X Play - Testing the display 01]()
-


The right tools for your repair


Similar guides
You might also be interested in these guides.


You might be interested in
