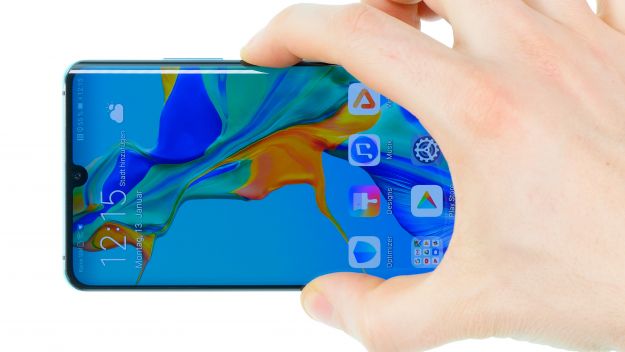
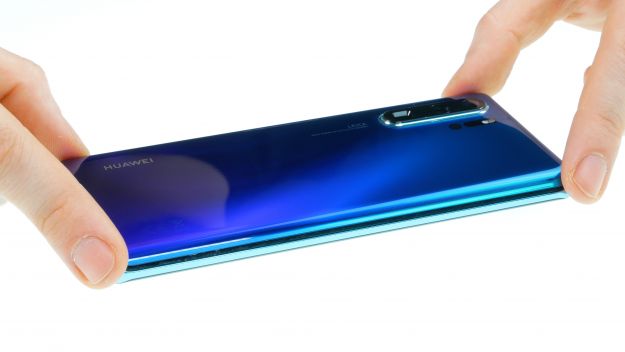
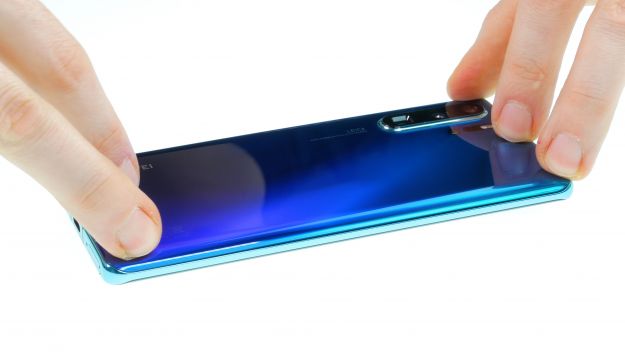
The screen of your Huawei P30 Pro is broken or shattered.

You have pixel errors or a vertical line from the top to the bottom on your P30 Pro display? You've dropped the Huawei device on the floor and the screen is flickering or broken?

Although a Huawei doesn't make it easy, but with a little patience, good preparation and the right repair guide, you can replace a splintered display of a Huawei P30 Pro yourself.

The device has a glued back cover made of glass and is therefore a bit more difficult to open. But with enough hot air and the right tools like the iFlex, the iPlastix or an iSclack even the strongest glue won't stand up to you!

Required tools

  • Flat Picks

    Flat Picks

    You need a very flat tool such as a flat pick to pry out parts that are glued in place.

    €5.00 at the iDoc store
  • Heat gun

    Heat gun

    You can use a heat gun to heat parts that are glued on so they’re easier to remove. In most cases, you can also use a hairdryer.

    from €14.47 on Amazon
  • iFlex Opening Tool

    iFlex Opening Tool

    Opening your smartphone can be a very delicate operation, especially if the glue is very persistent. The blade of the flexible but sturdy iFlex measures just 0.15 mm, so it fits in even the smallest gaps, such as between the screen and the frame. The practical iFlex is made of stainless steel and sits comfortably in the hand. This makes it the perfect assistant for every smartphone repair.

    €10.00 at the iDoc store
  • iPlastix Opening Tool

    iPlastix Opening Tool

    Do you want to open your smartphone or lever out large parts like the battery? Then the iPlastix with its large blade will help you. The practical assistant is made of flexible, especially sturdy plastic and lies comfortably in the hand. Thanks to its design, you can even get into smaller gaps, for example to lift the screen or to prevent it from sticking together again.

    €10.00 at the iDoc store
  • Tweezers

    Tweezers

    We recommend using tweezers to remove screws and various small parts from your device.

    €11.00 at the iDoc store
  • Plastic prying tool

    Plastic prying tool

    You need a flat plastic prying tool to disconnect the various plugs and connectors.

    €2.00 at the iDoc store
  • Steel Laboratory Spatula

    Steel Laboratory Spatula

    You need a flat and sturdy prying tool to disconnect glued parts.

    €4.00 at the iDoc store
  • Phillips PH00 screwdriver

    Phillips PH00 screwdriver

    You need the right screwdriver for removing PH00 screws.

    €12.00 at the iDoc store

Required replacement part

Show all replacement parts for the Huawei P30 Pro 

Passendes Werkzeug

Mit unserem Werkzeug gelingt dir die Reparatur.

for €40.00

Getting started with the repair of your Huawei P30 Pro

If you get stuck or have questions, you can post a comment. We’d be happy to help.

25 steps
  1. Switch off your Huawei P30 Pro

    Huawei P30 Pro - Switch off your Huawei P30 Pro 01
    Huawei P30 Pro - Switch off your Huawei P30 Pro 02
    Huawei P30 Pro - Switch off your Huawei P30 Pro 03
    Huawei P30 Pro - Switch off your Huawei P30 Pro 04
    Huawei P30 Pro - Switch off your Huawei P30 Pro 05
    1. To avoid short circuits during the repair you should always switch off the device first.
    2. If the screen cannot be used anymore because of a defective display, this is not that problematic.The device will turn off immediately, when you disconnect the battery in a few steps.
  2. Removing the back cover

    Huawei P30 Pro - Removing the back cover 01
    Huawei P30 Pro - Removing the back cover 02
    Huawei P30 Pro - Removing the back cover 03
    Huawei P30 Pro - Removing the back cover 04
    Huawei P30 Pro - Removing the back cover 05
    Huawei P30 Pro - Removing the back cover 06
    Huawei P30 Pro - Removing the back cover 07
    Huawei P30 Pro - Removing the back cover 08

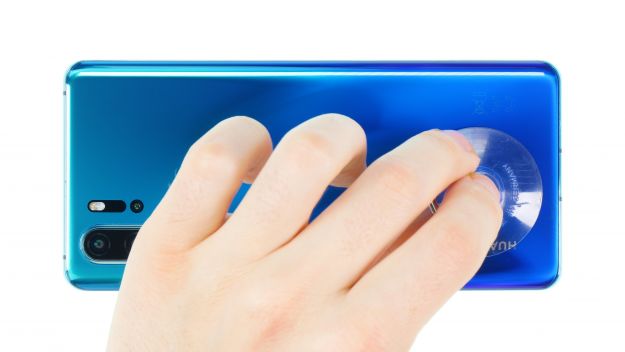
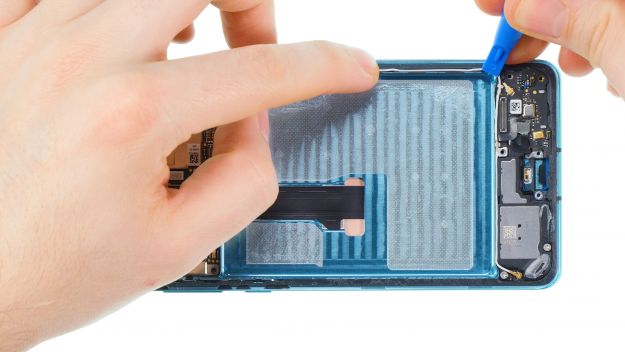
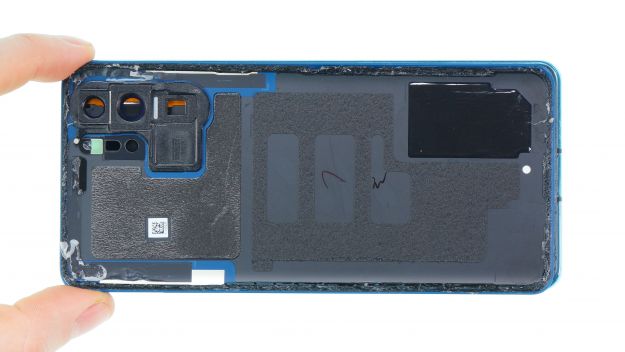
    The Huawei P30 Pro is opened via the heavily glued back cover.

    1. Heat the entire edge of the backcover and especially the part where you start to loosen the backcover. Do not heat the phone too much, but only so far that you can still touch it well.
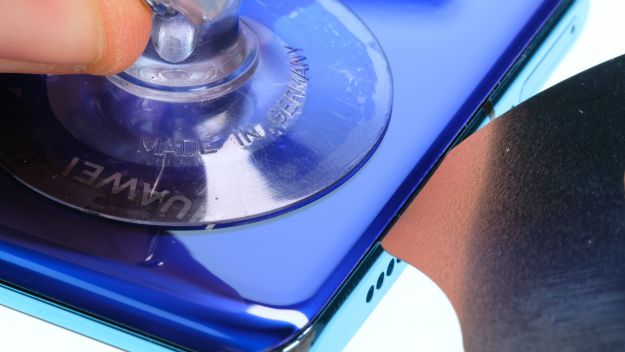
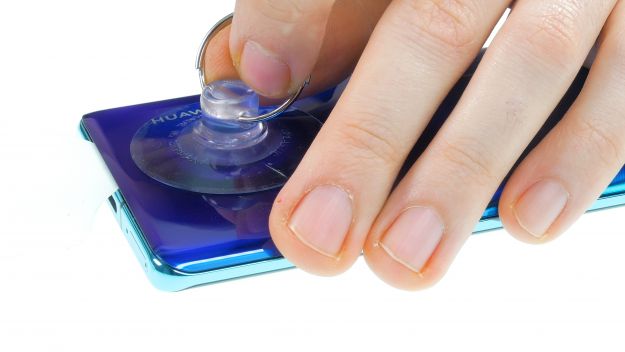
    2. Place the suction cup on the bottom of the device and pull to create a small gap between the back cover and the frame.
    3. Then try to get into the gap with your tool. With the iFlex this is a bit easier than with the iPlastix, because it is made of metal and a bit more stable. We recommend to continue with a plastic tool as soon as possible.
    4. Be especially careful with this step, as the back cover is made of glass and can break easily.
    5. Do not push the tool too far into the device and be careful not to scratch the backcover with the edges of the tool.

    Be especially careful near the cameras to avoid damaging them.

    1. Then heat the area you are working on again and move the tool further along the edge.
    2. To prevent the glue from sticking together again, you can use several picks and insert them into the already loosened part. Then go around the whole frame and loosen the glue bit by bit.

    Attention: after a repair the phone is basically no longer waterproof.


  3. Removing the mainboard cover / NFC antenna

    Huawei P30 Pro - Removing the mainboard cover / NFC antenna 01
    Huawei P30 Pro - Removing the mainboard cover / NFC antenna 02
    Huawei P30 Pro - Removing the mainboard cover / NFC antenna 03
    Huawei P30 Pro - Removing the mainboard cover / NFC antenna 04
    Huawei P30 Pro - Removing the mainboard cover / NFC antenna 05
    Huawei P30 Pro - Removing the mainboard cover / NFC antenna 06
    Huawei P30 Pro - Removing the mainboard cover / NFC antenna 07
    • 10 × 4,4 mm Phillips
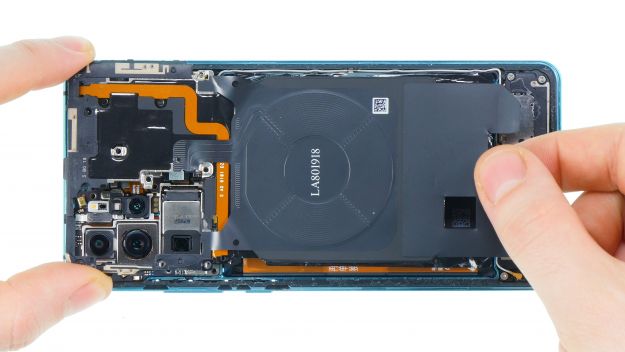
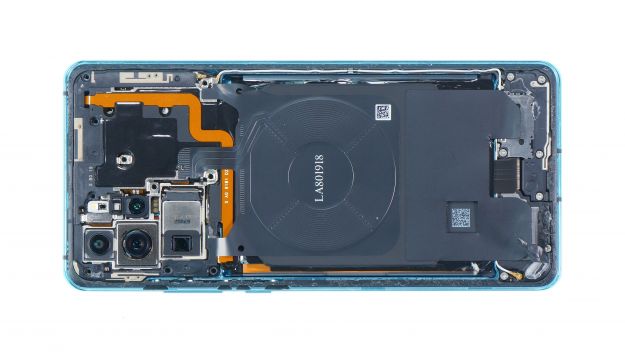
    1. Then remove all Phillips screws of equal length from the plastic cover and store them all together.
    2. Several screws are covered with black stickers or white water indicators.
    3. Use a pair of tweezers to remove the screws.
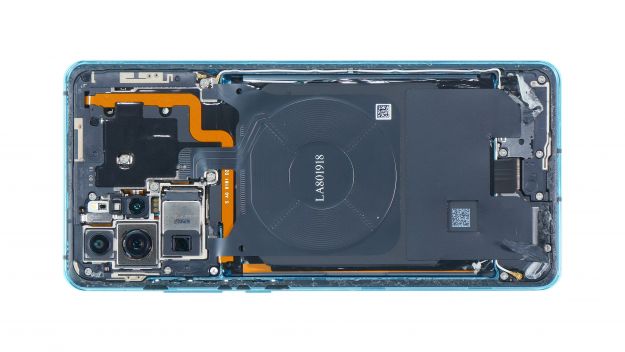
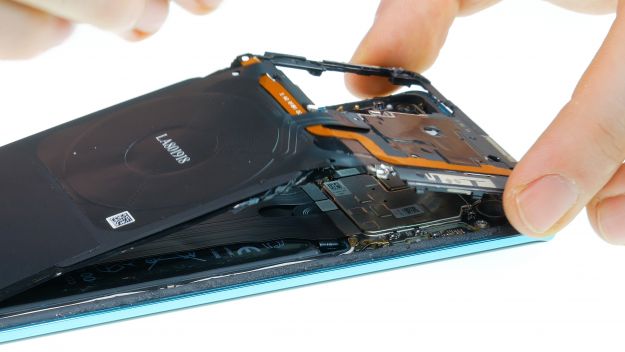
    4. The cover protects the mainboard and contains the coil for wireless charging.
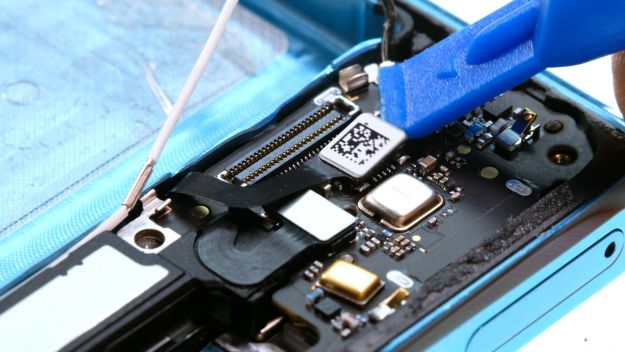
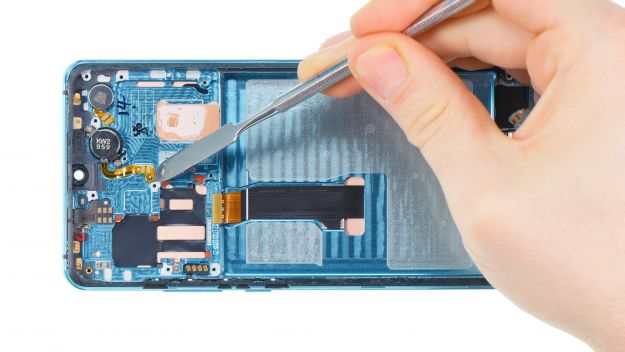
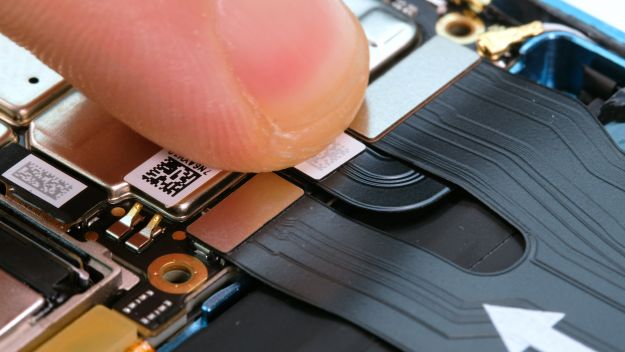
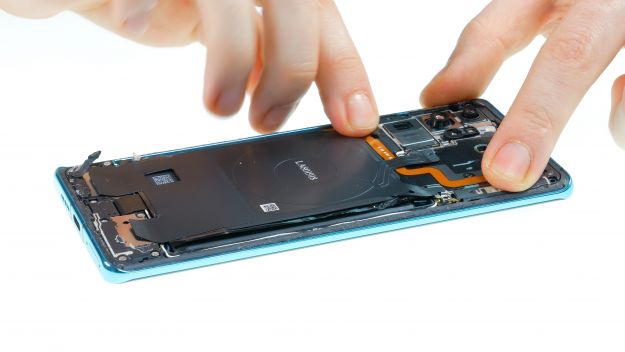
    5. The coil is glued at the bottom end. Loosen the glue by sliding the tweezers under it. Pay attention to the battery, which is directly underneath.
    6. Then lever up the cover which is hooked into the edge and take the cover out of the device.
  4. Disconnecting the battery

    Huawei P30 Pro - Disconnecting the battery 01
    Huawei P30 Pro - Disconnecting the battery 02
    Huawei P30 Pro - Disconnecting the battery 03
    Huawei P30 Pro - Disconnecting the battery 04
    Huawei P30 Pro - Disconnecting the battery 05
    • Battery connector
    1. Now the battery connector is uncovered.
    2. To avoid short circuits during repair, you should always disconnect the battery first.

    When disconnecting connectors, always take care not to damage any of the small components on the board.

  5. Removing the charging port flex cable

    Huawei P30 Pro - Removing the charging port flex cable 01
    Huawei P30 Pro - Removing the charging port flex cable 02
    Huawei P30 Pro - Removing the charging port flex cable 03
    Huawei P30 Pro - Removing the charging port flex cable 04
    Huawei P30 Pro - Removing the charging port flex cable 05
    Huawei P30 Pro - Removing the charging port flex cable 06
    Huawei P30 Pro - Removing the charging port flex cable 07
    Huawei P30 Pro - Removing the charging port flex cable 08
    • 5 × 4,4 mm Phillips
    • Connector

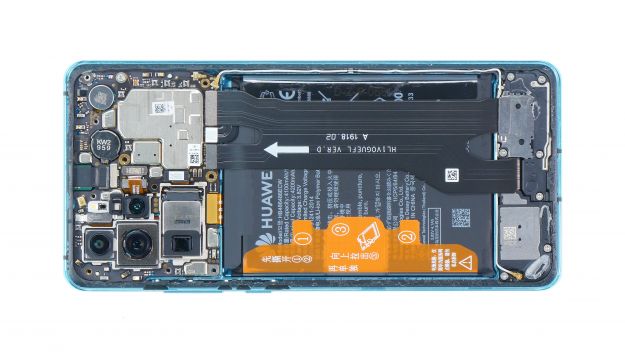
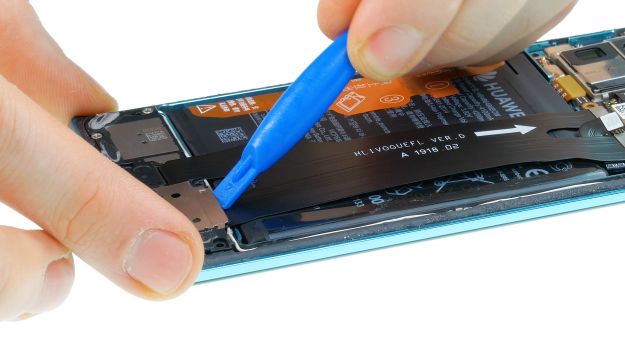
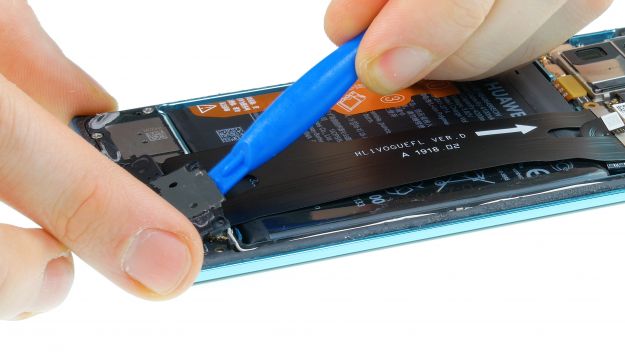
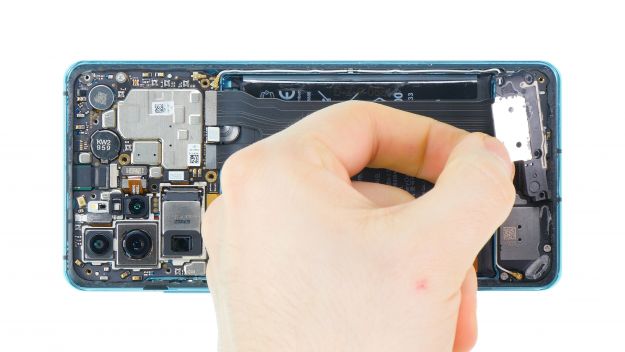
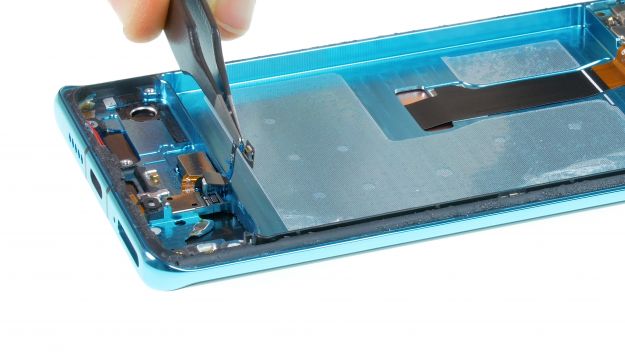
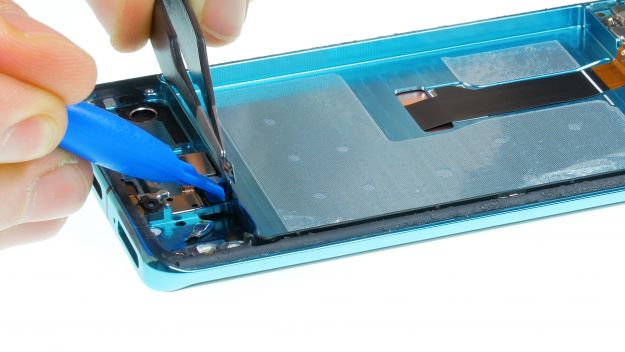
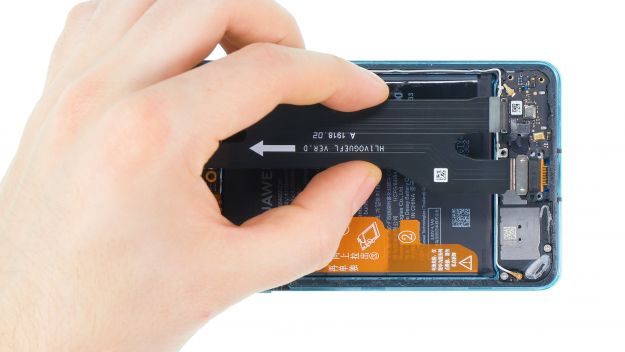
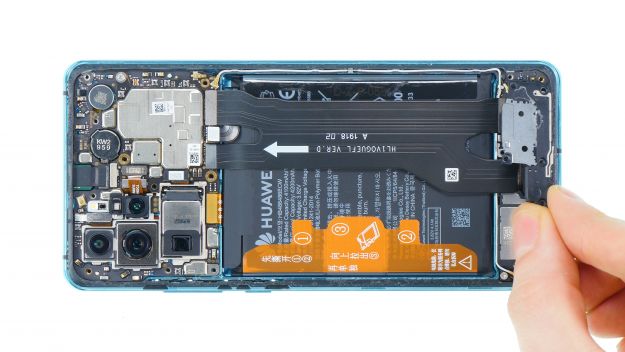
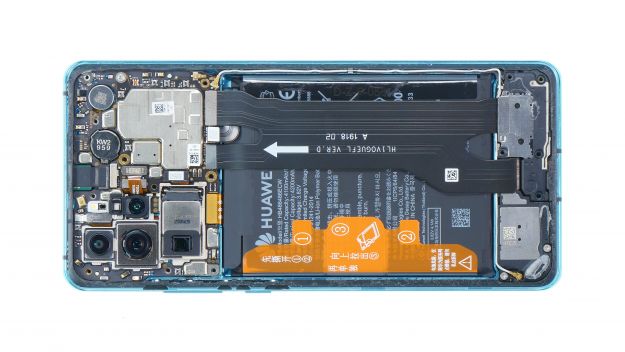
    In the next step, remove the wide flex cable that is above the battery. The cable contains the charging socket and it connects the lower board to the main board.

    1. First loosen the Phillips screws of the same length.
    2. Then remove the cover above the contacts.
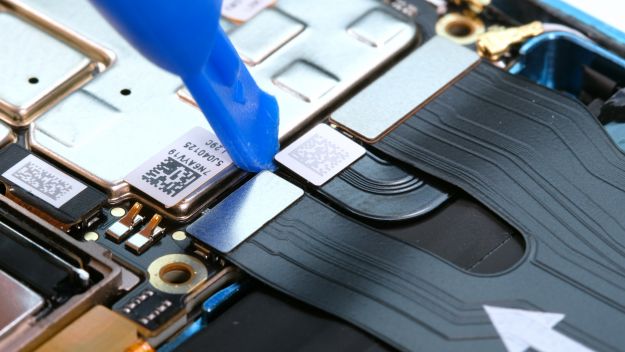
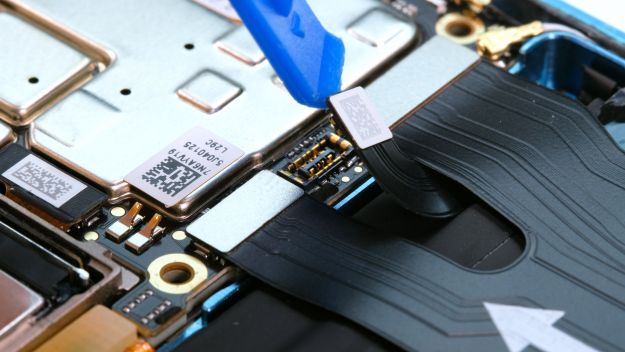
    3. Now you can disconnect all connectors with the spudger. Lever carefully and take care again not to damage any components on the board.
    4. When all contacts are disconnected, you can grab the flex cable and take the charging socket out of its opening.


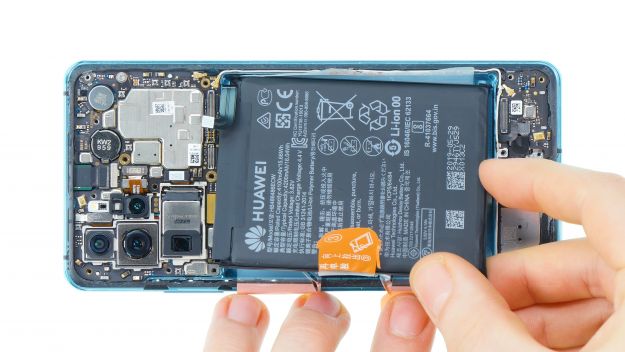
  6. Removing the battery

    Now check your spare display. There may already be a battery in it. Then you can skip this step.

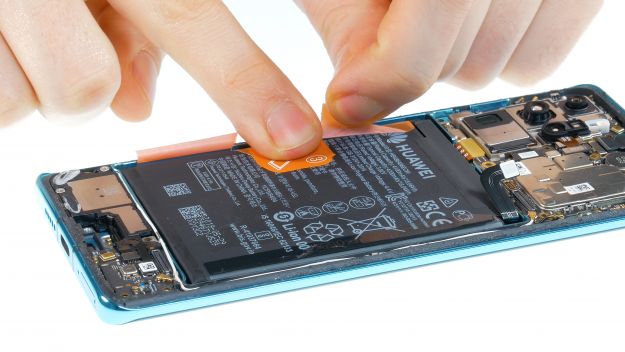
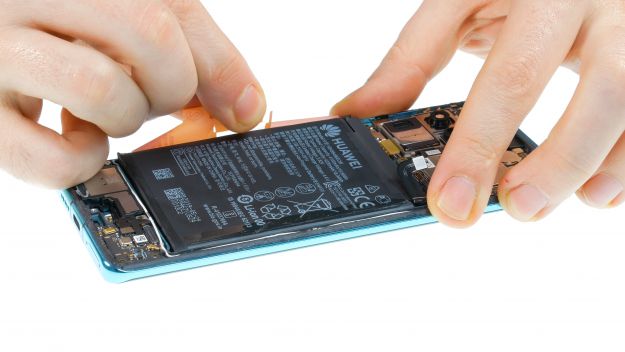
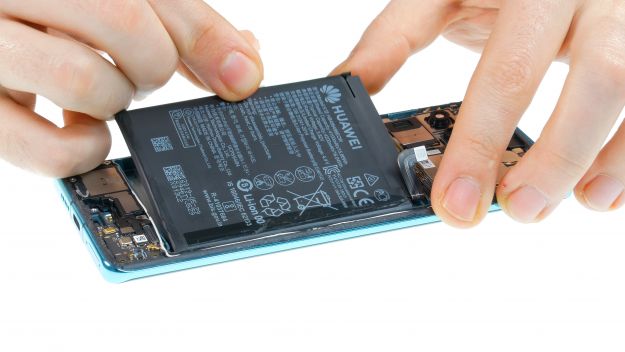
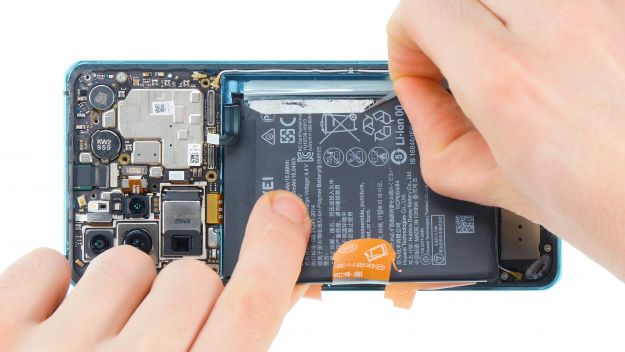
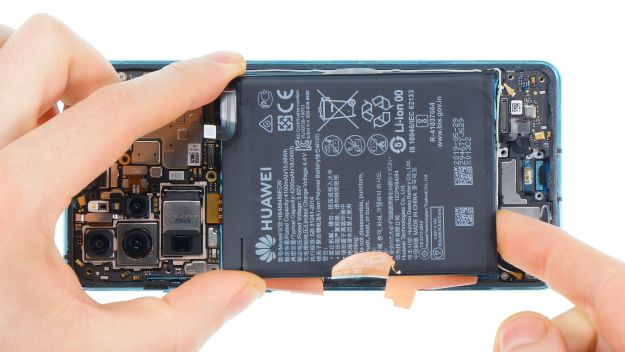
    The battery has a pull tab with which it can be pulled out of the device.

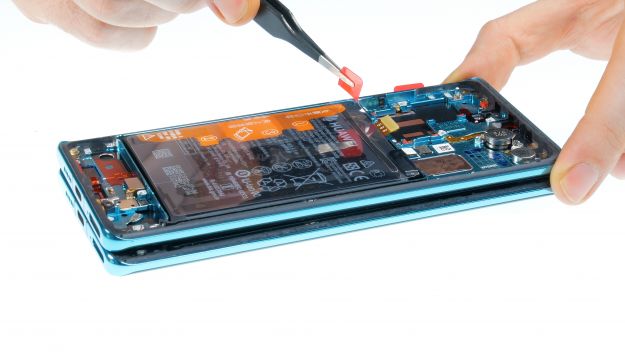
    1. First remove the foils marked with the numbers "one" and "two".
    2. Then the tab with the number "three" is exposed and you can pull it carefully.
    3. Hold the device very tightly with one hand and pull the tab vertically upwards. Be careful not to tear off the tab by accident.
    4. If the battery cannot be lifted in this way, you can use hot air to warm the glue.


    Never heat the battery directly, as it can easily be bent and thus damaged.
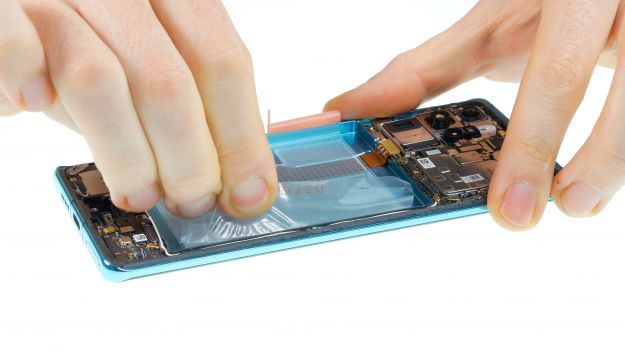
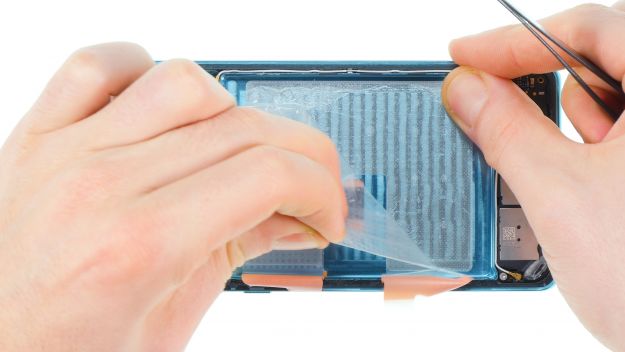
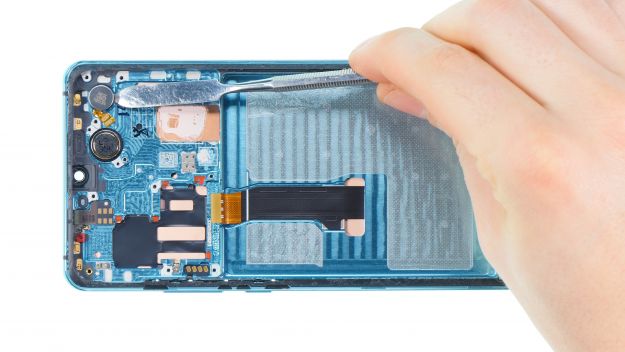
    1. Turn the device upside down and heat the screen. When the battery is detached, remove the foil on the other side.
    2. Also remove the foil underneath the battery to transfer it to your replacement display if necessary.
  7. Removing the SIM reader board

    • Antenna connector
    • Connector

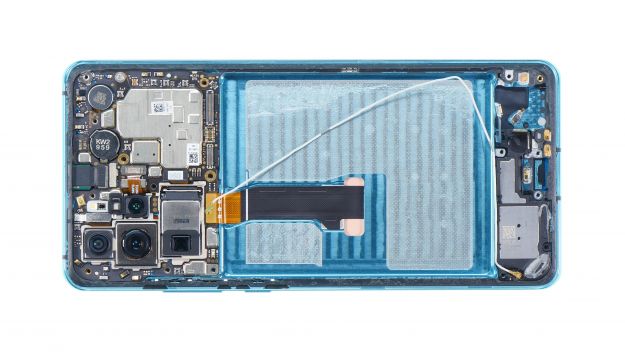
    Now all other components such as the main board, the speaker and the SIM card reader are removed.

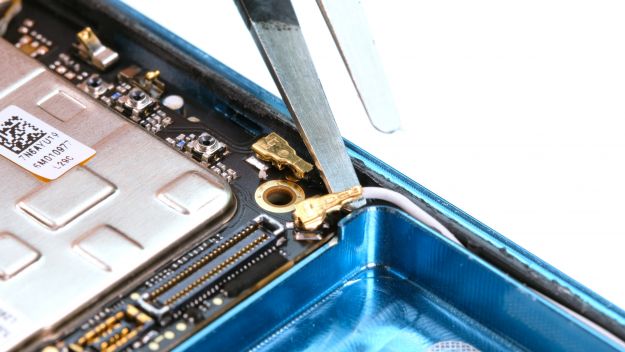
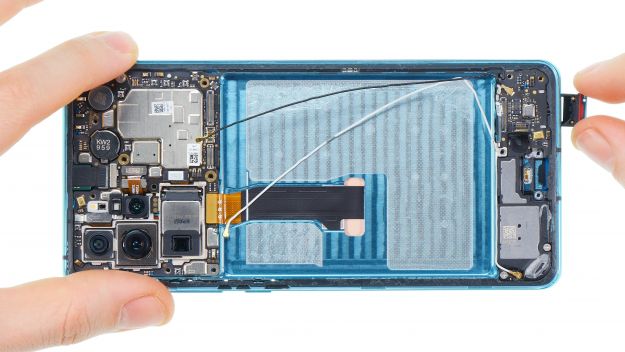
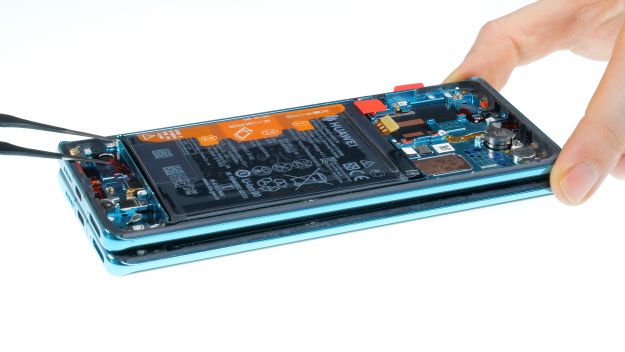
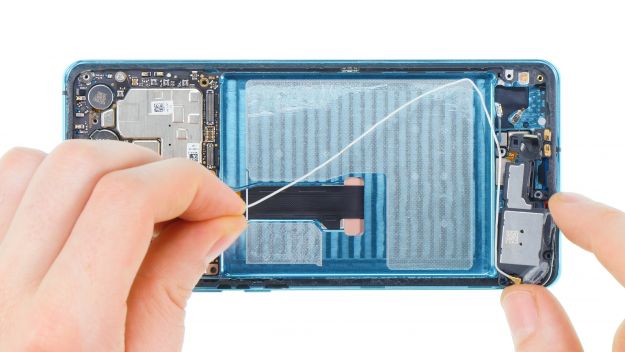
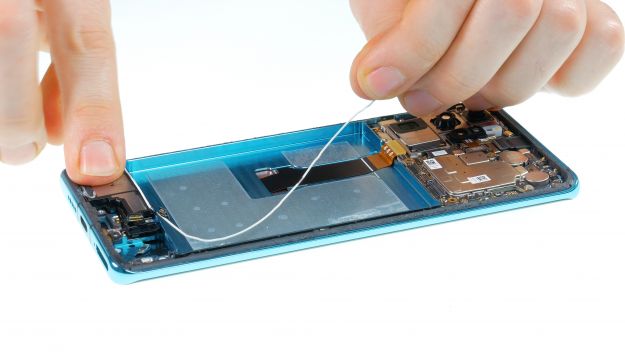
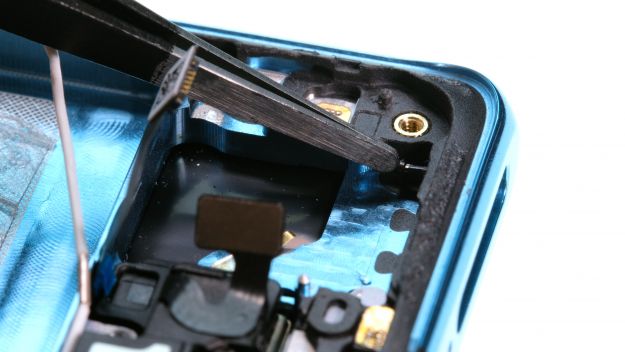
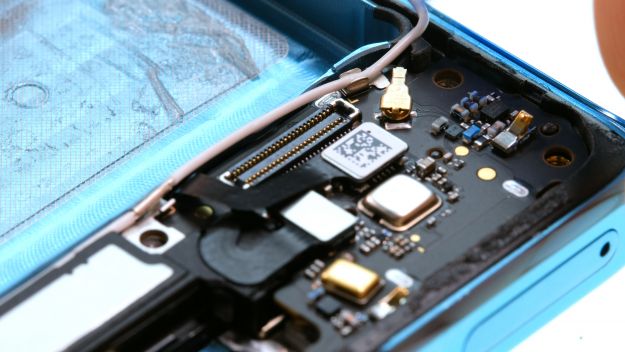
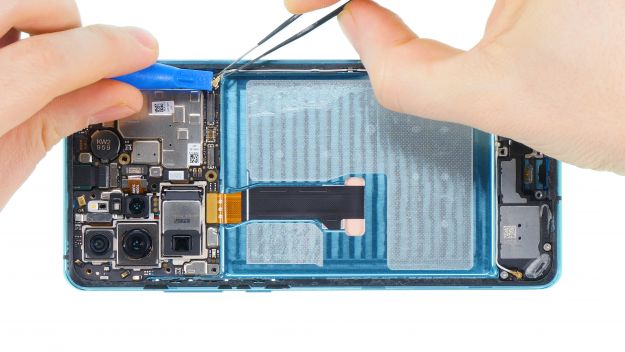
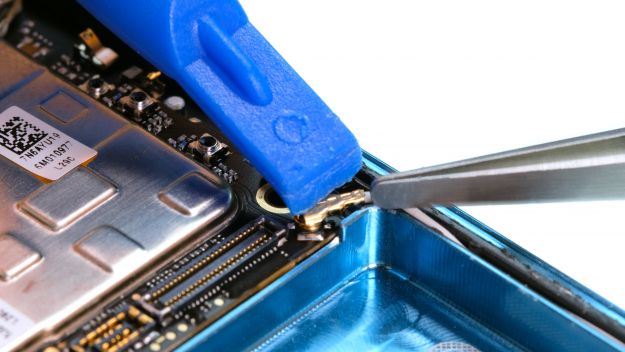
    1. First, disconnect the two antenna cables from the main board. Loosen the connectors by going under the cable with a pair of tweezers and turning the tweezers.
    2. Then pull both cables out of their sideways guide.
    3. Then disconnect both contacts from the lower board.
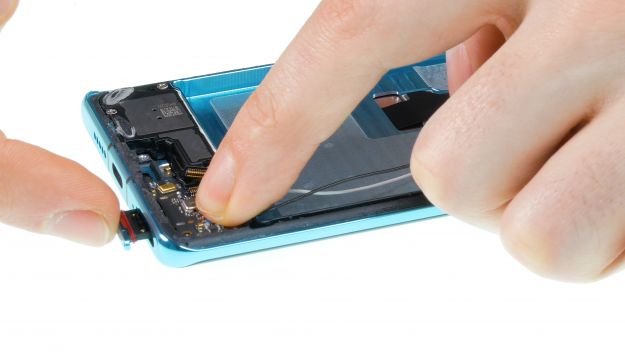
    4. Use a SIM tool or a paper clip to remove the SIM card holder.

    But be careful not to confuse the opening with the microphone opening to the left of the SIM card holder.

    1. Then lift the board with the SIM card reader a bit and take it out of the device together with the antenna.
  8. Removing the speaker

    Huawei P30 Pro - Removing the speaker 01
    Huawei P30 Pro - Removing the speaker 02
    Huawei P30 Pro - Removing the speaker 03
    Huawei P30 Pro - Removing the speaker 04
    Huawei P30 Pro - Removing the speaker 05
    Huawei P30 Pro - Removing the speaker 06
    • 2 × 4,4 mm Phillips
    • Connector
    1. Loosen the two screws that hold the speaker in place.
    2. Then lever the speaker out. It may be slightly glued in place.

    Under the loudspeaker there is a short connecting cable which must also be taken over.

    1. Loosen the connector and take the cable out.

    If you replace the speaker on your Huawei P30 Pro, you have to take over the antenna cable. You do not have to remove the small flexible cable.

  9. Removing the mainboard

    Huawei P30 Pro - Removing the mainboard 01
    Huawei P30 Pro - Removing the mainboard 02
    Huawei P30 Pro - Removing the mainboard 03
    Huawei P30 Pro - Removing the mainboard 04
    Huawei P30 Pro - Removing the mainboard 05
    • Display connector
    • 1 × 4,4 mm Phillips

    Be especially careful when handling the mainboard, as it cannot be repaired so easily if something breaks.

    1. The main board is secured with a single screw.


    1. Now disconnect the display connector from the mainboard.
    2. Then lift the board a bit, take it out of the unit and put it in a safe place.
  10. Removing the sensors

    Huawei P30 Pro - Removing the sensors 01
    Huawei P30 Pro - Removing the sensors 02
    Huawei P30 Pro - Removing the sensors 03
    Huawei P30 Pro - Removing the sensors 04
    1. Remove the glued sensors with hot air and a flat tool like a steel spatula.
  11. Removing the earpiece (optional)

    Huawei P30 Pro - Removing the earpiece (optional) 01
    Huawei P30 Pro - Removing the earpiece (optional) 02
    Huawei P30 Pro - Removing the earpiece (optional) 03
    Huawei P30 Pro - Removing the earpiece (optional) 04
    Huawei P30 Pro - Removing the earpiece (optional) 05
    Huawei P30 Pro - Removing the earpiece (optional) 06
    • 2 × 1,5 mm Phillips

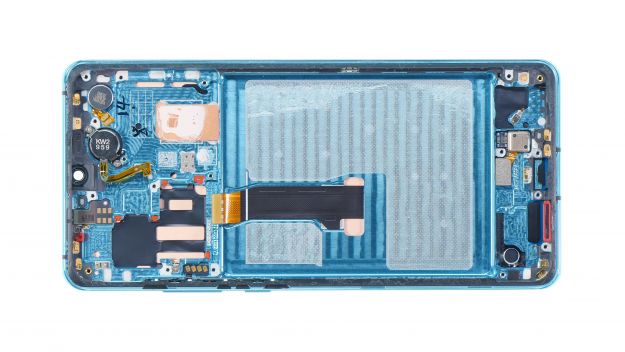
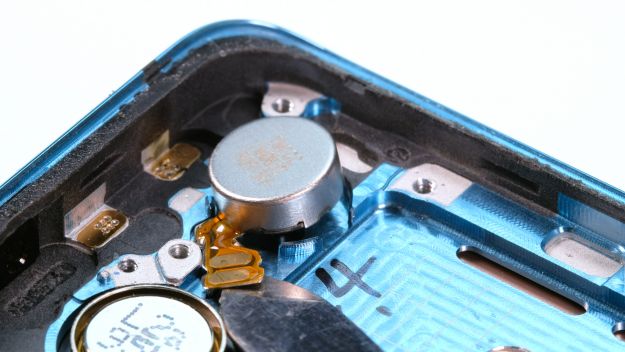
    Now compare your replacement display with your display again and take over all other components that are still missing in the new display. Usually there is already an earpiece and the vibration motor installed. If not, you will have to remove them both from the old display and take them over.

    1. Loosen the flexible cable of the earpiece with the steel spatula.
    2. Then remove both screws while holding the earpiece firmly. Then you can take it out.
  12. Removing the vibration motor (optional)

    Huawei P30 Pro - Removing the vibration motor (optional) 01
    Huawei P30 Pro - Removing the vibration motor (optional) 02
    Huawei P30 Pro - Removing the vibration motor (optional) 03
    Huawei P30 Pro - Removing the vibration motor (optional) 04
    Huawei P30 Pro - Removing the vibration motor (optional) 05
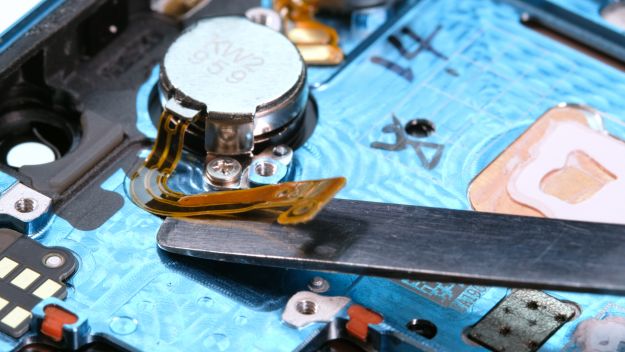
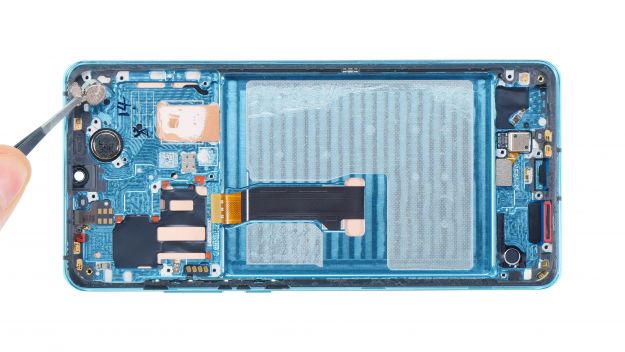
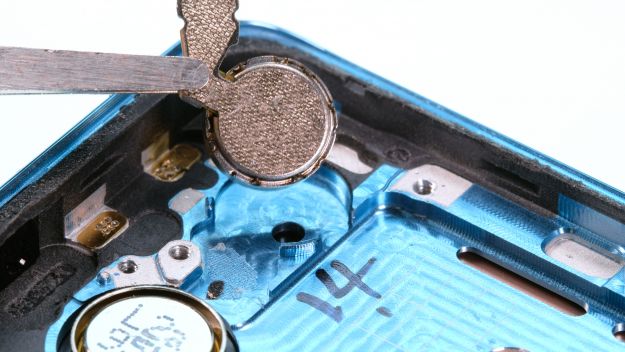
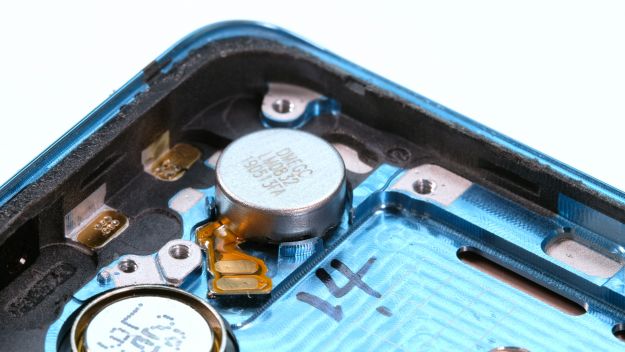
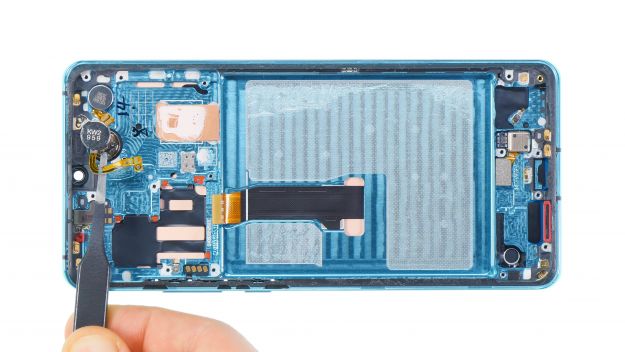
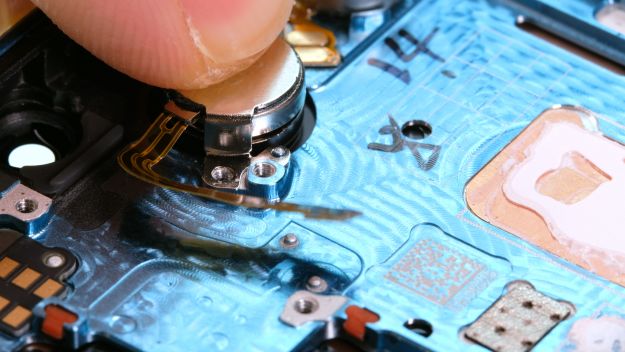
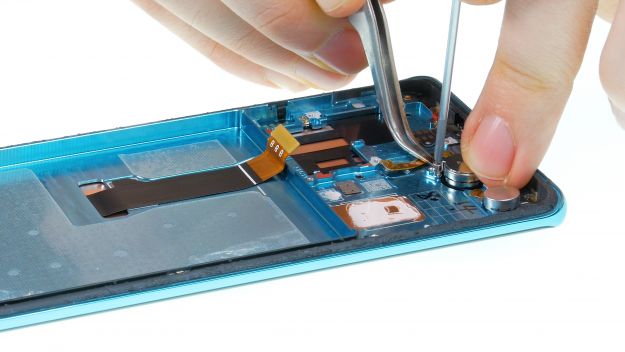
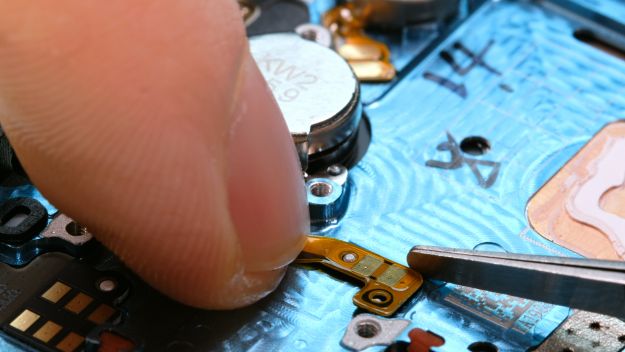
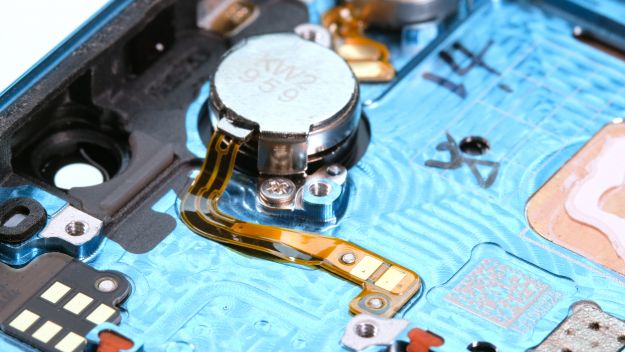
    1. Remove the vibration motor by moving the steel spatula under the flex cable and the motor itself.
  13. The right tools for your repair

    With the right tools, you will succeed in any repair. In our store you will find a large selection of professional quality tools.
    VIEW NOW
  14. Prepare the new display unit

    Huawei P30 Pro - Prepare the new display unit 01
    Huawei P30 Pro - Prepare the new display unit 02
    Huawei P30 Pro - Prepare the new display unit 03
    Huawei P30 Pro - Prepare the new display unit 04
    1. Bevor du alle Teile in das neue Display einbaust, entferne die Schutzfolien auf den Klebeflächen und über den Öffnungen im neuen Display.
    2. Vergleiche altes und neues Display genau. Übernehme falls nötige weitere Kleinteile, wie Tasten oder Dichtungen.
  15. Installing the vibration motor (optional)

    Huawei P30 Pro - Installing the vibration motor (optional) 01
    Huawei P30 Pro - Installing the vibration motor (optional) 02
    Huawei P30 Pro - Installing the vibration motor (optional) 03
    Huawei P30 Pro - Installing the vibration motor (optional) 04
    Huawei P30 Pro - Installing the vibration motor (optional) 05
    1. Before you reinstall all parts, remove the protective films on the adhesive surfaces and over the openings in the new display.
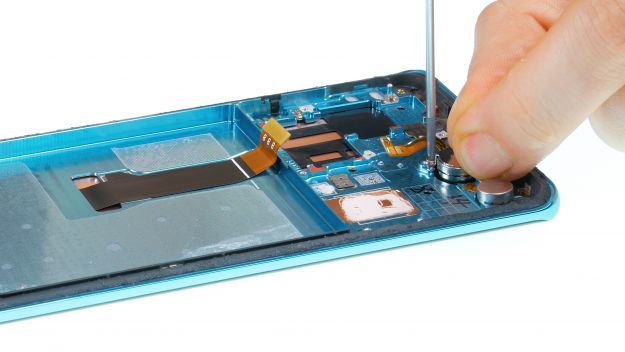
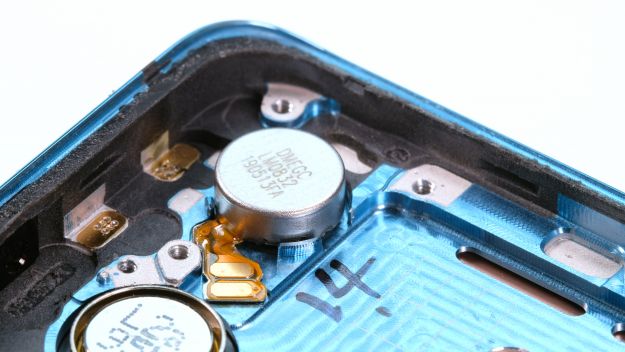
    2. Then, if necessary, put the vibration motor back in place.

    Make sure that there is still glue on the underside so that it holds in place properly.

  16. Installing the earpiece (optional)

    Huawei P30 Pro - Installing the earpiece (optional) 01
    Huawei P30 Pro - Installing the earpiece (optional) 02
    Huawei P30 Pro - Installing the earpiece (optional) 03
    Huawei P30 Pro - Installing the earpiece (optional) 04
    Huawei P30 Pro - Installing the earpiece (optional) 05
    Huawei P30 Pro - Installing the earpiece (optional) 06
    1. Put on the earpiece and screw it in place.
    2. Make sure it's in the right position. The small holes next to the screw threads fit exactly onto the retaining lugs on the display.
    3. Also glue the flex cable back on. There the small holes in the cable also help with positioning.
  17. Installing the sensors

    Huawei P30 Pro - Installing the sensors 01
    Huawei P30 Pro - Installing the sensors 02
    Huawei P30 Pro - Installing the sensors 03
    Huawei P30 Pro - Installing the sensors 04
    Huawei P30 Pro - Installing the sensors 05
    1. Reinsert the sensors and press them down firmly; there should be no dust or other dirt on the sensors.
  18. Installing the mainboard

    Huawei P30 Pro - Installing the mainboard 01
    Huawei P30 Pro - Installing the mainboard 02
    Huawei P30 Pro - Installing the mainboard 03
    Huawei P30 Pro - Installing the mainboard 04
    Huawei P30 Pro - Installing the mainboard 05
    Huawei P30 Pro - Installing the mainboard 06
    • 1 × 4,4 mm Phillips
    • Display connector
    1. Now the main board can be inserted again. Be careful not to get the display flex cable stuck under it.
    2. Place the board at an angle at the top and guide the front camera into its guide.
    3. Then let the board slide into the unit.
    4. Gently press it down slightly at all points and make sure it is in the correct position.
    5. Connect the display connector.
    6. Finally, fasten the board with the screw.
  19. Installing the speaker

    Huawei P30 Pro - Installing the speaker 01
    Huawei P30 Pro - Installing the speaker 02
    Huawei P30 Pro - Installing the speaker 03
    Huawei P30 Pro - Installing the speaker 04
    Huawei P30 Pro - Installing the speaker 05
    Huawei P30 Pro - Installing the speaker 06
    • 2 × 4,4 mm Phillips
    1. Now the loudspeaker and SIM card reader can be inserted again.
    2. First connect the small flex cable.
    3. Then insert the loudspeaker again. Press it down a little when it is properly positioned.
  20. Installing the SIM card reader board

    • Antenna connector
    • Connector
    1. Before you insert the SIM card reader, make sure that the SIM pin does not stick out.
    2. Then place the board in position and insert the SIM card holder. If it is stuck, do not push it in with force, but check if the board is sitting correctly.
    3. Then connect both connectors.
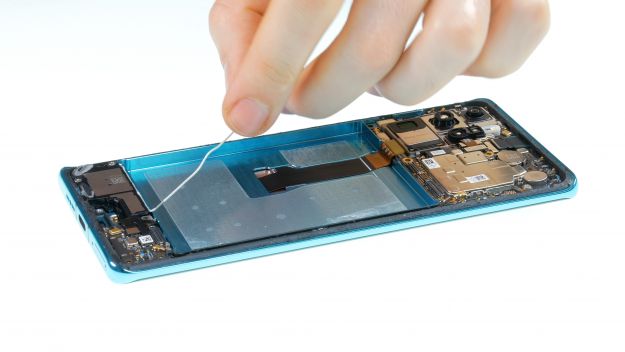
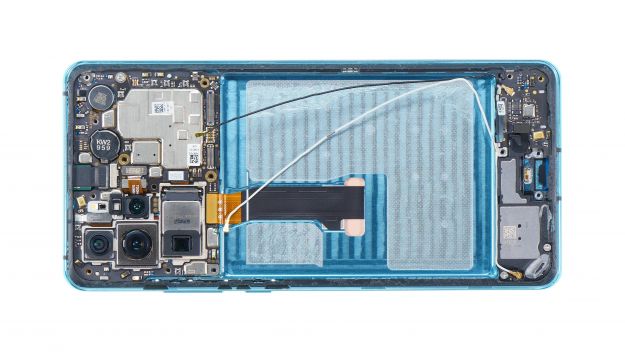
    4. Now lead both antenna cables back along the edge up to the main board. Press them into their sockets and along the battery compartment. The white cable lies over the black one.
    5. Then connect both cables to the main board. Position the contact with a pair of tweezers and then carefully press it down with a spudger until the connector locks into place. This is a bit trickier and often requires several attempts.

    If you replace the SIM card reader on your Huawei P30 Pro, you will have to take over the antenna cable.

  21. Installing the battery

    Huawei P30 Pro - Installing the battery 01
    Huawei P30 Pro - Installing the battery 02
    Huawei P30 Pro - Installing the battery 03
    1. If your replacement display has no battery, take over the foil from the old display.
    2. Then put the battery back in place and attach the foil.
  22. Installing the charging port flex cable

    Huawei P30 Pro - Installing the charging port flex cable 01
    Huawei P30 Pro - Installing the charging port flex cable 02
    Huawei P30 Pro - Installing the charging port flex cable 03
    Huawei P30 Pro - Installing the charging port flex cable 04
    Huawei P30 Pro - Installing the charging port flex cable 05
    Huawei P30 Pro - Installing the charging port flex cable 06
    • Connector
    • 5 × 4,4 mm Phillips

    Now the charging port with the wide flex cable can be inserted again.

    1. Push it into its opening until it fits properly.
    2. Then connect all the large connectors.
    3. Insert the cover at the bottom and screw it in place.
  23. Connecting the battery

    Huawei P30 Pro - Connecting the battery 01
    Huawei P30 Pro - Connecting the battery 02
    Huawei P30 Pro - Connecting the battery 03
    • Battery connector

    Now reconnect the battery to the main board.

    1. Position the plug over its contact and press it down gently.
  24. Installing the mainboard cover / NFC antenna

    Huawei P30 Pro - Installing the mainboard cover / NFC antenna 01
    Huawei P30 Pro - Installing the mainboard cover / NFC antenna 02
    Huawei P30 Pro - Installing the mainboard cover / NFC antenna 03
    Huawei P30 Pro - Installing the mainboard cover / NFC antenna 04
    Huawei P30 Pro - Installing the mainboard cover / NFC antenna 05
    • 10 × 4,4 mm Phillips

    The cover with the charging coil must first be hooked under at the top of the device.

    1. Place it at an angle and then push it down.
    2. When it is properly seated, you can refasten the cover with the screws.
  25. Testing the Huawei P30 Pro

    Huawei P30 Pro - Testing the Huawei P30 Pro 01
    Huawei P30 Pro - Testing the Huawei P30 Pro 02
    Huawei P30 Pro - Testing the Huawei P30 Pro 03
    Huawei P30 Pro - Testing the Huawei P30 Pro 04
    Huawei P30 Pro - Testing the Huawei P30 Pro 05
    Huawei P30 Pro - Testing the Huawei P30 Pro 06
    Huawei P30 Pro - Testing the Huawei P30 Pro 07
    1. Now test the device before you close it permanently. Huawei has a special app for this called Hi Care.
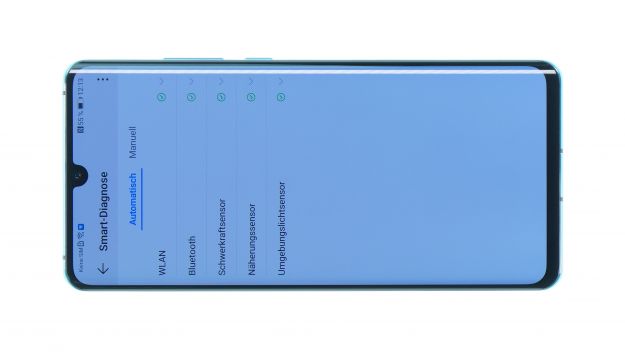
    2. Open the app, then run the Smart Diagnostics. Now some functions are tested automatically.
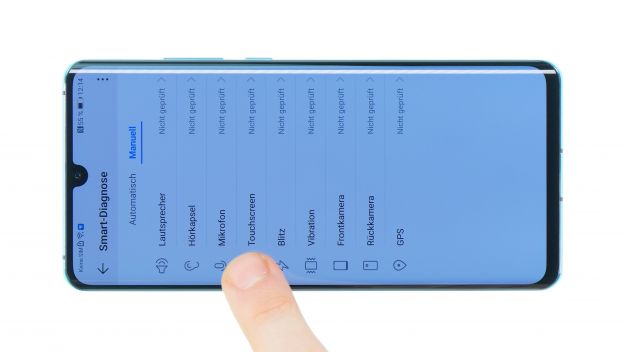
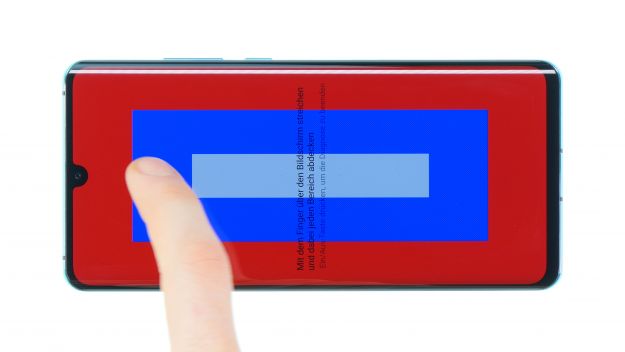
    3. Then you can test the device manually. Check the touch screen, microphone, speaker and all other functions.
    4. If something doesn't work, check the corresponding components for damage and if they are connected correctly.
    5. If everything is OK, you can now close your device.


  26. Installing the back cover

    Huawei P30 Pro - Installing the back cover 01
    Huawei P30 Pro - Installing the back cover 02
    Huawei P30 Pro - Installing the back cover 03
    Huawei P30 Pro - Installing the back cover 04
    1. Before you put the back cover on the frame, check the glue. It should be evenly distributed around the edge so that the backcover is flush with the frame. Remove excess glue if necessary.
    2. If you like, you can also remove the old glue and use a new adhesive frame.
    3. Position the backcover centered over the device and place it slowly. Do not press it firmly until it is correctly positioned.
    4. Heat the back cover again with hot air to make the adhesive bond even better.
    5. As long as the glue cools down, you can press the back glass firmly with your fingers or weigh it down slightly.

    Please note, that the smartphone is no longer 100% protected against liquid damage after repair.

Ø 4 (4 Ratings)

Bewerte unsere Anleitung

Hat dir unsere Anleitung weitergeholfen? Wir sind auf deine Beurteilung gespannt.

Submit rating

Submit rating

How did you like this repair guide?

Exceptional

Similar guides

You might also be interested in these guides.

You might be interested in

Get in touch with iDoc
Please contact our customer service for any questions about iDoc's products and services.

  • Send a message

    If you have a question about a guide or want to give us general feedback, just use our contact form

    Write a message
  • Free shipping

    From a minimum order value of 79.00 € your order will be shipped free of charge within Germany.

  • Call iDoc

    If you have any questions about our guides or services, call us from Monday to Friday, 10:00 a.m. to 6:00 p.m.

    +49 30 200 514 455
  • 5 star service

    We offer top quality and service. Our customers confirm this as well.

    Show reviews

Profi-Insights & Tipps für deine erfolgreiche Handy-Reparatur

iDoc schenkt dir den ultimativen Reparatur-Guide GUIDE GRATIS ANFORDERN

Profi-Insights & Tipps für deine erfolgreiche Handy-Reparatur

iDoc schenkt dir den ultimativen Reparatur-Guide GUIDE GRATIS ANFORDERN