
Annoyed by poor sound quality on the phone? You only hear the person you are talking to only softly or not at all?
In these photo instruction you will find the solution to your problem. We will show you step by step how to replace the defective earcup of your iPhone SE (2nd generation) to get back a high sound quality.
Since the iPhone SE (2nd generation) is virtually identical to the iPhone 8, we have decided to reuse the photos from the iPhone 8 manual in this guide. All steps to be carried out are also to be carried out in the same way as for the iphone 8.
We at iDoc wish you success in repairing and would appreciate an evaluation of our guide!
Required tools
-
Heat gun
Heat gun
You can use a heat gun to heat parts that are glued on so they’re easier to remove. In most cases, you can also use a hairdryer.
from €15.99 on Amazon -
For storing screws
For storing screws
We recommend storing your screws so you don’t mix up the various screws and small parts.
from €10.99 on Amazon -
Tweezers
Tweezers
We recommend using tweezers to remove screws and various small parts from your device.
on Amazon -
Pick Set
Pick Set
You need a flat but stable tool such as a pick to pry out parts that are glued in place.
from €14.99 on Amazon -
Plastic prying tool
Plastic prying tool
You need a flat plastic prying tool to disconnect the various plugs and connectors.
from €14.99 on Amazon -
Pentalobe PL1 screwdriver
Pentalobe PL1 screwdriver
You need the right screwdriver for removing pentalobe PL1 screws.
on Amazon -
Phillips PH00 screwdriver
Phillips PH00 screwdriver
You need the right screwdriver for removing PH00 screws.
from €10.84 on Amazon
Required replacement part
- iPhone SE 2020 Earpiece


Getting started with the repair of your iPhone SE (2020)
If you get stuck or have questions, you can post a comment. We’d be happy to help.
-
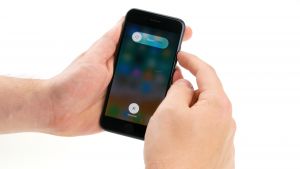
Switching off your iPhone SE (2nd generation)
![iPhone SE (2020) - Switching off your iPhone SE (2nd generation) 01]()
![iPhone SE (2020) - Switching off your iPhone SE (2nd generation) 02]()
![iPhone SE (2020) - Switching off your iPhone SE (2nd generation) 03]()
-
-
Removing the rear case screws
-
Heating up the display
-
Detaching the display
-
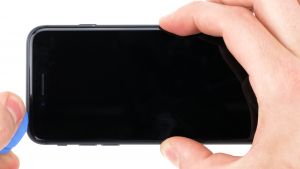
Opening the display
![iPhone SE (2020) - Opening the display 01]()
![iPhone SE (2020) - Opening the display 02]()
-
-
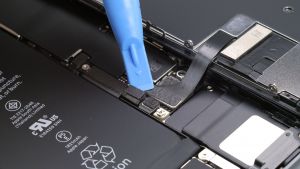
Disconnecting the battery connector
-
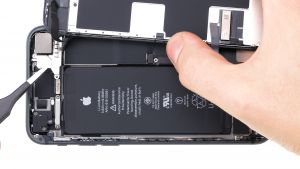
Disconnecting the display connectors
-
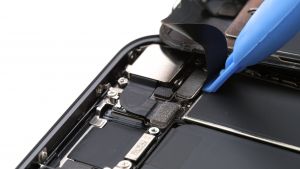
Disconnecting the FaceTime connector
-
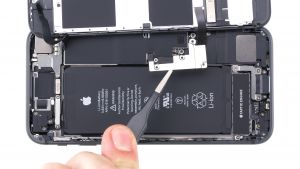
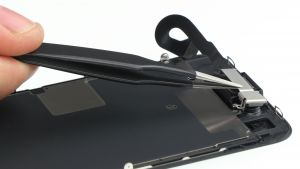
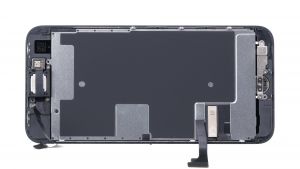
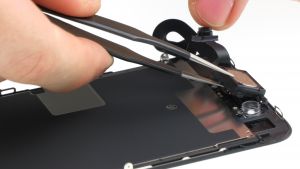
Removing the earpiece
-
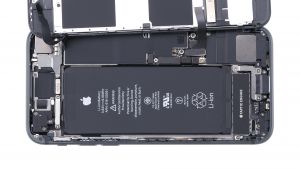
Installing the earpiece
-
Detaching the old and aligning the new adhesive frame
-
Attaching the FaceTime connector
-
Connecting the display
![iPhone SE (2020) - Connecting the display 01]()
![iPhone SE (2020) - Connecting the display 02]()
![iPhone SE (2020) - Connecting the display 03]()
-
-
Attaching the battery connector
-
Attaching the display
![iPhone SE (2020) - Attaching the display 01]()
![iPhone SE (2020) - Attaching the display 02]()
![iPhone SE (2020) - Attaching the display 03]()
![iPhone SE (2020) - Attaching the display 04]()
-
-
Fastening the rear case screws


The right tools for your repair


Similar guides
You might also be interested in these guides.


You might be interested in


