The display is broken or shows pixel errors.

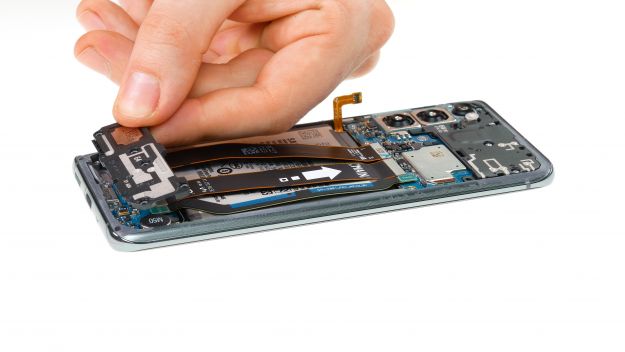
Usually a fall is the origin of a broken screen on a smartphone. This sure is annoying at first, but usually the display can be repaired with the right instructions. We at iDoc will show you how to replace the broken display of your SAMSUNG GALAXY S20 by yourself.

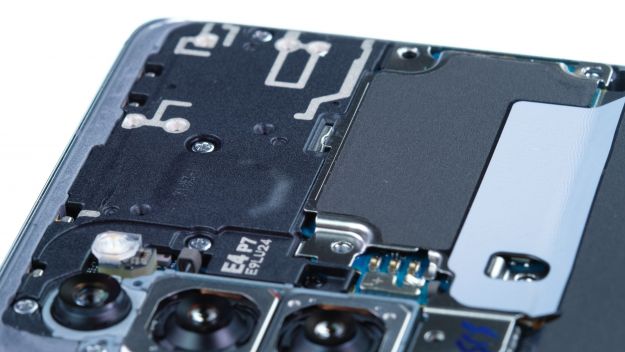
The Samsung GALAXY S20 is opened via the heavily glued glass back cover. All components of the device are located in the display unit, so all components such as the battery, main board, speaker etc. must be removed and inserted into the new display.

We recommend replacing the display together with the units frame. This method makes the repair easier and more promising. If there are already dents and scratches in the device frame, these are also removed by replacing the display.

If anything is unclear at any point, or if questions arise at any time, you can always contact our iDoc support. We are always happy to help!

Good luck with the repair and have fun with your as good as new SAMSUNG GALAXY S20!

Required tools

  • Flat Picks

    Flat Picks

    You need a very flat tool such as a flat pick to pry out parts that are glued in place.

    from €11.95 on Amazon
  • iFlex Opening Tool

    iFlex Opening Tool

    Opening your smartphone can be a very delicate operation, especially if the glue is very persistent. The blade of the flexible but sturdy iFlex measures just 0.15 mm, so it fits in even the smallest gaps, such as between the screen and the frame. The practical iFlex is made of stainless steel and sits comfortably in the hand. This makes it the perfect assistant for every smartphone repair.

    from €10.95 on Amazon
  • iPlastix Opening Tool

    iPlastix Opening Tool

    Do you want to open your smartphone or lever out large parts like the battery? Then the iPlastix with its large blade will help you. The practical assistant is made of flexible, especially sturdy plastic and lies comfortably in the hand. Thanks to its design, you can even get into smaller gaps, for example to lift the screen or to prevent it from sticking together again.

    on Amazon
  • Tweezers

    Tweezers

    We recommend using tweezers to remove screws and various small parts from your device.

    on Amazon
  • Plastic prying tool

    Plastic prying tool

    You need a flat plastic prying tool to disconnect the various plugs and connectors.

    from €14.99 on Amazon
  • Steel Laboratory Spatula

    Steel Laboratory Spatula

    You need a flat and sturdy prying tool to disconnect glued parts.

    on Amazon
  • Phillips PH00 screwdriver

    Phillips PH00 screwdriver

    You need the right screwdriver for removing PH00 screws.

    from €10.84 on Amazon

Required replacement part

Show all replacement parts for the Galaxy S20 

Getting started with the repair of your Galaxy S20

If you get stuck or have questions, you can post a comment. We’d be happy to help.

27 steps
  1. Switching off the device

    Galaxy S20 - Switching off the device 01
    Galaxy S20 - Switching off the device 02
    Galaxy S20 - Switching off the device 03
    1. Switch off the device at the beginning to avoid short circuits during the repair.

    If the screen can no longer be used due to damage, the device is switched off by disconnecting the battery.


  2. Removing the back cover

    Galaxy S20 - Removing the back cover 01
    Galaxy S20 - Removing the back cover 02
    Galaxy S20 - Removing the back cover 03
    Galaxy S20 - Removing the back cover 04
    Galaxy S20 - Removing the back cover 05
    Galaxy S20 - Removing the back cover 06
    Galaxy S20 - Removing the back cover 07
    Galaxy S20 - Removing the back cover 08
    Galaxy S20 - Removing the back cover 09
    Used tools
    Flat Picks
    iFlex Opening Tool
    iSclack evo Opening Tool

    The Samsung Galaxy S20 is opened via the heavily bonded glass back cover.

    1. Heat the frame of the device with hot air to about 60-80 degrees. Heating it makes the backcover's adhesive easier to remove.
    2. Take a suction cup and place it on the bottom of the device.
    3. Pull the suction cup and guide your flat opening tool into the resulting gap.

    The iFlex opening tool, which is made of thin, strong metal, is very suitable for removing such glued back covers. Once inserted, we recommend using a plastic tool, as this will not scratch the frame and back cover.You can also use an iSclack instead of a suction cup. This tool works like a pair of pliers with suction cups on both sides.

    1. Insert a narrow plectrum into the already loosened part so that the glue does not reattach.
    2. Guide your tool along the entire edge of the back cover.
    Warm up the tool from time to time and work carefully to avoid breaking the glass. This step takes some time.
    1. In the area of the camera you should also take care not to insert your tool too far into the device.
    Please note: Once the device has been opened for the first time, a hundred percent protection against the ingress of dust and liquids can no longer be guaranteed.
    Used tools
    iFlex Opening Tool
    iSclack evo Opening Tool
  3. Removing the charging coil

    Galaxy S20 - Removing the charging coil 01
    Galaxy S20 - Removing the charging coil 02
    Galaxy S20 - Removing the charging coil 03
    Galaxy S20 - Removing the charging coil 04
    Galaxy S20 - Removing the charging coil 05
    Used tools
    Wiha PicoFinish Phillips Screwdriver PH00
    Magnetic Pad
    • 5 × 4,0 mm Phillips
    1. Remove the Phillips screws of equal length from the charging coil.

    An iDoc magnetic pad can help you sort screws and smaller components.

    1. The coil is slightly glued to the speaker. Loosen the glue and remove the cover. It is slightly hooked at the top end.
    Used tools
    Wiha PicoFinish Phillips Screwdriver PH00
    Magnetic Pad
  4. Disconnecting the battery

    Galaxy S20 - Disconnecting the battery 01
    Galaxy S20 - Disconnecting the battery 02
    Galaxy S20 - Disconnecting the battery 03
    Galaxy S20 - Disconnecting the battery 04
    Used tools
    Pry Tool
    • Battery Connector
    1. Now disconnect the battery with a plastic spudger.

    Pay attention to the small components next to the battery connector. Lever from the other side to avoid accidentally damaging them.


    Used tools
  5. Removing the speaker

    Galaxy S20 - Removing the speaker 01
    Galaxy S20 - Removing the speaker 02
    Galaxy S20 - Removing the speaker 03
    Galaxy S20 - Removing the speaker 04
    Galaxy S20 - Removing the speaker 05
    • 5 × 4,0 mm Phillips
    1. Loosen the Phillips screws that secure the speaker in the unit.
    2. Then lift up the speaker and take it out.
  6. Removing the flex cables

    Galaxy S20 - Removing the flex cables 01
    Galaxy S20 - Removing the flex cables 02
    Galaxy S20 - Removing the flex cables 03
    Galaxy S20 - Removing the flex cables 04
    Galaxy S20 - Removing the flex cables 05
    Galaxy S20 - Removing the flex cables 06
    Galaxy S20 - Removing the flex cables 07
    • Connector
    1. Loosen and remove the flex cables that run over the battery.
    2. Separate the connectors carefully with the spudger and take out the two upper cables.
    3. Then disconnect the display cable from the motherboard.
  7. Removing the battery

    Galaxy S20 - Removing the battery 01
    Galaxy S20 - Removing the battery 02
    Galaxy S20 - Removing the battery 03
    Galaxy S20 - Removing the battery 04
    Galaxy S20 - Removing the battery 05
    Galaxy S20 - Removing the battery 06
    Galaxy S20 - Removing the battery 07
    Galaxy S20 - Removing the battery 08
    Used tools
    iPlastix Opening Tool
    Battery Spudger
    1. The battery is strongly glued. You should use hot air again to loosen the glue more easily.

    Never heat the battery directly, but from underneath via the screen.

    1. Fold the display flex cable that runs above the battery to the side. If necessary you can fix it to prevent it from getting in the way while removing the battery.
    2. Use a tool such as the iSesamo or a battery supdger to lever.
    3. Lever with the tool around the battery to release it bit by bit.
    4. Do not bend the battery and take care not to pinch the battery or damage its cover.
    5. Once the glue is slightly loosened, you can use a flat plastic tool such as the iPlastix to slide beneath the battery.
    6. Take enough time for this step and warm up the glue in between.
    7. Once the adhesive is loosened, you can remove the battery from the device.


    Used tools
    iPlastix Opening Tool
    Battery Spudger
  8. Removing the mainboard cover

    Galaxy S20 - Removing the mainboard cover 01
    Galaxy S20 - Removing the mainboard cover 02
    Galaxy S20 - Removing the mainboard cover 03
    Galaxy S20 - Removing the mainboard cover 04
    • 4 × 4,0 mm Phillips
    1. Remove the four screws from the main board cover.
    2. Use a spudger to lift the cover and take it out.
  9. Removing the main board

    • 1 × 4,0 mm Phillips
    • 1 × 2,8 mm Phillips
    • Connector
    1. Disconnect the various connectors from the motherboard. Take care again not to damage any components on the board.
    2. Lever carefully and bend the contacts slightly to the side.
    3. Remove the SIM holder. You can use a SIM tool or a paper clip to remove the SIM holder.
    4. Loosen the screws that fix the board and the cameras.
    5. Lever carefully on one side and take out the main board with both hands. Make sure that no cables or connectors get caught on it.

    Be especially careful when handling the main board, as it cannot be repaired so easily.

  10. Removing the USB board

    Galaxy S20 - Removing the USB board 01
    Galaxy S20 - Removing the USB board 02
    Galaxy S20 - Removing the USB board 03
    Galaxy S20 - Removing the USB board 04
    Galaxy S20 - Removing the USB board 05
    • 3 × 4,0 mm Phillips

    In the lower part of the device is a small circuit board where the USB charging socket is located.

    1. Loosen the three screws.
    2. Use a spudger to lift the board slightly upwards and pull it carefully out of the frame.
  11. Removing the vibration motor

    Galaxy S20 - Removing the vibration motor 01
    Galaxy S20 - Removing the vibration motor 02
    Galaxy S20 - Removing the vibration motor 03
    1. The vibration motor is glued. Use hot air to loosen it.
    2. Lever the motor out with a flat tool.
    3. Do not lever where the golden contacts are, as these can easily be bent.
  12. Removing the earpiece

    Galaxy S20 - Removing the earpiece 01
    Galaxy S20 - Removing the earpiece 02
    Galaxy S20 - Removing the earpiece 03
    Galaxy S20 - Removing the earpiece 04
    Galaxy S20 - Removing the earpiece 05
    1. Use a flat tool to slide under the glued earpiece to loosen it.

    It is possible that your spare dislay already comes with a new earpiece. If so, you do not have to take it over and you can skip this step.

  13. Removing the sensor

    Galaxy S20 - Removing the sensor 01
    Galaxy S20 - Removing the sensor 02
    Galaxy S20 - Removing the sensor 03
    Galaxy S20 - Removing the sensor 04

    Next to the earcup is another sensor.

    1. Loosen the thin cable with a steel spatula.
    2. Lift the sensor out of its opening.
  14. The right tools for your repair

    With the right tools, you will succeed in any repair. In our store you will find a large selection of professional quality tools.
    VIEW NOW
  15. Preparing the display

    Galaxy S20 - Preparing the display 01
    1. Compare your new display with the old one. If necessary you have to take over gaskets or covers. An original Samsung spare part from the iDoc Store already has all the components installed.
    2. Remove the foils that protect the various openings for e. g. the camera and sensors
  16. Inserting the sensor

    Galaxy S20 - Inserting the sensor 01
    Galaxy S20 - Inserting the sensor 02
    Galaxy S20 - Inserting the sensor 03
    Galaxy S20 - Inserting the sensor 04
    1. Position the sensor in its place in the device and press it down slightly.
  17. Inserting the earpiece

    Galaxy S20 - Inserting the earpiece 01
    Galaxy S20 - Inserting the earpiece 02
    Galaxy S20 - Inserting the earpiece 03
    Galaxy S20 - Inserting the earpiece 04
    1. Place the earpiece in its opening.
    If there is no new adhesive surface for the earpiece in your new display, you have to take it over from the old display.
    1. Press the earpiece down to glue it back in place.
  18. Inserting the vibration motor

    Galaxy S20 - Inserting the vibration motor 01
    Galaxy S20 - Inserting the vibration motor 02
    Galaxy S20 - Inserting the vibration motor 03
    1. Put the vibration motor back in its place and press it down.

    Make sure that there is still some glue on the bottom.

  19. Inserting the USB board

    Galaxy S20 - Inserting the USB board 01
    Galaxy S20 - Inserting the USB board 02
    Galaxy S20 - Inserting the USB board 03
    Galaxy S20 - Inserting the USB board 04
    Galaxy S20 - Inserting the USB board 05
    • 3 × 4,0 mm Phillips
    1. Position the USB board diagonally at the bottom of the device and then push it into the frame.
    2. Fasten the Phillips screws.

    Make sure that it is properly positioned before you screw it in.

  20. Inserting the mainboard

    Galaxy S20 - Inserting the mainboard 01
    Galaxy S20 - Inserting the mainboard 02
    Galaxy S20 - Inserting the mainboard 03
    Galaxy S20 - Inserting the mainboard 04
    Galaxy S20 - Inserting the mainboard 05
    Galaxy S20 - Inserting the mainboard 06
    Galaxy S20 - Inserting the mainboard 07
    Galaxy S20 - Inserting the mainboard 08
    • 1 × 4,0 mm Phillips
    • 1 × 2,8 mm Phillips
    • Connector
    1. Bend all flex cables a bit to the side and then put the main board into the device.
    2. Position it at the top and guide the board down until it fits properly.
    3. Be careful not to pinch any cables under the board.
    4. If the motherboard lies flush and flat in the unit, you can screw it in place.
    5. Put the SIM holder back in place. If it is stuck, do not push it in with force, but check whether the main board is already positioned correctly.
    6. Then connect all connectors.

    Position the connectors over their sockets and press them down gently. The connectors should snap directly into place. If they do'nt fit properly, loosen them again and reposition them.

  21. Installing the mainboard cover

    Galaxy S20 - Installing the mainboard cover 01
    Galaxy S20 - Installing the mainboard cover 02
    Galaxy S20 - Installing the mainboard cover 03
    Galaxy S20 - Installing the mainboard cover 04
    • 4 × 4,0 mm Phillips
    1. Place the top cover at an angle and then press it down.
    2. When it is clicked in place on all sides, you can fasten it.
  22. Inserting the battery

    Galaxy S20 - Inserting the battery 01
    Galaxy S20 - Inserting the battery 02
    Galaxy S20 - Inserting the battery 03
    1. Check the adhesive residues on the underside of the battery. Make sure that the adhesive does not wrinkle, otherwise it could push the battery upwards. If the new display comes with adhesive surfaces for the battery, you should remove all old adhesive from your battery.
    2. Then insert the battery into the device. Make sure that it has a little space on all sides and is not pushed against the frame anywhere.
  23. Installing the flex cables

    Galaxy S20 - Installing the flex cables 01
    Galaxy S20 - Installing the flex cables 02
    Galaxy S20 - Installing the flex cables 03
    Galaxy S20 - Installing the flex cables 04
    Galaxy S20 - Installing the flex cables 05
    Galaxy S20 - Installing the flex cables 06
    Galaxy S20 - Installing the flex cables 07
    • Connector
    1. Reinsert the flex cables that run above the battery.
    2. The side labeled "MAIN" should face up inside the unit.
    3. Connect the connectors to the main board and the USB board.
  24. Inserting the speaker

    Galaxy S20 - Inserting the speaker 01
    Galaxy S20 - Inserting the speaker 02
    Galaxy S20 - Inserting the speaker 03
    Galaxy S20 - Inserting the speaker 04
    • 5 × 4,0 mm Phillips
    1. Insert the speaker, press it down and screw it in place. Make sure it's hooked in at the bottom.
  25. Connecting the battery

    Galaxy S20 - Connecting the battery 01
    Galaxy S20 - Connecting the battery 02
    Galaxy S20 - Connecting the battery 03
    • Battery Connector
    1. Position the battery contact over its socket on the mainboard and press it down.
  26. Installing the charging coil

    Galaxy S20 - Installing the charging coil 01
    Galaxy S20 - Installing the charging coil 02
    Galaxy S20 - Installing the charging coil 03
    Galaxy S20 - Installing the charging coil 04
    • 5 × 4,0 mm Phillips
    1. Put on the metal cover with the charging coil.
    2. Hook it in at the top and fasten all screws.
  27. Testing the Galaxy S20

    Galaxy S20 - Testing the Galaxy S20 01
    Galaxy S20 - Testing the Galaxy S20 02
    Galaxy S20 - Testing the Galaxy S20 03
    Galaxy S20 - Testing the Galaxy S20 04
    Galaxy S20 - Testing the Galaxy S20 05
    1. Test your Galaxy S20 before you finally close the device.
    2. Switch on the device and open the telefone app.
    3. Here you enter *#0*# and a test menu opens.
    4. In the test menu you can test the display for pixel errors and check the touchscreen and other functions such as the camera, the speaker or the status LED.
    5. If everything is OK, you can lock your smartphone for good.
  28. Attaching the back cover

    Galaxy S20 - Attaching the back cover 01
    Galaxy S20 - Attaching the back cover 02
    Galaxy S20 - Attaching the back cover 03
    Galaxy S20 - Attaching the back cover 04
    Galaxy S20 - Attaching the back cover 05
    Galaxy S20 - Attaching the back cover 06
    Galaxy S20 - Attaching the back cover 07
    Galaxy S20 - Attaching the back cover 08
    1. Before you put the backcover back on you should check the glue. It should be evenly distributed on the edge of the backcover. Remove excess glue if necessary.
    2. If you like, you can also remove the old glue and use a new one.
    Please note, that even with a new adhesive frame a 100% protection against the ingress of dust and liquids can no longer be guaranteed.
    1. Before attaching a new adhesive frame, you must first remove all old adhesive residues on the backcover and frame. You can use a plastic supdger to scrape off some of the glue. Cleaning alcohol and a lint-free cloth can help to remove the residue.
    2. Check the alignment of the frame, then peel off the first protective film and apply the adhesive to the frame. Don't press it down yet, but check that it is properly seated on all sides. The adhesive should not protrude at anywhere.
    3. Press the adhesive down all around so that it bonds properly to the frame.
    4. Loosen the second foil. Make sure that the adhesive does not come off the frame.
    5. Position the backcover over the device and put it down slowly.
    6. Heat the backcover again with hot air so that the adhesive bonds again.
    7. As long as the glue cools down, you can press the backcover down with your fingers or weight it down with a few books.
Ø 5 (3 Ratings)

Bewerte unsere Anleitung

Hat dir unsere Anleitung weitergeholfen? Wir sind auf deine Beurteilung gespannt.

Submit rating

Submit rating

How did you like this repair guide?

Exceptional

Similar guides

You might also be interested in these guides.

You might be interested in

Get in touch with iDoc

Please contact our customer service for any questions about iDoc's products and services.

  • Send a message

    If you have a question about a guide or want to give us general feedback, just use our contact form

    Write a message
  • Free shipping

    From a minimum order value of 79.00 € your order will be shipped free of charge within Germany.

  • Call iDoc

    If you have any questions about our guides or services, call us from Monday to Friday, 10:00 a.m. to 6:00 p.m.

    +49 30 200 514 455
  • 5 star service

    We offer top quality and service. Our customers confirm this as well.

    Show reviews

Profi-Insights & Tipps für deine erfolgreiche Handy-Reparatur

iDoc schenkt dir den ultimativen Reparatur-Guide GUIDE GRATIS ANFORDERN

Profi-Insights & Tipps für deine erfolgreiche Handy-Reparatur

iDoc schenkt dir den ultimativen Reparatur-Guide GUIDE GRATIS ANFORDERN