
The standby button isn’t working.
In this guide, we show you how to replace your iPhone 4’s standby/sensor cable. You need this repair if the standby button isn’t working or has no pressure point. Even if your screen no longer goes dark when you’re talking on the phone, or your microphone doesn’t work for videos or FaceTime, replacing this cable will fix the problem.
Required tools
-
For storing screws
For storing screws
We recommend storing your screws so you don’t mix up the various screws and small parts.
from €10.99 on Amazon -
Menda ESD Spudger
Menda ESD Spudger
You need a flat plastic prying tool to disconnect the various plugs and connectors.
from €26.38 on Amazon -
Steel Laboratory Spatula
Steel Laboratory Spatula
You need a flat and sturdy prying tool to disconnect glued parts.
on Amazon -
Pentalobe PL1 screwdriver
Pentalobe PL1 screwdriver
You need the right screwdriver for removing pentalobe PL1 screws.
on Amazon -
Phillips PH00 screwdriver
Phillips PH00 screwdriver
You need the right screwdriver for removing PH00 screws.
from €10.84 on Amazon
Required replacement part
- iPhone 4 Standby/sensor cable
Steps
39 Steps


Getting started with the repair of your iPhone 4
If you get stuck or have questions, you can post a comment. We’d be happy to help.
-
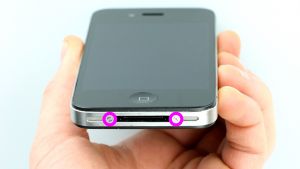
Removing the enclosure screws
![iPhone 4 - Removing the enclosure screws 01]()
-
-
Removing the back cover
![iPhone 4 - Removing the back cover 01]()
![iPhone 4 - Removing the back cover 02]()
-
-
Disconnecting the battery connector
![iPhone 4 - Disconnecting the battery connector 01]()
![iPhone 4 - Disconnecting the battery connector 02]()
-
-
Removing the battery
![iPhone 4 - Removing the battery 01]()
![iPhone 4 - Removing the battery 02]()
![iPhone 4 - Removing the battery 03]()
-
-
Plastic tab
![iPhone 4 - Plastic tab 01]()
![iPhone 4 - Plastic tab 02]()
-
-
Disconnecting the dock connector cable
![iPhone 4 - Disconnecting the dock connector cable 01]()
![iPhone 4 - Disconnecting the dock connector cable 02]()
![iPhone 4 - Disconnecting the dock connector cable 03]()
-
-
Removing the Wi-Fi cover
![iPhone 4 - Removing the Wi-Fi cover 01]()
![iPhone 4 - Removing the Wi-Fi cover 02]()
![iPhone 4 - Removing the Wi-Fi cover 03]()
-
-
Disconnecting the connectors
![iPhone 4 - Disconnecting the connectors 01]()
![iPhone 4 - Disconnecting the connectors 02]()
![iPhone 4 - Disconnecting the connectors 03]()
-
-
Removing the rear camera
![iPhone 4 - Removing the rear camera 01]()
-
-
Removing the water indicator
![iPhone 4 - Removing the water indicator 01]()
-
-
Removing the SIM card tray
![iPhone 4 - Removing the SIM card tray 01]()
-
-
Removing the logic board
![iPhone 4 - Removing the logic board 01]()
![iPhone 4 - Removing the logic board 02]()
![iPhone 4 - Removing the logic board 03]()
![iPhone 4 - Removing the logic board 04]()
-
-
Removing the speaker
![iPhone 4 - Removing the speaker 01]()
![iPhone 4 - Removing the speaker 02]()
-
-
Removing the vibration motor
![iPhone 4 - Removing the vibration motor 01]()
-
-
Loosening the screws on the sides
![iPhone 4 - Loosening the screws on the sides 01]()
![iPhone 4 - Loosening the screws on the sides 02]()
![iPhone 4 - Loosening the screws on the sides 03]()
-
-
Removing the four corner screws
![iPhone 4 - Removing the four corner screws 01]()
![iPhone 4 - Removing the four corner screws 02]()
![iPhone 4 - Removing the four corner screws 03]()
![iPhone 4 - Removing the four corner screws 04]()
-
-
Disconnecting the display
![iPhone 4 - Disconnecting the display 01]()
![iPhone 4 - Disconnecting the display 02]()
![iPhone 4 - Disconnecting the display 03]()
![iPhone 4 - Disconnecting the display 04]()
-
-
Taking off the display
![iPhone 4 - Taking off the display 01]()
-
-
Removing the earpiece
![iPhone 4 - Removing the earpiece 01]()
-
-
Removing the screws
![iPhone 4 - Removing the screws 01]()
-
-
Removing the cable
![iPhone 4 - Removing the cable 01]()
![iPhone 4 - Removing the cable 02]()
![iPhone 4 - Removing the cable 03]()
![iPhone 4 - Removing the cable 04]()
-
-
Preparing the cable set
![iPhone 4 - Preparing the cable set 01]()
![iPhone 4 - Preparing the cable set 02]()
-
-
Installing the cable set
![iPhone 4 - Installing the cable set 01]()
![iPhone 4 - Installing the cable set 02]()
![iPhone 4 - Installing the cable set 03]()
![iPhone 4 - Installing the cable set 04]()
-
-
Fastening the screws
![iPhone 4 - Fastening the screws 01]()
-
-
Attaching the display
![iPhone 4 - Attaching the display 01]()
![iPhone 4 - Attaching the display 02]()
![iPhone 4 - Attaching the display 03]()
![iPhone 4 - Attaching the display 04]()
-
-
Putting in the corner screws
![iPhone 4 - Putting in the corner screws 01]()
![iPhone 4 - Putting in the corner screws 02]()
![iPhone 4 - Putting in the corner screws 03]()
![iPhone 4 - Putting in the corner screws 04]()
-
-
Tightening the screws on the sides
![iPhone 4 - Tightening the screws on the sides 01]()
![iPhone 4 - Tightening the screws on the sides 02]()
![iPhone 4 - Tightening the screws on the sides 03]()
-
-
Installing the vibration motor
![iPhone 4 - Installing the vibration motor 01]()
![iPhone 4 - Installing the vibration motor 02]()
-
-
Installing the speaker
![iPhone 4 - Installing the speaker 01]()
![iPhone 4 - Installing the speaker 02]()
-
-
Installing the logic board
![iPhone 4 - Installing the logic board 01]()
![iPhone 4 - Installing the logic board 02]()
![iPhone 4 - Installing the logic board 03]()
![iPhone 4 - Installing the logic board 04]()
-
-
Attaching the water indicator
![iPhone 4 - Attaching the water indicator 01]()
-
-
Connecting the connections
![iPhone 4 - Connecting the connections 01]()
-
-
Installing the Wi-Fi cover
![iPhone 4 - Installing the Wi-Fi cover 01]()
![iPhone 4 - Installing the Wi-Fi cover 02]()
-
-
Attaching the dock connector cable
![iPhone 4 - Attaching the dock connector cable 01]()
-
-
Aligning the plastic tab
![iPhone 4 - Aligning the plastic tab 01]()
-
-
Installing the battery
![iPhone 4 - Installing the battery 01]()
![iPhone 4 - Installing the battery 02]()
![iPhone 4 - Installing the battery 03]()
-
-
Attaching the back cover
![iPhone 4 - Attaching the back cover 01]()
-
-
Fastening the enclosure screws
![iPhone 4 - Fastening the enclosure screws 01]()
-
-
Setting the time
![iPhone 4 - Setting the time 01]()
-


The right tools for your repair


Similar guides
You might also be interested in these guides.


You might be interested in

