The vibration on your iPhone 12 no longer works properly?
This problem can be caused by a malfunctioning Taptic Engine. In our detailed photo guide, we will show you how you can easily replace it yourself.
Replacing the Taptic Engine is moderately difficult. In order to be able to detach it the speaker and the SIM module have to be removed beforehand.
Good luck with your repair! You can find the right tool kit for your iPhone in our online store.
Required tools
-
iSclack evo Opening Tool
iSclack evo Opening Tool
Opening your device can be a real test of patience, when the screen or back of your phone is glued very strong. With an iSclack evo, you can simplify the process. The pincer-like handle allows you to create a gap between the screen and the frame with minimal effort. At the same time, you have the other hand free to use a narrow tool such as a plectrum or the iFlex to enlarge the gap. The included cover foils allow you to use the iSclack evo even if the screen is splintered.
on Amazon -
Tweezers
Tweezers
We recommend using tweezers to remove screws and various small parts from your device.
on Amazon -
Pick Set
Pick Set
You need a flat but stable tool such as a pick to pry out parts that are glued in place.
from €14.99 on Amazon -
SIM Tool
SIM Tool
If you want to use a different SIM card or repair most parts of your Apple devices, you’ll have to remove the SIM card first. The SIM card tray only comes out if you insert a tool with a very fine point into the small hole next to the SIM card slot. This tool is designed especially for ejecting the SIM card from all iPhones and iPads, and fits perfectly into the appropriate opening.
on Amazon -
Plastic prying tool
Plastic prying tool
You need a flat plastic prying tool to disconnect the various plugs and connectors.
from €14.99 on Amazon -
Pentalobe PL1 screwdriver
Pentalobe PL1 screwdriver
You need the right screwdriver for removing pentalobe PL1 screws.
on Amazon -
Phillips PH00 screwdriver
Phillips PH00 screwdriver
You need the right screwdriver for removing PH00 screws.
from €10.84 on Amazon -
Phillips screwdriver with centering pin
Phillips screwdriver with centering pin
Phillips screwdriver with practical centering pin for logic board screws.
on Amazon - Y-type Y000 screwdriver
Required replacement part
- iPhone 12 Taptic Engine


Getting started with the repair of your iPhone 12
If you get stuck or have questions, you can post a comment. We’d be happy to help.
-
Switching off your iPhone12
![iPhone 12 - Switching off your iPhone12 01]()
![iPhone 12 - Switching off your iPhone12 02]()
![iPhone 12 - Switching off your iPhone12 03]()
-
-
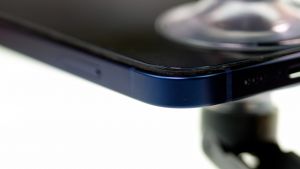
Removing the Pentalobe screws
-
Heating up the edge of the screen
-
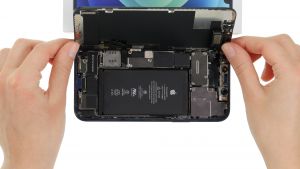
Lifting up the screen
-
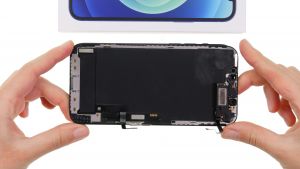
Detaching the screen
-
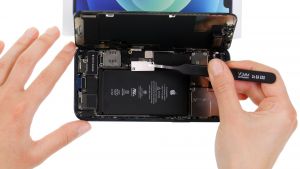
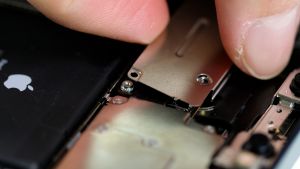
Removing the cover plates
-
Detaching the battery connector
-
Detaching the screen connectors
-
Removing the speaker
-
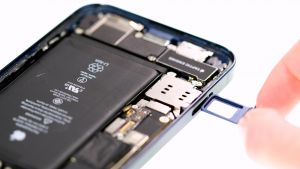
Removing the SIM tray
-
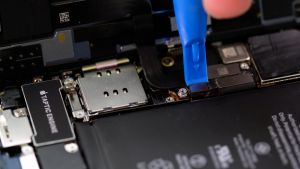
Removing the SIM module
-
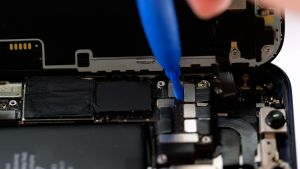
Removing the Taptic Engine
-
Inserting the Taptic Engine
-
Inserting the SIM module
-
Inserting the SIM tray
![iPhone 12 - Inserting the SIM tray 01]()
![iPhone 12 - Inserting the SIM tray 02]()
-
-
Inserting the speaker
-
Attaching the screen connectors
![iPhone 12 - Attaching the screen connectors 01]()
![iPhone 12 - Attaching the screen connectors 02]()
![iPhone 12 - Attaching the screen connectors 03]()
![iPhone 12 - Attaching the screen connectors 04]()
-
-
Attaching the battery connector
![iPhone 12 - Attaching the battery connector 01]()
![iPhone 12 - Attaching the battery connector 02]()
![iPhone 12 - Attaching the battery connector 03]()
-
-
Testing your iPhone 12
![iPhone 12 - Testing your iPhone 12 01]()
![iPhone 12 - Testing your iPhone 12 02]()
![iPhone 12 - Testing your iPhone 12 03]()
![iPhone 12 - Testing your iPhone 12 04]()
![iPhone 12 - Testing your iPhone 12 05]()
![iPhone 12 - Testing your iPhone 12 06]()
![iPhone 12 - Testing your iPhone 12 07]()
-
-
Installing the cover plates
-
Installing the display
![iPhone 12 - Installing the display 01]()
![iPhone 12 - Installing the display 02]()
![iPhone 12 - Installing the display 03]()
-
-
Fastening the Pentalobe screws


The right tools for your repair


Similar guides
You might also be interested in these guides.


You might be interested in