Having trouble charging the battery of your iPhone 12? Your iPhone is no longer recognized by your computer?
This can be caused by a broken Lightning connector. In this photo guide, we explain step by step how you can replace it on your own.
Replacing the Lightning connector is one of the most time-consuming repairs on the iPhone 12. The cable set of the Lightning connector is strongly glued to the case's bottom and fixed to the case's edge with several different screws. Since some components are located above the cable set, they have to be removed first. So plan enough time for this.
Good luck with your repair! You can find the right tool kit for your iPhone in our online store.
Required tools
-
Heat gun
Heat gun
You can use a heat gun to heat parts that are glued on so they’re easier to remove. In most cases, you can also use a hairdryer.
from €15.99 on Amazon -
Tweezers
Tweezers
We recommend using tweezers to remove screws and various small parts from your device.
on Amazon -
Pick Set
Pick Set
You need a flat but stable tool such as a pick to pry out parts that are glued in place.
from €14.99 on Amazon -
Plastic prying tool
Plastic prying tool
You need a flat plastic prying tool to disconnect the various plugs and connectors.
from €14.99 on Amazon -
Steel Laboratory Spatula
Steel Laboratory Spatula
You need a flat and sturdy prying tool to disconnect glued parts.
on Amazon -
Pentalobe PL1 screwdriver
Pentalobe PL1 screwdriver
You need the right screwdriver for removing pentalobe PL1 screws.
on Amazon -
Phillips PH00 screwdriver
Phillips PH00 screwdriver
You need the right screwdriver for removing PH00 screws.
from €10.84 on Amazon - Y-type Y000 screwdriver
Required replacement part
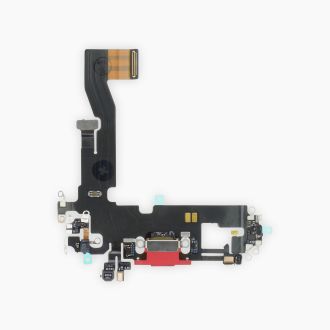
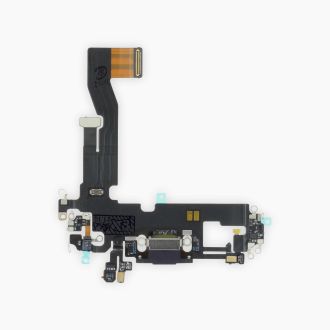
- iPhone 12 Lightning Connector Schwarz


Getting started with the repair of your iPhone 12
If you get stuck or have questions, you can post a comment. We’d be happy to help.
-
Switching off your iPhone12
![iPhone 12 - Switching off your iPhone12 01]()
![iPhone 12 - Switching off your iPhone12 02]()
![iPhone 12 - Switching off your iPhone12 03]()
-
-
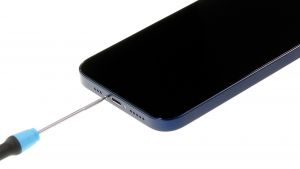
Removing the Pentalobe screws
-
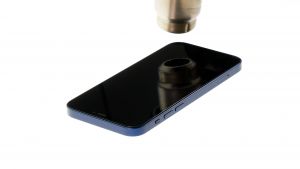
Heating up the edge of the screen
-
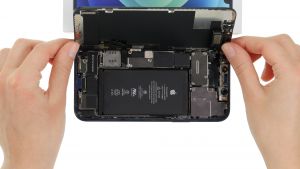
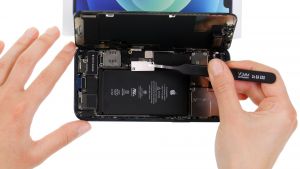
Lifting up the screen
-
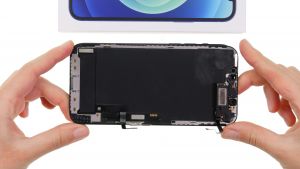
Detaching the screen
-
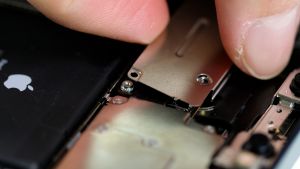
Removing the cover plates
-
Detaching the battery connector
-
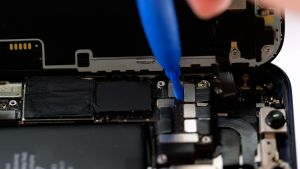
Detaching the screen connectors
-
Removing the speaker
-
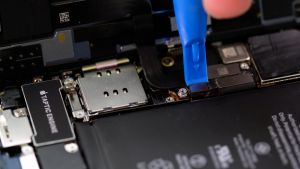
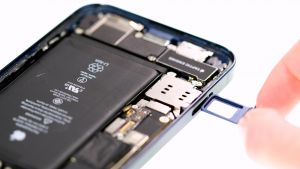
Removing the SIM tray
-
Removing the SIM module
-
Removing the Taptic Engine
-
Removing the battery
-
Removing the dual camera
-
Detaching the Bluetooth cable
-
Removing the logicboard
-
Removing the barometric vent
-
Removing the Lightning connector
-
Inserting the Lightning connector
-
Inserting the barometric vent
-
Inserting the logicboard
-
Installing the Bluetooth cable
-
Inserting the dual camera
-
Inserting the battery
-
Inserting the Taptic Engine
-
Inserting the SIM module
-
Inserting the SIM tray
![iPhone 12 - Inserting the SIM tray 01]()
![iPhone 12 - Inserting the SIM tray 02]()
-
-
Inserting the speaker
-
Attaching the screen connectors
![iPhone 12 - Attaching the screen connectors 01]()
![iPhone 12 - Attaching the screen connectors 02]()
![iPhone 12 - Attaching the screen connectors 03]()
![iPhone 12 - Attaching the screen connectors 04]()
-
-
Attaching the battery connector
![iPhone 12 - Attaching the battery connector 01]()
![iPhone 12 - Attaching the battery connector 02]()
![iPhone 12 - Attaching the battery connector 03]()
-
-
Testing your iPhone 12
![iPhone 12 - Testing your iPhone 12 01]()
![iPhone 12 - Testing your iPhone 12 02]()
![iPhone 12 - Testing your iPhone 12 03]()
![iPhone 12 - Testing your iPhone 12 04]()
![iPhone 12 - Testing your iPhone 12 05]()
-
-
Installing the cover plates
-
Installing the display
![iPhone 12 - Installing the display 01]()
![iPhone 12 - Installing the display 02]()
![iPhone 12 - Installing the display 03]()
-
-
Fastening the Pentalobe screws


The right tools for your repair


Similar guides
You might also be interested in these guides.


You might be interested in