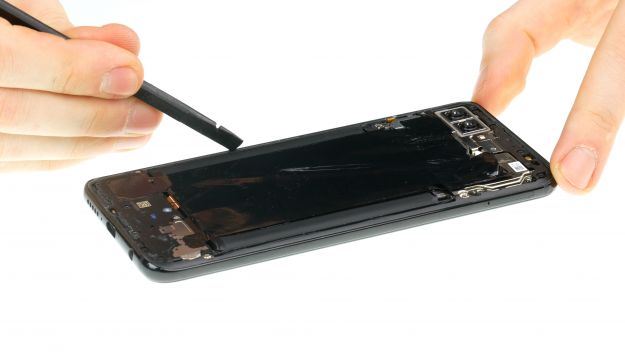
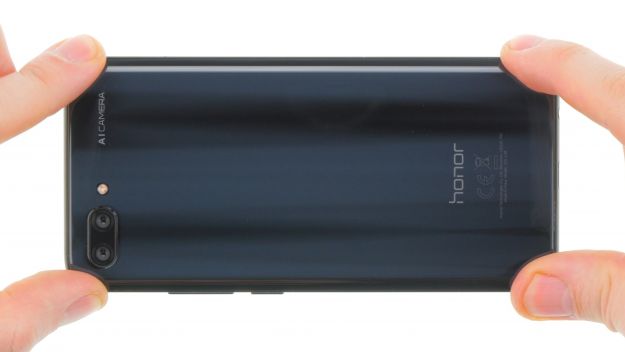
Your screen is cracked or no longer works.

Is the screen of your Honor 10 cracked or is the touchscreen not working properly anymore? With our instructions you can easily repair your Honor 10 yourself!

During this repair, we replace the entire display unit including the frame, not just the broken screen.


The repair is a bit more difficult because the Honor 10 has to be opened via the glass back cover.


Make a backup before the repair, use a clean work surface and take your time. If you are stuck at any point, simply contact our live chat or write a comment on the corresponding step.

Required tools

  • Tool for prying out batteries

    Tool for prying out batteries

    You have to use a very stable tool to pry out the battery. At the same time, it has to be flat enough to insert below the battery.

    €2.00 at the iDoc store
  • Heat gun

    Heat gun

    You can use a heat gun to heat parts that are glued on so they’re easier to remove. In most cases, you can also use a hairdryer.

    from €14.47 on Amazon
  • For storing screws

    For storing screws

    We recommend storing your screws so you don’t mix up the various screws and small parts.

    €10.00 at the iDoc store
  • iFlex Opening Tool

    iFlex Opening Tool

    Opening your smartphone can be a very delicate operation, especially if the glue is very persistent. The blade of the flexible but sturdy iFlex measures just 0.15 mm, so it fits in even the smallest gaps, such as between the screen and the frame. The practical iFlex is made of stainless steel and sits comfortably in the hand. This makes it the perfect assistant for every smartphone repair.

    €10.00 at the iDoc store
  • iPlastix Opening Tool

    iPlastix Opening Tool

    Do you want to open your smartphone or lever out large parts like the battery? Then the iPlastix with its large blade will help you. The practical assistant is made of flexible, especially sturdy plastic and lies comfortably in the hand. Thanks to its design, you can even get into smaller gaps, for example to lift the screen or to prevent it from sticking together again.

    €10.00 at the iDoc store
  • Tweezers

    Tweezers

    We recommend using tweezers to remove screws and various small parts from your device.

    €11.00 at the iDoc store
  • Plastic prying tool

    Plastic prying tool

    You need a flat plastic prying tool to disconnect the various plugs and connectors.

    €2.00 at the iDoc store
  • Steel Laboratory Spatula

    Steel Laboratory Spatula

    You need a flat and sturdy prying tool to disconnect glued parts.

    €4.00 at the iDoc store
  • Phillips PH00 screwdriver

    Phillips PH00 screwdriver

    You need the right screwdriver for removing PH00 screws.

    €12.00 at the iDoc store

Required replacement part

Show all replacement parts for the Honor 10 

Passendes Werkzeug

Mit unserem Werkzeug gelingt dir die Reparatur.

for €40.00

Getting started with the repair of your Honor 10

If you get stuck or have questions, you can post a comment. We’d be happy to help.

21 steps
  1. Switch off the device

    Honor 10 - Switch off the device 01
    Honor 10 - Switch off the device 02
    Honor 10 - Switch off the device 03
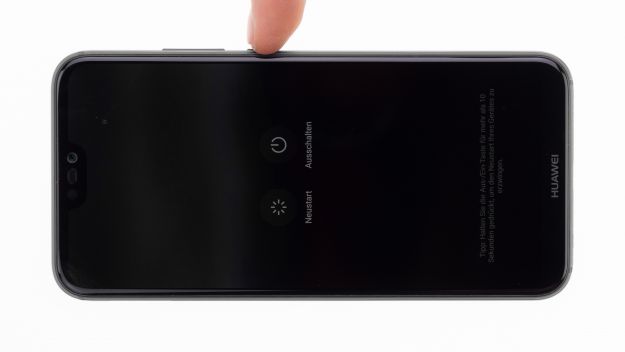
    1. Turn off your device by holding down the power button until the “Power off” option appears.
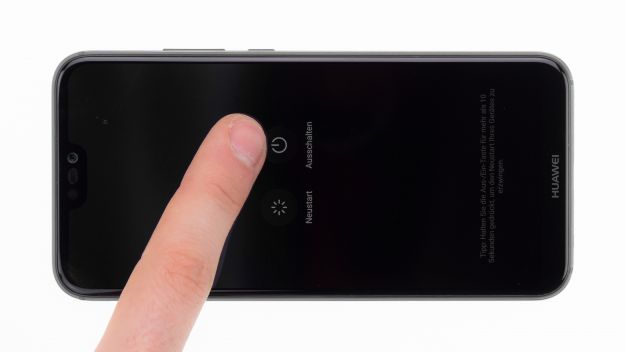
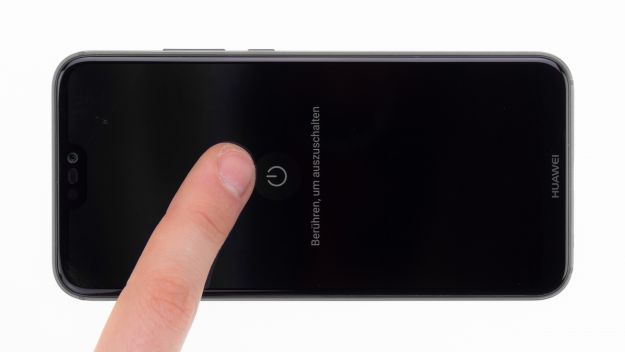
    2. Use your finger to confirm that you want to shut down your Honor 10 and wait until the screen goes blank.

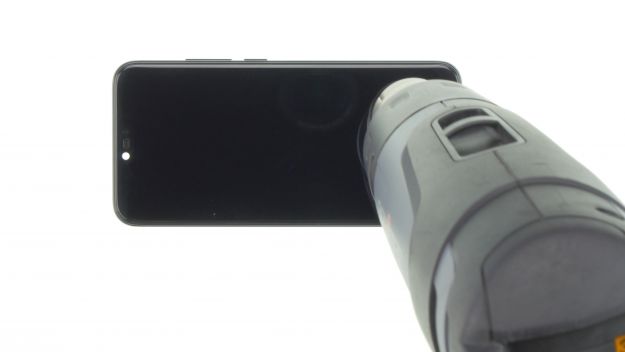
    Here in the picture you see another device, because the display of the Honor 10 did not function any more.

  2. Remove the back cover

    Honor 10 - Remove the back cover 01
    Honor 10 - Remove the back cover 02
    Honor 10 - Remove the back cover 03
    Honor 10 - Remove the back cover 04
    Honor 10 - Remove the back cover 05
    Honor 10 - Remove the back cover 06
    Honor 10 - Remove the back cover 07
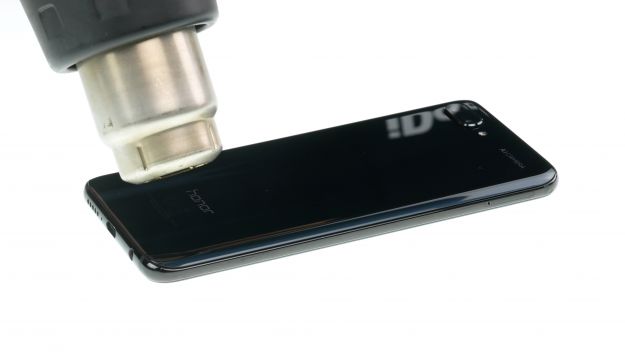
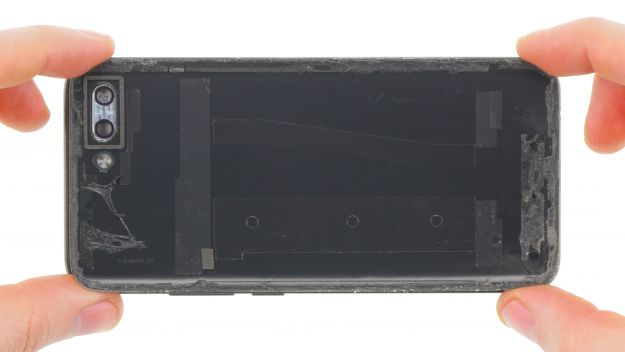
    1. The back cover’s firmly glued to the chassis. Heat the device evenly with hot air to soften the glue. A temperature of 60 - 80°C should be sufficient. As a rule of thumb, you should still be able to touch your device without it being uncomfortably hot.
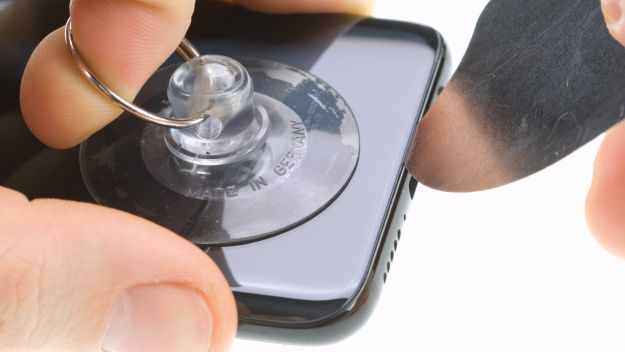
    2. The easiest way to loosen the back cover is to use a flat and flexible tool such as the iPlastix or iFlex. You will also need several picks to unstick the back cover all around.
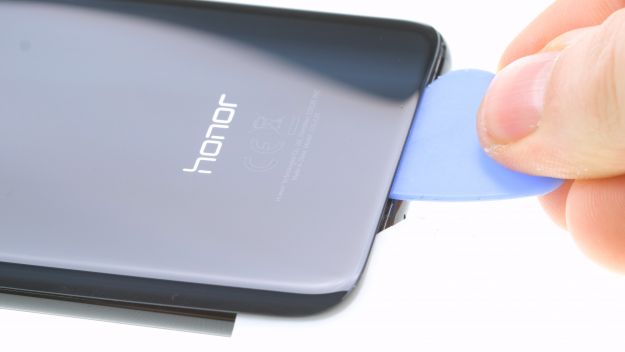
    1. Heat the spot where you start and place a flat tool between the back cover and the frame.

    The iPlastix is made of plastic, so it won't scratch the device. On the other hand, it's very soft and tricky to insert.

    Be extra careful, the back cover can break very easily. If necessary, apply the heat several times and try again. Removing the back cover might take a little longer. Take a little more time and work carefully to make sure you don't break anything.

    1. Once the tool is inserted, stick a pick into the gap to keep it open. Then run the tool around the entire edge to gradually loosen the glue.
    2. Then heat the next part and insert the picks one by one.

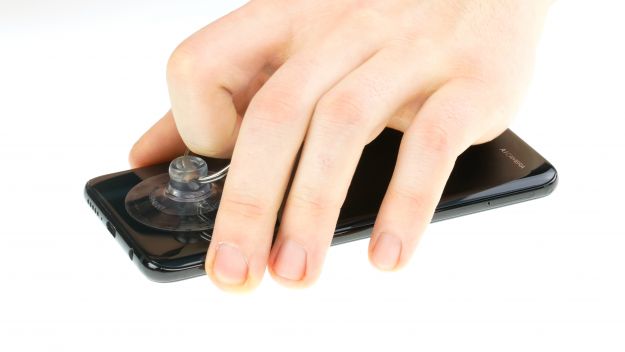
    Use a suction cup to lift the glass if you can’t find anywhere to insert the tool

  3. Loosen the heat shield

    Honor 10 - Loosen the heat shield 01
    Honor 10 - Loosen the heat shield 02
    Honor 10 - Loosen the heat shield 03
    Honor 10 - Loosen the heat shield 04

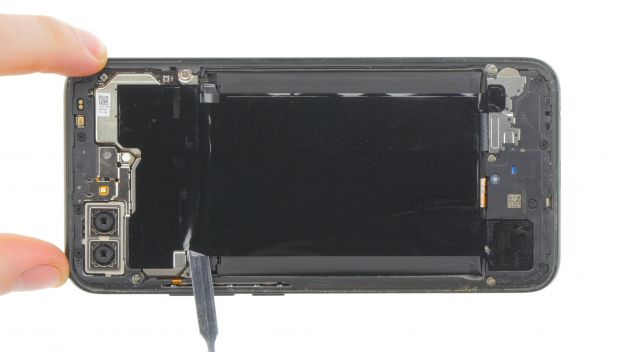
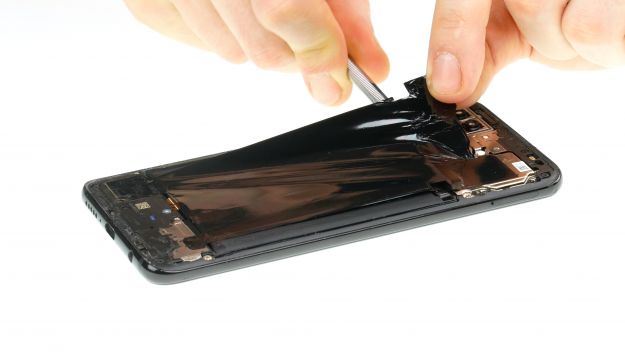
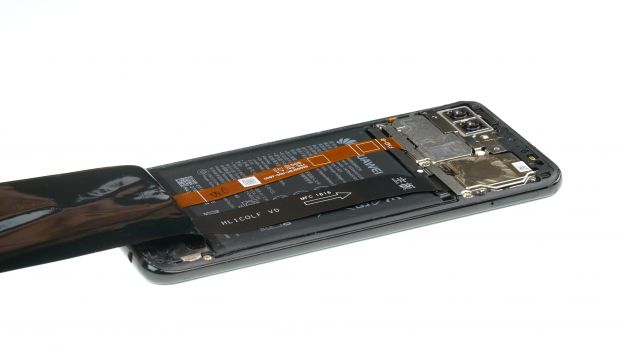
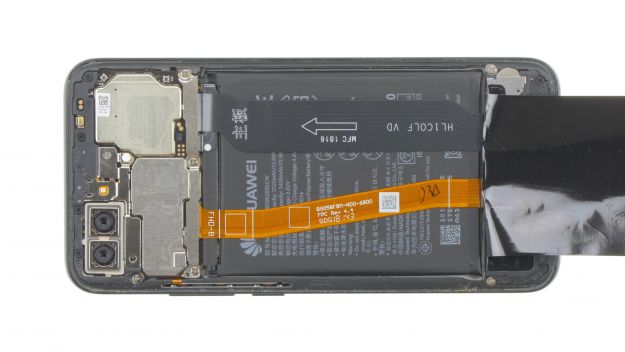
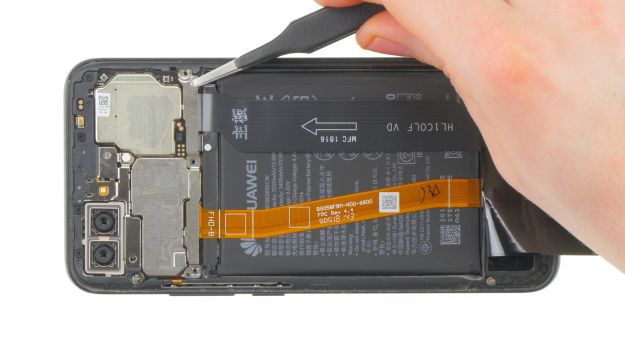
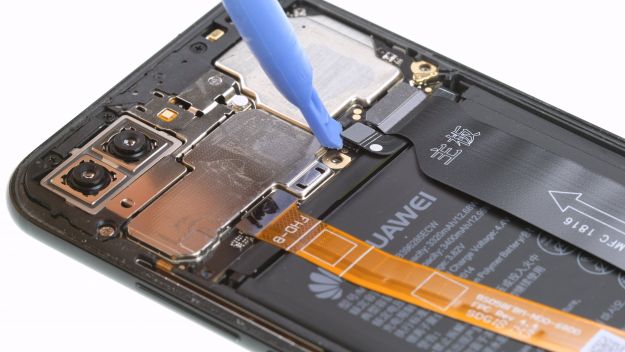
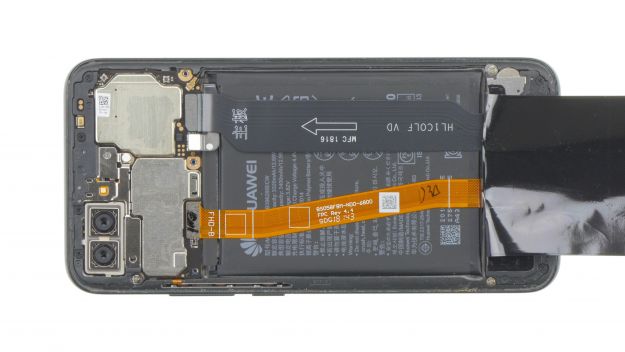
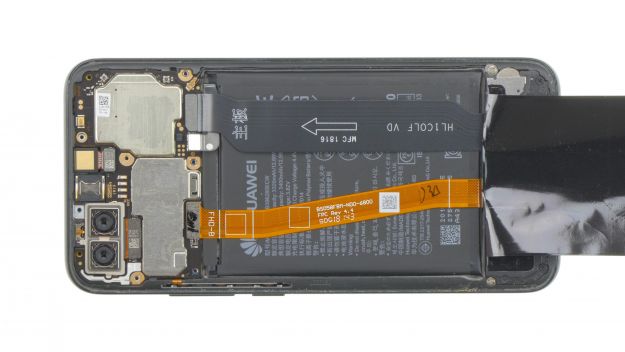
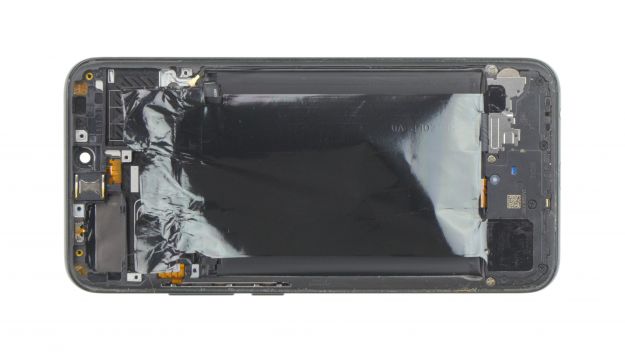
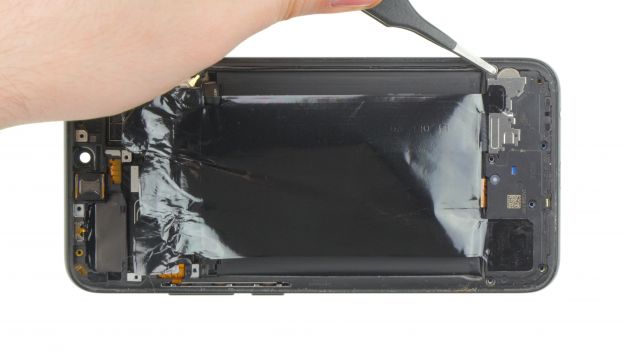
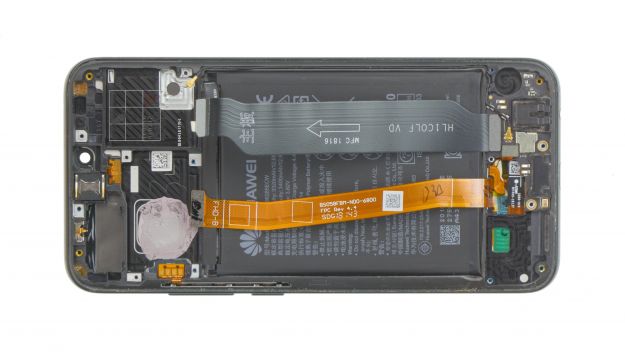
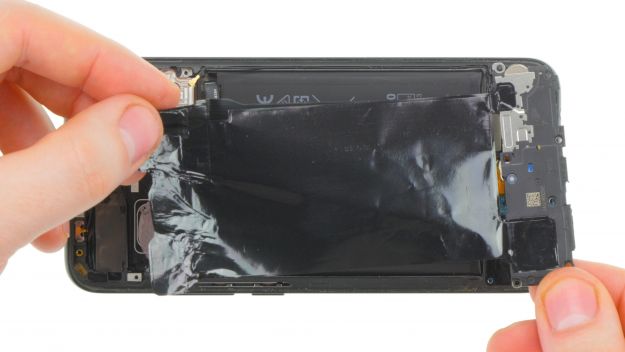
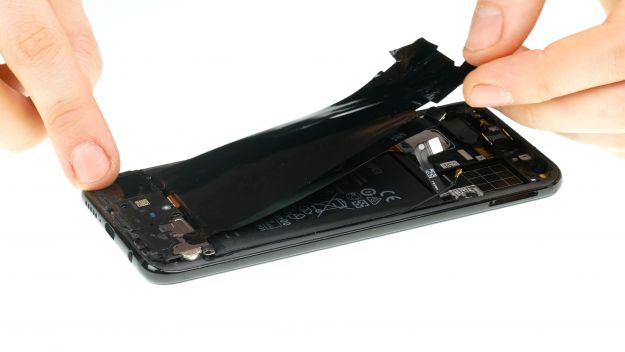
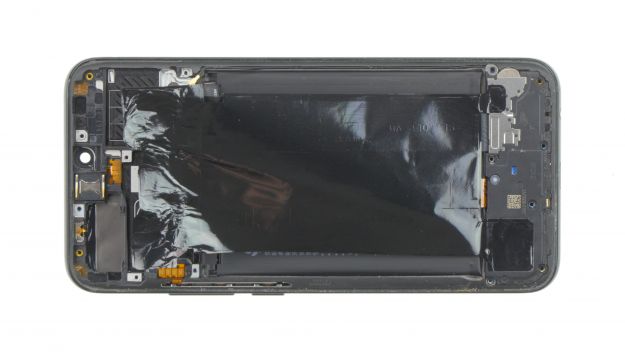
    All components in the device are covered by a black graphite foil, which serves for better heat distribution.

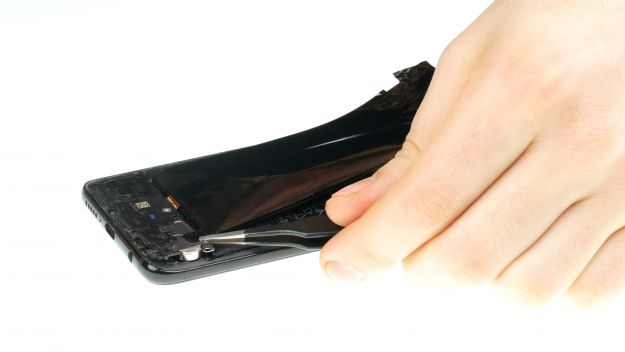
    1. Loosen the foil on the upper side and fold it down.
    2. You can heat the adhesive again to loosen it more easily.
  4. Disconnect the battery

    Honor 10 - Disconnect the battery 01
    Honor 10 - Disconnect the battery 02
    Honor 10 - Disconnect the battery 03
    Honor 10 - Disconnect the battery 04
    Honor 10 - Disconnect the battery 05
    Honor 10 - Disconnect the battery 06
    • 3 × 2,8 mm Phillips
    • Battery connector

    Before starting the repair, always disconnect the battery contact first to prevent short circuits and avoid accidentally turning on your device during the repair.

    1. Use a phillips screwdriver (PH00) to remove the phillips screws. Then take off the cover. The cover is hooked under on the upper side. Put all the parts in the same section of your magnetic pad.
    2. Using the spudger, carefully disconnect the battery contact from the motherboard. Use a plastic tool to avoid short circuits.

    Always lever from a side where there are no small components on the mainboard. This way you avoid damage.

  5. Remove the cameras

    Honor 10 - Remove the cameras 01
    Honor 10 - Remove the cameras 02
    Honor 10 - Remove the cameras 03
    Honor 10 - Remove the cameras 04
    Honor 10 - Remove the cameras 05
    Honor 10 - Remove the cameras 06
    Honor 10 - Remove the cameras 07
    Honor 10 - Remove the cameras 08
    • 4 × 3,4 mm Phillips
    • 2 × 2,8 mm Phillips
    • Camera connector

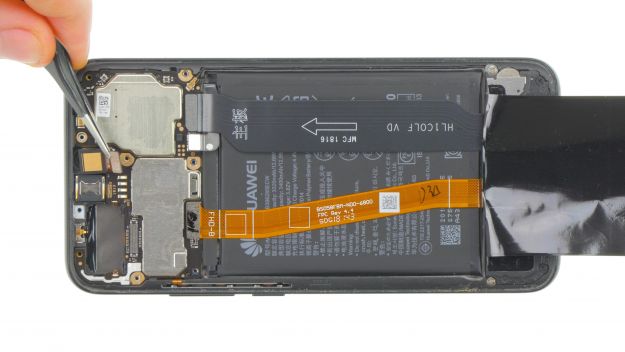
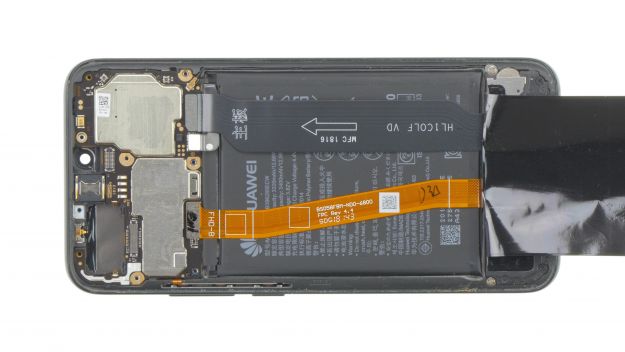
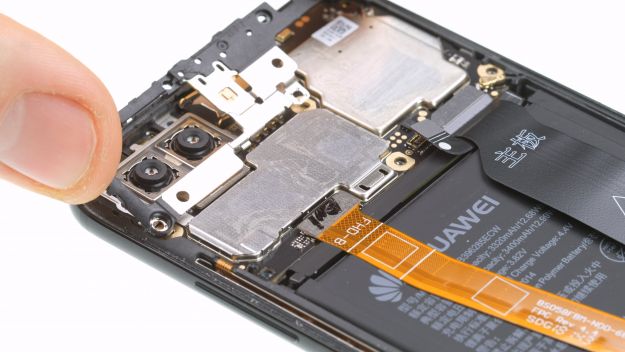
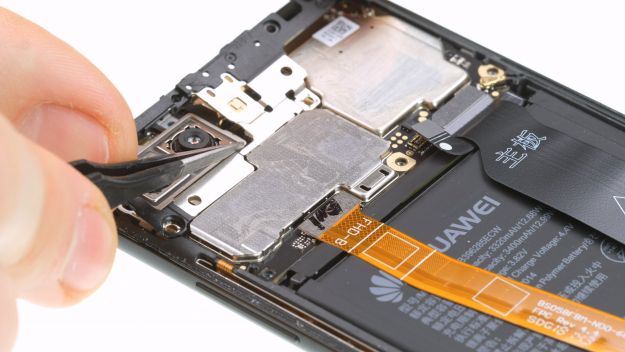
    Next, remove the two camera modules. The camera contacts are secured with a cover.

    1. Loosen all Phillips screws first. One of them is covered with a small white sticker.

    The screws in Honor 10 have different lengths. Be careful not to mix them up.

    1. Then carefully lever the cover loose with a pair of tweezers. The cover is hooked in several places.
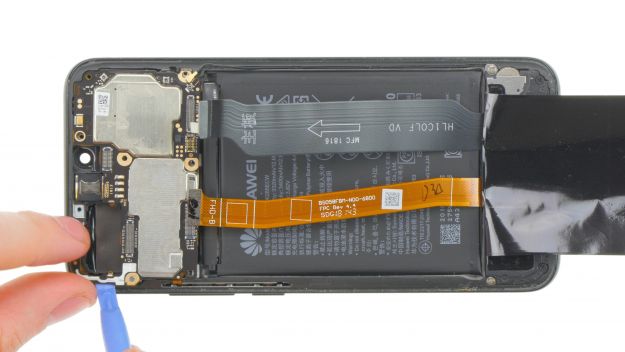
    2. Next loosen the connectors carefully with a spudger.
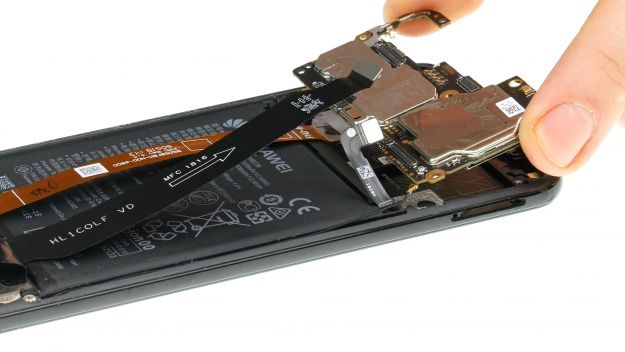
    3. Finally remove both cameras from the device.

    Make sure that no dirt or fingerprints get on the camera lenses.

  6. Remove the mainboard

    Honor 10 - Remove the mainboard 01
    Honor 10 - Remove the mainboard 02
    Honor 10 - Remove the mainboard 03
    Honor 10 - Remove the mainboard 04
    Honor 10 - Remove the mainboard 05
    Honor 10 - Remove the mainboard 06
    Honor 10 - Remove the mainboard 07
    • Antenna connector
    • USB flex cable connector
    • Display connector

    Several flexible flat cables and an antenna are still connected to the mainboard.

    1. Loosen the contacts of the flexbile flat cables with the spudger. The cables connect the display and the USB board to the motherboard.
    2. Loosen the antenna cable carefully by turning the tweezers. Do not lever off the contact with a spudger. There is a danger of damaging the socket on the circuit board.
    3. Remove the SIM card holder if it is still in the device.
    4. Carefully lever the board up a little and then take it out.
  7. Remove the speaker

    Honor 10 - Remove the speaker 01
    Honor 10 - Remove the speaker 02
    Honor 10 - Remove the speaker 03
    Honor 10 - Remove the speaker 04
    Honor 10 - Remove the speaker 05
    • 4 × 2,8 mm Phillips
    • 3 × 3,4 mm Phillips

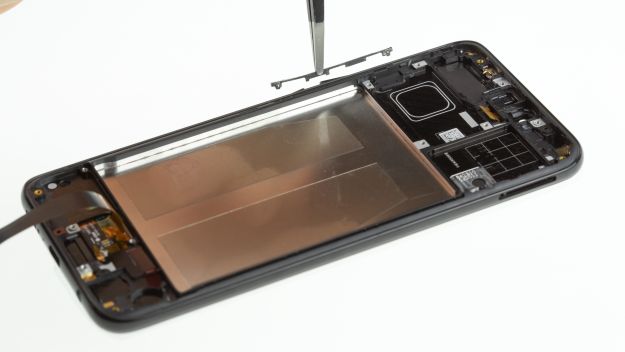
    The speaker is fixed with several screws, lightly glued and hooked to the frame.


    1. First fold over the heat shield.
    2. Loosen the Phillips screws of different lengths. Sort them on a magnetic mat, for example, so you don't mix them up when you insert them again.
    3. Then lever the speaker in several places until you can lift it a little and remove it.
  8. Remove the USB-C board

    Honor 10 - Remove the USB-C board 01
    Honor 10 - Remove the USB-C board 02
    Honor 10 - Remove the USB-C board 03
    Honor 10 - Remove the USB-C board 04
    Honor 10 - Remove the USB-C board 05
    Honor 10 - Remove the USB-C board 06
    Honor 10 - Remove the USB-C board 07
    • Antenna connector
    • USB flex cable connector
    • Fingerprint connector
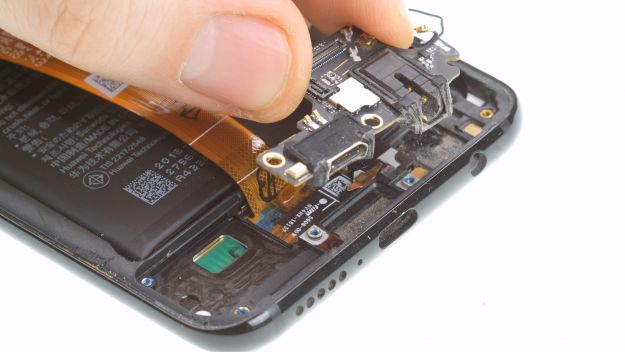
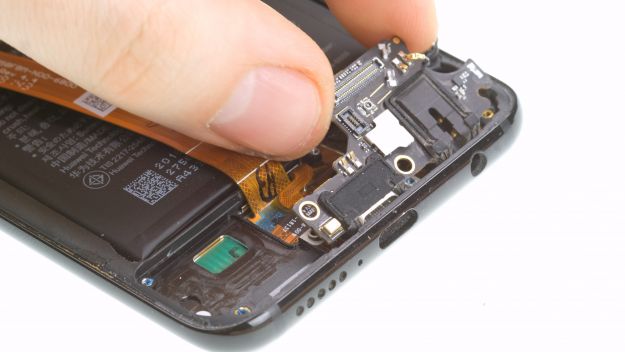
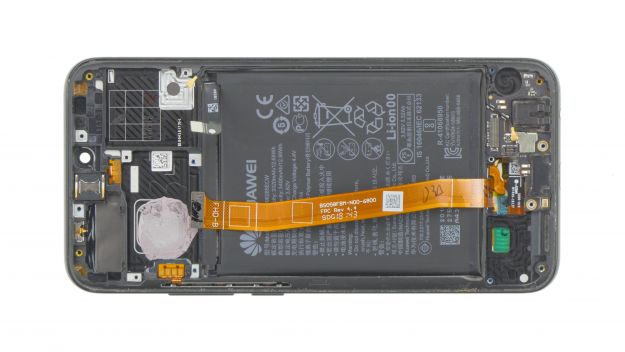
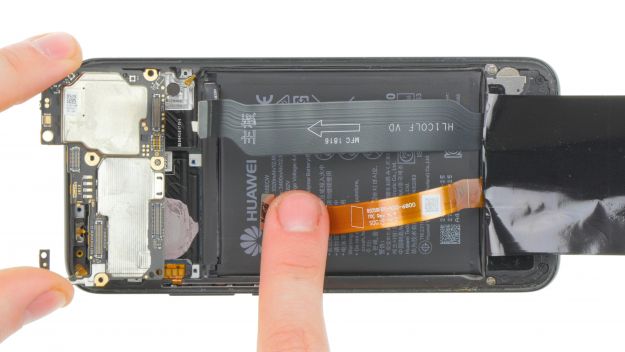
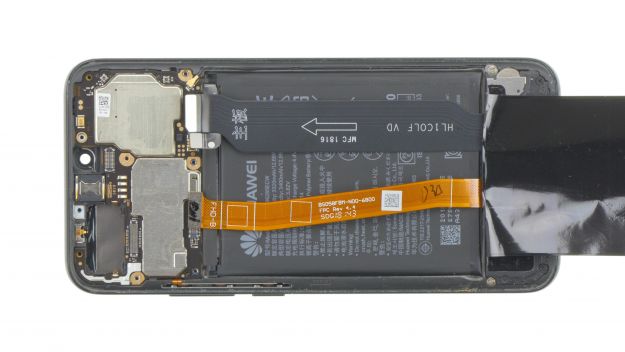
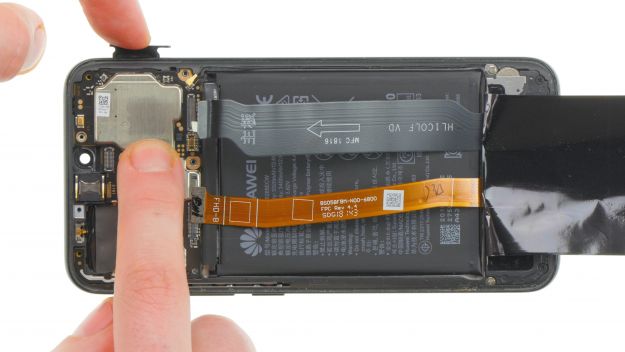
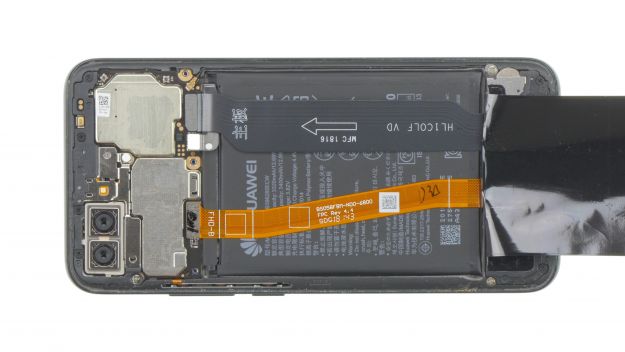
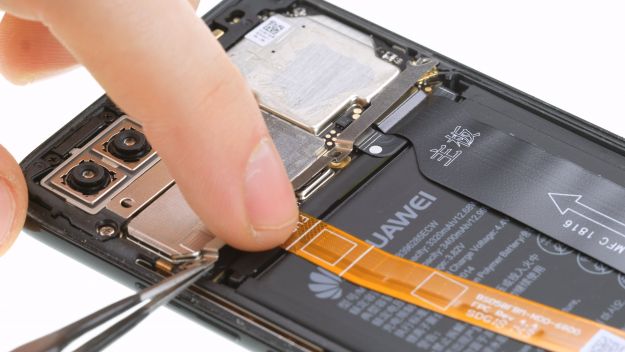
    1. First remove the flex cable running over the battery.
    2. Loosen the connector and remove the cable.
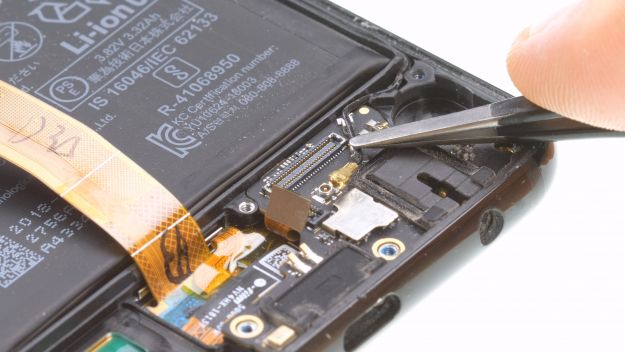
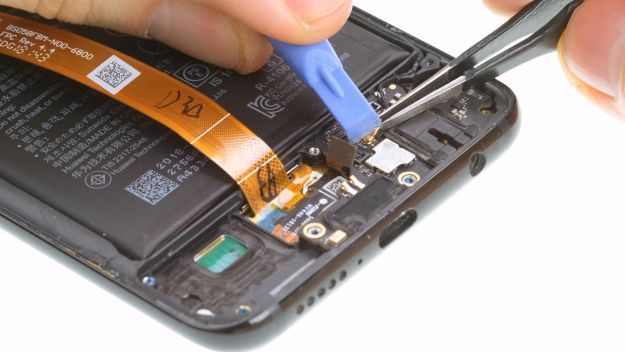
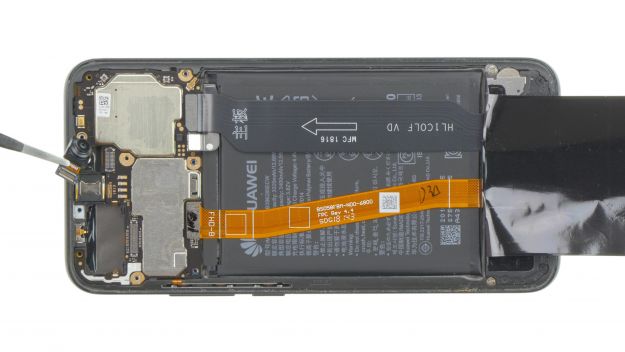
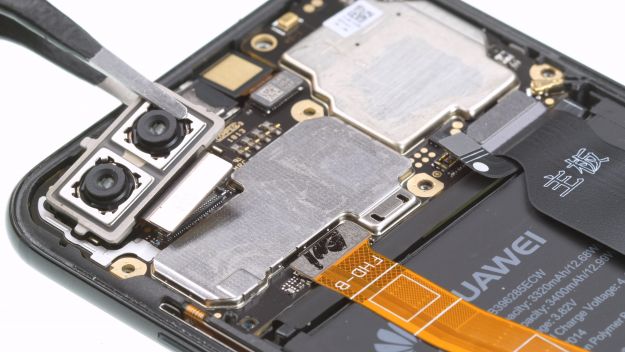
    3. Use tweezers again to release the black antenna cable and lever it out of the metal clamps.
    4. Loosen the small contact for the fingerprint sensor.
    5. Carefully lever the USB board up with a spudger. Push it away from the frame at the bottom to release it.
    6. Then remove the board from the device. Make sure that the rubber seals for the USB socket and headphone socket remain on the board. If they remain in the case, take them out and attach them to the board.
  9. Remove the battery

    Honor 10 - Remove the battery 01
    Honor 10 - Remove the battery 02
    Honor 10 - Remove the battery 03
    Honor 10 - Remove the battery 04
    Honor 10 - Remove the battery 05
    Honor 10 - Remove the battery 06

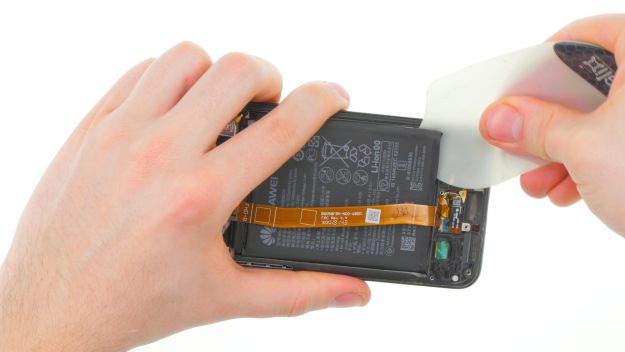
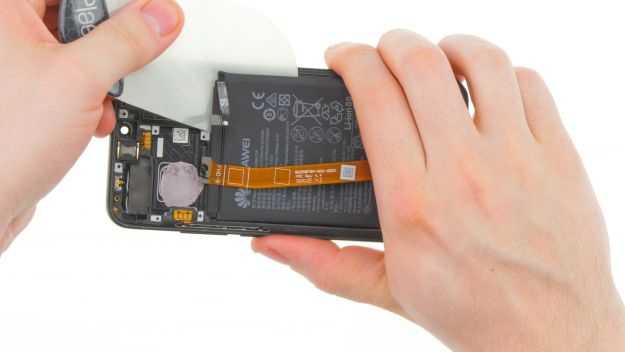
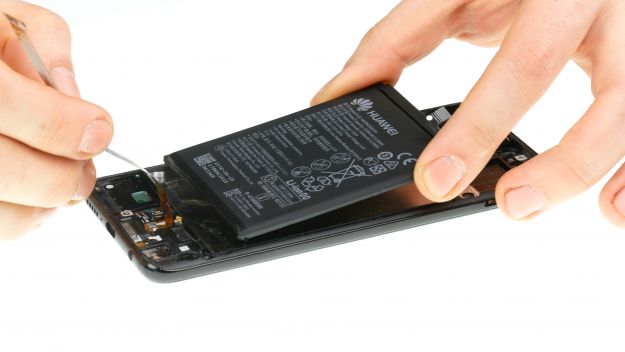
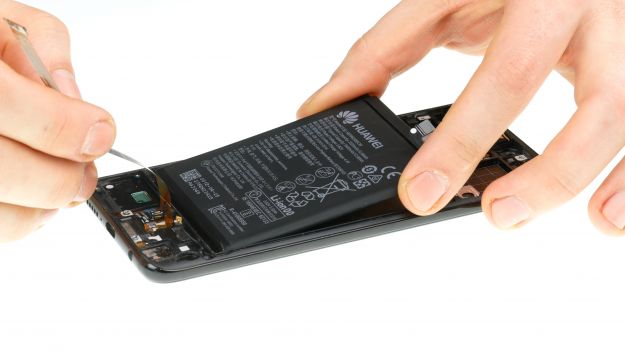
    The battery is glued into the case generously.

    1. You can loosen the glue more easily by warming it up again. But never heat the battery directly, heat it from the display.
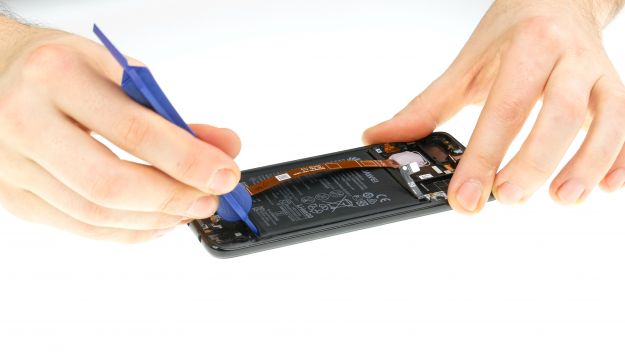
    2. Slide a flat tool like the iPlastix under the battery.
    3. If you can't get it under the battery, you can also use a wider, more stable tool like the Battery Spudger.
    4. Then move a flat tool around and gradually lift the battery out of the device.

    Try to bend the battery as little as possible and take care not to damage the surface.

  10. Remove the earpiece and the antenna

    Honor 10 - Remove the earpiece and the antenna 01
    Honor 10 - Remove the earpiece and the antenna 02
    Honor 10 - Remove the earpiece and the antenna 03
    Honor 10 - Remove the earpiece and the antenna 04
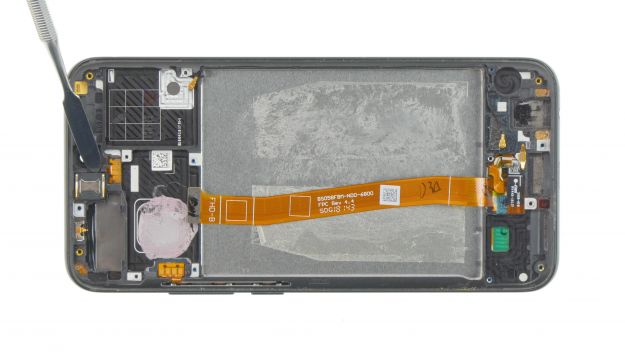
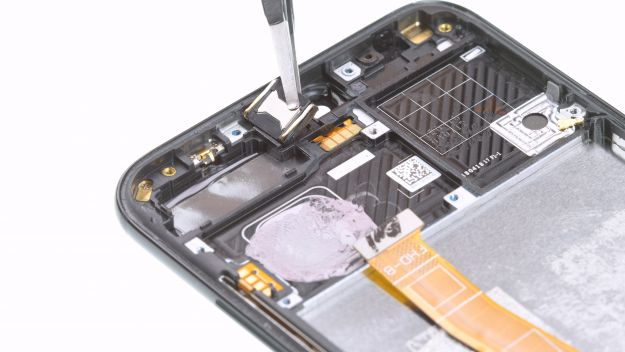
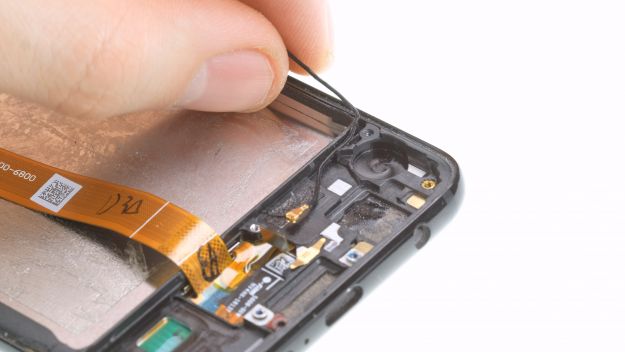
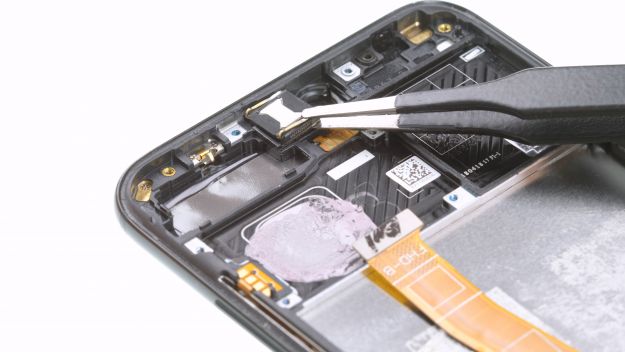
    1. The earpiece is lightly glued into the device.
    2. Heat the adhesive and lift out the earpiece.
    3. Note the orientation of the golden contacts to insert the earpiece correctly later.
    4. Pull the black antenna out of its sideways guide.
  11. The right tools for your repair

    With the right tools, you will succeed in any repair. In our store you will find a large selection of professional quality tools.
    VIEW NOW
  12. Transfer standby and volume keys (optional)


    1. Check if your replacement display already has standby and volume keys built in. If not, you have to copy them from the old display.
    2. Heat the flex cable with the four golden contact surfaces and loosen it carefully with a steel spatula or another very thin tool.
    3. Drive the steel spatula between the cable and the housing frame and loosen the adhesive there as well.
    4. Remove the component from the frame with the buttons.
    5. Lever out the silver clip that fixes the buttons in the frame.
    6. Remove the two buttons.
    7. Install all parts in the new display. Make sure that the silver clip fixes the keys and the buttons work.
  13. Prepare the new display

    Honor 10 - Prepare the new display 01
    Honor 10 - Prepare the new display 02
    1. Now compare your display with the new replacement display and check if you still need to take over small parts such as seals.
    2. Also check the spare part for external damage. If the glass is scratched or the flex cable is damaged, do not install the display but exchange it with your dealer.
    3. If everything is in good condition, remove all plastic film over the various adhesive surfaces.
  14. Install the earpiece and the antenna

    Honor 10 - Install the earpiece and the antenna 01
    Honor 10 - Install the earpiece and the antenna 02
    Honor 10 - Install the earpiece and the antenna 03
    Honor 10 - Install the earpiece and the antenna 04
    1. Place the black antenna in its sideways guide.
    2. Put the earpiece in its place.

    Make sure that the golden contacts point to the left in the device.

  15. Insert the battery

    Honor 10 - Insert the battery 01
    Honor 10 - Insert the battery 02
    1. Place the battery in the device.
    2. Make sure it has some space on all sides and is not pressed against one side.
  16. Install the USB-C Board

    Honor 10 - Install the USB-C Board 01
    Honor 10 - Install the USB-C Board 02
    Honor 10 - Install the USB-C Board 03
    Honor 10 - Install the USB-C Board 04
    Honor 10 - Install the USB-C Board 05
    Honor 10 - Install the USB-C Board 06
    • Antenna connector
    • USB flex cable connector
    • Fingerprint connector
    1. Make sure that the rubber seals for the USB socket and the headphone socket are on the board.
    2. Place the board on the bottom edge and press it down until it fits properly.
    3. Connect the black antenna cable and press it into the silver brackets.
    4. Connect the fingerprint sensor and the wide flex cable. The white arrow must point upwards.
  17. Install the speaker

    Honor 10 - Install the speaker 01
    Honor 10 - Install the speaker 02
    Honor 10 - Install the speaker 03
    Honor 10 - Install the speaker 04
    • 4 × 2,8 mm Phillips
    • 3 × 3,4 mm Phillips
    1. Insert the speaker together with the heat shield and press it firmly into the device until it sits properly.
    2. Secure the speaker with the Phillips screws.
  18. Install the mainboard

    Honor 10 - Install the mainboard 01
    Honor 10 - Install the mainboard 02
    Honor 10 - Install the mainboard 03
    Honor 10 - Install the mainboard 04
    Honor 10 - Install the mainboard 05
    • Antenna connector
    • USB flex cable connector
    • Display connector
    1. Insert the mainboard into the device and make sure that you do not pinch any cables under the board.
    2. Press the motherboard a little and check if it fits correctly.
    3. Insert the SIM card holder. If it gets stuck, don't push it in with force, but check if the mainboard is seated correctly.
    4. Connect the two flex cables and the antenna cable. You can use a pair of tweezers to position the antenna and then connect it with a spudger.
  19. Install the cameras

    Honor 10 - Install the cameras 01
    Honor 10 - Install the cameras 02
    Honor 10 - Install the cameras 03
    Honor 10 - Install the cameras 04
    Honor 10 - Install the cameras 05
    Honor 10 - Install the cameras 06
    • 2 × 2,8 mm Phillips
    • 4 × 3,4 mm Phillips
    1. Place both camera modules in their openings.
    2. Connect the connectors. Make sure they click into place with a slight click.
    3. Position the cover on the bottom edge. It must be hooked underneath there.
    4. Then press the cover everywhere until it fits properly.
    5. Screw the cover together with the screws of different lengths.
  20. Connect the battery

    Honor 10 - Connect the battery 01
    Honor 10 - Connect the battery 02
    Honor 10 - Connect the battery 03
    Honor 10 - Connect the battery 04
    Honor 10 - Connect the battery 05
    • Battery connector
    • 3 × 2,8 mm Phillips
    1. Connect the battery to the motherboard.
    2. Put on the cover and screw it on.
    3. The cover is hooked into the upper side.
    4. Finally, fold over the black foil and stick it on.
  21. Prepare the back cover

    Honor 10 - Prepare the back cover 01
    Honor 10 - Prepare the back cover 02
    1. There are several ways to put the backcover back on again.
    2. If the existing adhesive is still in place and available in all places, you can use it again.
    3. If this is not the case you have to use new glue.
    4. First remove all old glue residues.
    5. Then apply the new glue. You can use thin double-sided tape or liquid glue. Be very sparing with the glue and make sure it doesn't get into the device.
  22. Attach the back cover

    Honor 10 - Attach the back cover 01
    Honor 10 - Attach the back cover 02
    Honor 10 - Attach the back cover 03
    Honor 10 - Attach the back cover 04
    1. Finally, place the back cover flush on the frame and make sure it is exactly centered.
    2. Press it firmly so that the adhesive bonds properly.
    3. You can also warm it up a bit and keep it between a few books for 30 minutes so that the glue will bond properly.
Ø 4.3 (4 Ratings)

Bewerte unsere Anleitung

Hat dir unsere Anleitung weitergeholfen? Wir sind auf deine Beurteilung gespannt.

Submit rating

Submit rating

How did you like this repair guide?

Exceptional

Similar guides

You might also be interested in these guides.

You might be interested in

Get in touch with iDoc

Please contact our customer service for any questions about iDoc's products and services.

  • Send a message

    If you have a question about a guide or want to give us general feedback, just use our contact form

    Write a message
  • Free shipping

    From a minimum order value of 79.00 € your order will be shipped free of charge within Germany.

  • Call iDoc

    If you have any questions about our guides or services, call us from Monday to Friday, 10:00 a.m. to 6:00 p.m.

    +49 30 200 514 455
  • 5 star service

    We offer top quality and service. Our customers confirm this as well.

    Show reviews

Profi-Insights & Tipps für deine erfolgreiche Handy-Reparatur

iDoc schenkt dir den ultimativen Reparatur-Guide GUIDE GRATIS ANFORDERN

Profi-Insights & Tipps für deine erfolgreiche Handy-Reparatur

iDoc schenkt dir den ultimativen Reparatur-Guide GUIDE GRATIS ANFORDERN