
The display of your iPhone SE (2nd generation) has a crack? No cracks, but your display remains black?
Even if your display no longer reacts to touch or your LCD flickers, it is still useful to replace the display. In this photo tutorial we will guide you step by step to replace your display yourself. This way you are not only completely independent of workshops, but also save money.
In the photos of this repair guide you can see the iPhone 8, because we reused the photos from the iPhone 8 manual in this guide. This is because it is almost identical in construction to the iPhone SE (2nd generation). All steps to be carried out have also remained the same.
Otherwise, we wish you good luck now! We look forward to your evaluation of our manual.
Required tools
-
Heat gun
Heat gun
You can use a heat gun to heat parts that are glued on so they’re easier to remove. In most cases, you can also use a hairdryer.
from €15.99 on Amazon -
For storing screws
For storing screws
We recommend storing your screws so you don’t mix up the various screws and small parts.
from €10.99 on Amazon -
Tweezers
Tweezers
We recommend using tweezers to remove screws and various small parts from your device.
on Amazon -
Pick Set
Pick Set
You need a flat but stable tool such as a pick to pry out parts that are glued in place.
from €14.99 on Amazon -
Plastic prying tool
Plastic prying tool
You need a flat plastic prying tool to disconnect the various plugs and connectors.
from €14.99 on Amazon -
Pentalobe PL1 screwdriver
Pentalobe PL1 screwdriver
You need the right screwdriver for removing pentalobe PL1 screws.
on Amazon -
Phillips PH00 screwdriver
Phillips PH00 screwdriver
You need the right screwdriver for removing PH00 screws.
from €10.84 on Amazon - Y-type Y000 screwdriver
Required replacement part
- iPhone SE (2nd / 3rd Gen) display


Getting started with the repair of your iPhone SE (2020)
If you get stuck or have questions, you can post a comment. We’d be happy to help.
-
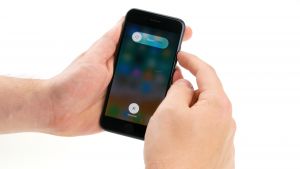
Switching off your iPhone SE (2nd generation)
![iPhone SE (2020) - Switching off your iPhone SE (2nd generation) 01]()
![iPhone SE (2020) - Switching off your iPhone SE (2nd generation) 02]()
![iPhone SE (2020) - Switching off your iPhone SE (2nd generation) 03]()
-
-
Removing the rear case screws
-
Heating up the display
-
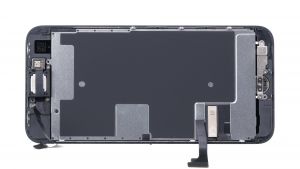
Detaching the display
-
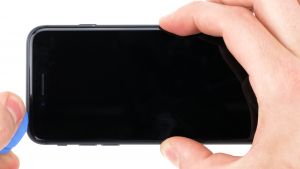
Opening the display
![iPhone SE (2020) - Opening the display 01]()
![iPhone SE (2020) - Opening the display 02]()
-
-
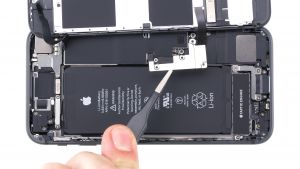
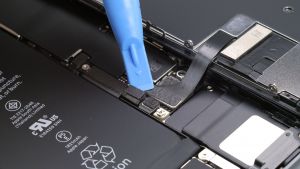
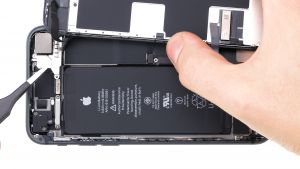
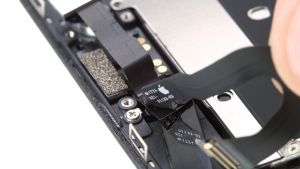
Disconnecting the battery connector
-
Disconnecting the display connectors
-
Disconnecting the FaceTime connector
-
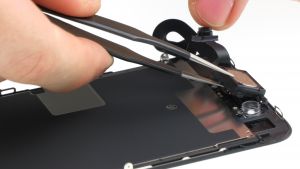
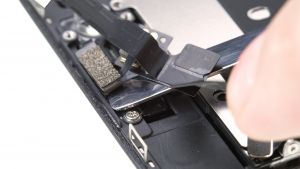
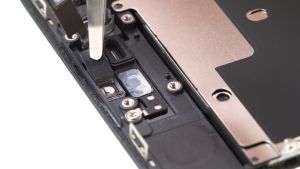
Removing the earpiece
-
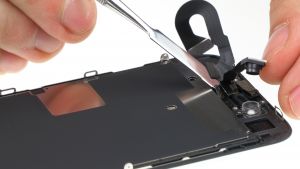
Removing the FaceTime cable
-
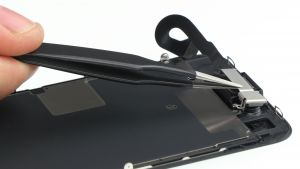
Removing the home button
-
Removing the back plate
-
Preparing the new display
![iPhone SE (2020) - Preparing the new display 01]()
![iPhone SE (2020) - Preparing the new display 02]()
-
-
Attaching the back plate
-
Installing the home button
-
Installing the FaceTime cable
-
Installing the earpiece
-
Detaching the old and aligning the new adhesive frame
-
Attaching the FaceTime connector
-
Connecting the display
![iPhone SE (2020) - Connecting the display 01]()
![iPhone SE (2020) - Connecting the display 02]()
![iPhone SE (2020) - Connecting the display 03]()
-
-
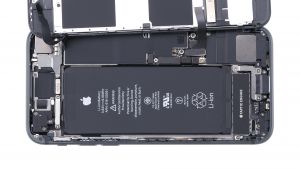
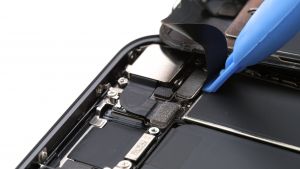
Attaching the battery connector
-
Attaching the display
![iPhone SE (2020) - Attaching the display 01]()
![iPhone SE (2020) - Attaching the display 02]()
![iPhone SE (2020) - Attaching the display 03]()
![iPhone SE (2020) - Attaching the display 04]()
-
-
Fastening the rear case screws
-
Testing the new display
![iPhone SE (2020) - Testing the new display 01]()
![iPhone SE (2020) - Testing the new display 02]()
![iPhone SE (2020) - Testing the new display 03]()
-


The right tools for your repair


Similar guides
You might also be interested in these guides.


You might be interested in


